Rough Country 736.20 User Manual
Page 8
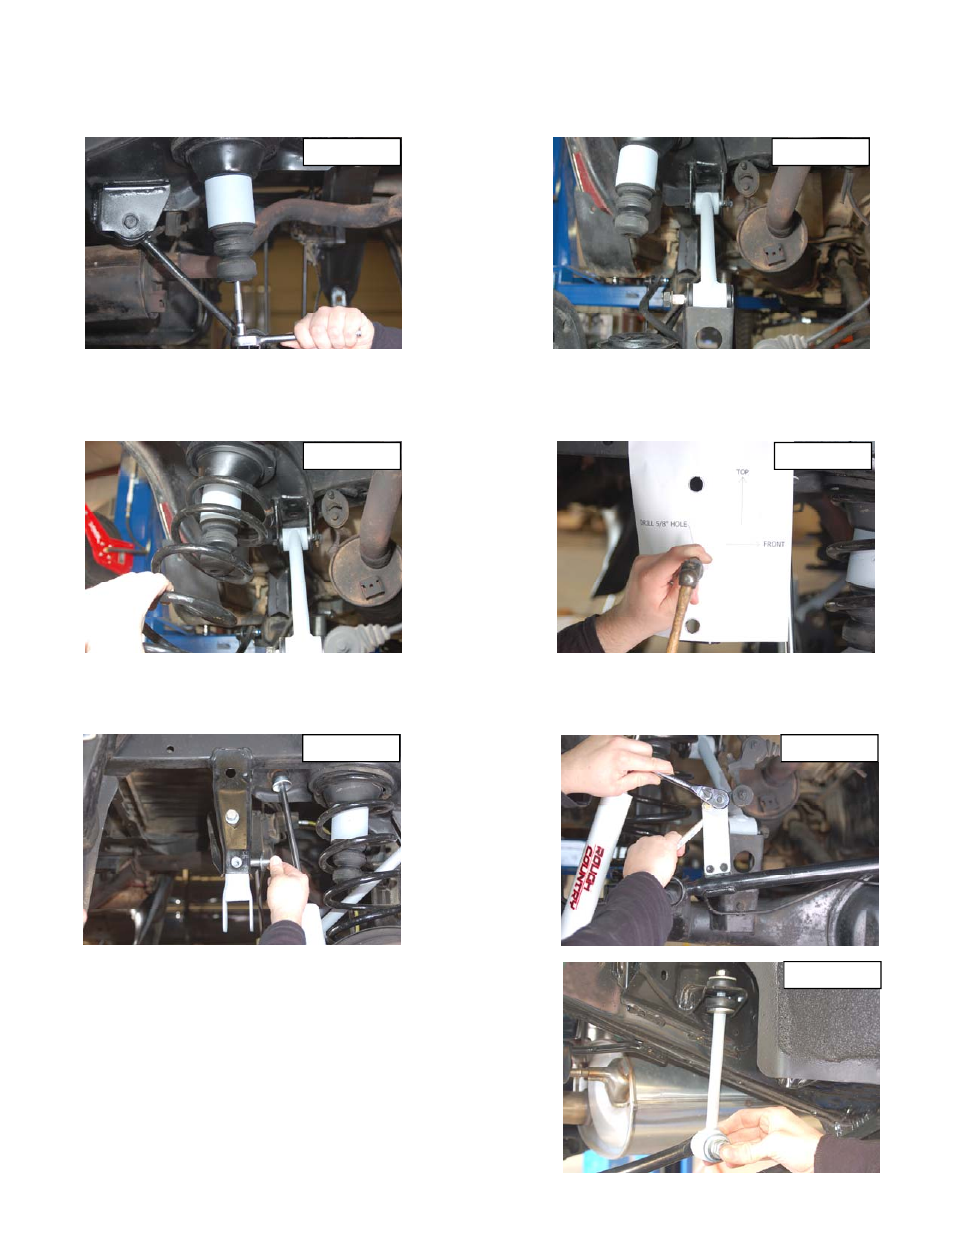
17. Install the new track rod bracket with the supplied 1/2” x 2 1/4” bolt, washers & nuts in hole that was drilled. Install
the supplied 5/8” x 3 1/2” long bolt in the lower hole as shown in Photo 11. Do not tighten at this time. Be sure to
install the 5/8” bolt from the front of the bracket to allow shock clearance.
18. Install the track rod in the new drop bracket with the stock hardware using a 22mm wrench.
19. Install the bracket on the track rod with factory hardware using a
12mm wrench. Install the stock bracket on new bracket with the
supplied 5/16” x 1” bolts using a 13mm wrench. See Photo 12.
20. Using a 13mm wrench, install the upper sway bar link on the sway
bar. See Photo 13.
21. Insert the sleeves in 1770bag11 in the eyelet and install using the
supplied 12mm x 65mm Bolts & lock nuts. Tighten using a 19mm
socket. See Photo 13.
22. Install the tires/wheels on the vehicle and remove the jack stands.
Lower vehicle to the ground and install the track rod on the axle
mount. Tighten track bar hardware using a 22mm wrench.
23. Tighten the control arm bolts using a 22mm wrench.
PHOTO 11
PHOTO 12
PHOTO 13
12. Install the new bump stop spacers & factory bump stops with supplied 8mm x 95mm bolts, washers., using a 13mm
wrench. See Photo 7.
13. With the rear supported with a floor jack, loosen the control arms using a 22mm wrench. Replace with new control
arms, making sure the offset goes to the top. See Photo 8. Do not tighten at this time.
14. With the axle lowered, install the new coil springs. See Photo 9. Jack up the axle to seat the coil springs.
15. Install the supplied shock absorbers part # 651896 in the factory mounts with supplied bushings using a 17mm
wrench for the bottom and a 14mm wrench for the top.
16. Using the supplied template as a guide; mark and drill the 5/8” hole for the new track rod bracket. See Photo 10.
PHOTO 8
PHOTO 9
PHOTO 10
PHOTO 7