Rough Country 734.20 User Manual
Page 4
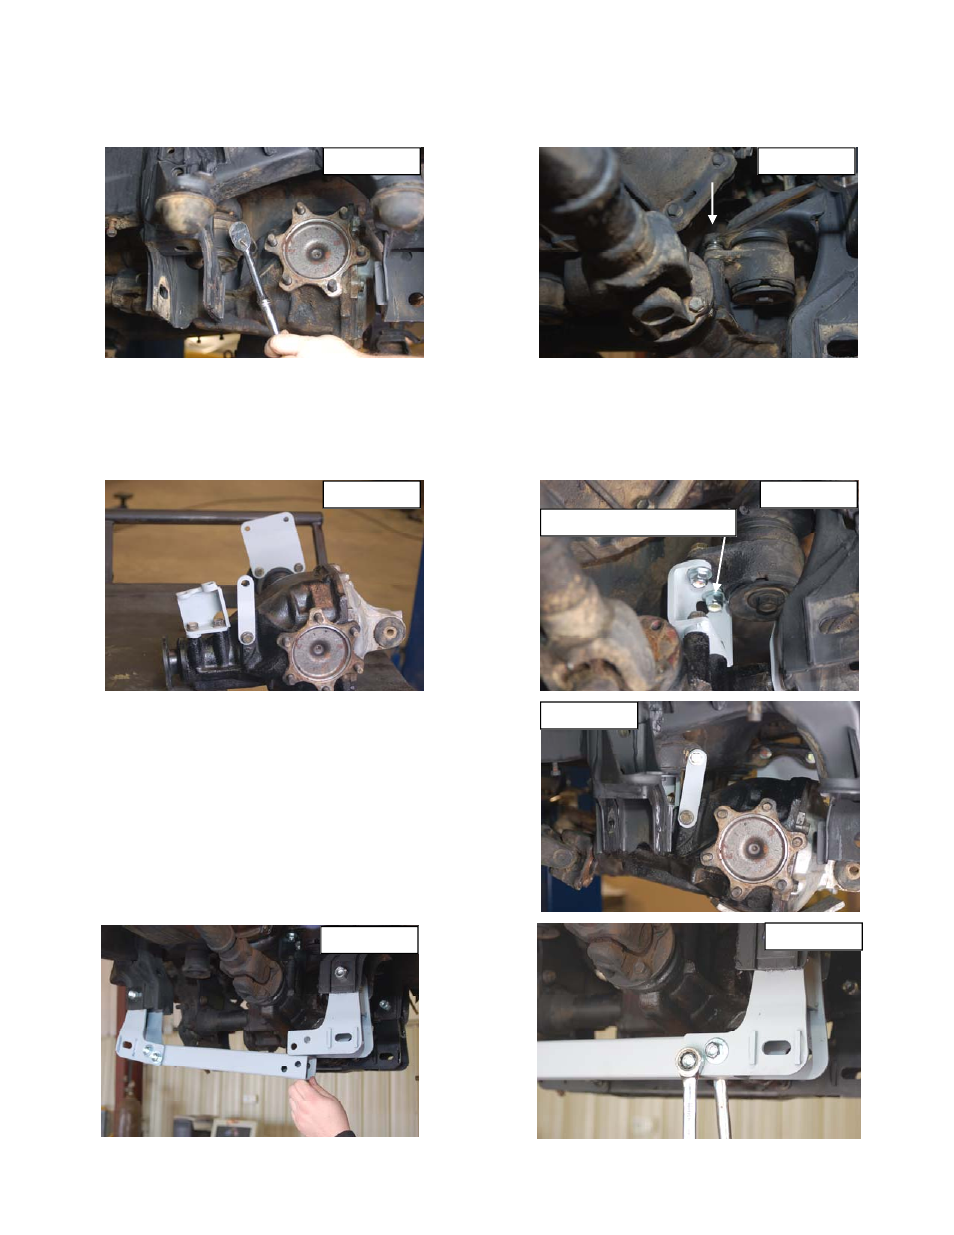
17. With the differential still supported, remove the passenger side hardware securing the differential to the frame as
shown
in
PHOTO 15 & 16 using a 17mm wrench. Retain hardware for reuse. Remove the differential from the vehi
cle.
PHOTO 15
PHOTO 16
18. Install the new Rough Country drop brackets on the differential as shown in PHOTO 17 using the stock hardware
and a 17mm wrench. Do not fully tighten at this time.
19. Reinstall the differential in the vehicle and install the supplied 2- 7/16” x 1 1/4” bolts on the driver side. Install the 1-
7/16” x 1 1/2” & 1-7/16 x 1 1/4” bolt in the passenger side. See PHOTO 18. The longer 1 1/2” bolt will install on the
Passenger side upper bracket forward hole.
PHOTO 17
PHOTO 18
Longer 1 1/2” installs here
20. Install the 1– 7/16” x 1 1/4” bolt as shown in PHOTO 19 on the
passenger side bracket. Do not tighten at this time.
21. Install the new rear cross-member brackets as shown in PHOTO
20 in the stock mounts with the supplied 5/8” x 4” hardware /
square washers using a 24mm wrench.
22. Install the center tube in the drop down brackets using the sup-
plied 14MM X 85MM bolts/washers & nuts. Tighten using a
19mm socket /wrench at this time. See Photo 21.
PHOTO 19
PHOTO 20
PHOTO 21