Rough Country 562P User Manual
Page 2
FRONT INSTALLATION INSTRUCTIONS
1. Place the vehicle on a level surface and chock the rear wheels.
2. Jack up the front of the vehicle and support with jack stands on the frame rail.
3. Remove the front wheels and tires. Support the axle with a floor jack.
4. Remove the stock shock absorber from the upper mount using a 19mm wrench and the lower mount using a 18mm
wrench. Retain the lower shock mounting bolt for reuse.
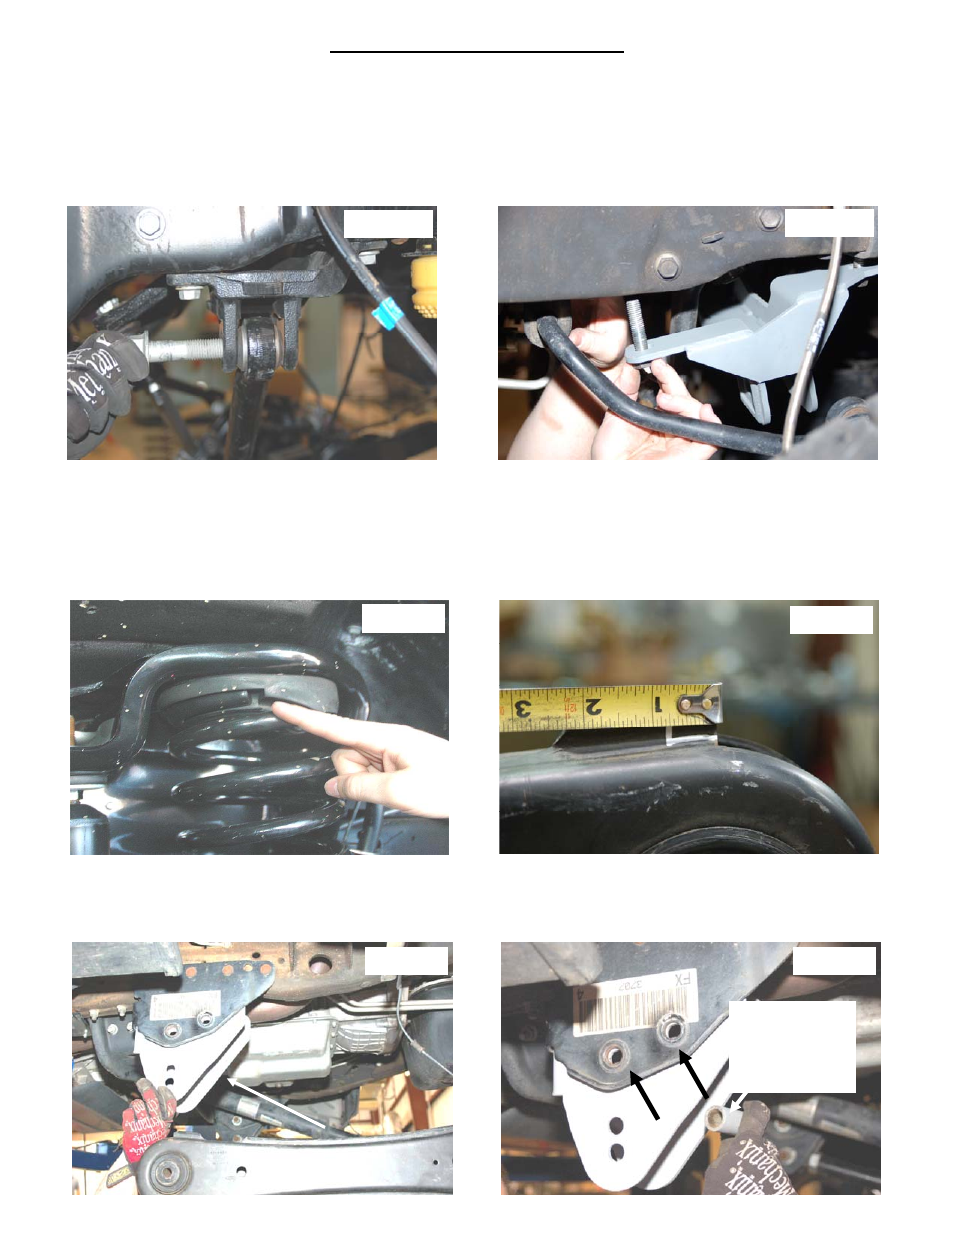
5. Remove the stock track bar from the frame as shown in Photo 1 using a 30mm socket / wrench and retain the factory
hardware.
6. Install Rough Country track rod bracket with the factory hardware as shown in Photo 2. Tighten with a 22mm socket.
7. Remove lower sway bar nut on the axle using a 21mm wrench to allow the axle to move downward for the installation
of the new coil.
8. Using the floor jack, lower the axle to allow for the coil spring to be removed from the coil mount. Take notice of the
position of the coil wraps on the top and bottom spring in the mount. The new Rough Country coil with its progressive
rate design built into the coil will be installed in the same position. See Photo 3.
6. Using a measuring tape, mark 3/4” from the end of the factory radius arm as shown and trim using a reciprocating
saw. This area is trimmed for clearance on the crush sleeve. See Photo 4.
9. Using a 1 1/8” wrench, and socket remove the bolt holding the radius arm to the frame.
10. Insert the radius arm drop bracket into the stock location. See Photo 5.
11. Insert the supplied crush sleeves in the bracket as shown in Photo 6 and secure using the 3/4” x 5” bolts, washers &
nuts. Tighten using a 1 1/8” wrench & socket .(2 Per side).
Radius Arm
Frame Mount
Bracket Crush
Sleeve
Passenger
Radius Arm
Frame Mount
Bracket
Photo 5
Photo 6
Photo 3
Photo 4
Photo 1
Photo 2