Rough Country PERF644 User Manual
Page 5
REAR INSTALLATION INSTRUCTIONS
1. Chock the front wheels. Jack up the rear of the vehicle and remove the tires and wheels.
2. Place jack stands under the frame rail to support the vehicle. Place a floor jack under the differential to lightly
support the axle.
3. Remove the stock shock absorbers using a 18mm & 15mm wrench on the bottom and a 13mm socket on top.
Retain the hardware for reuse.
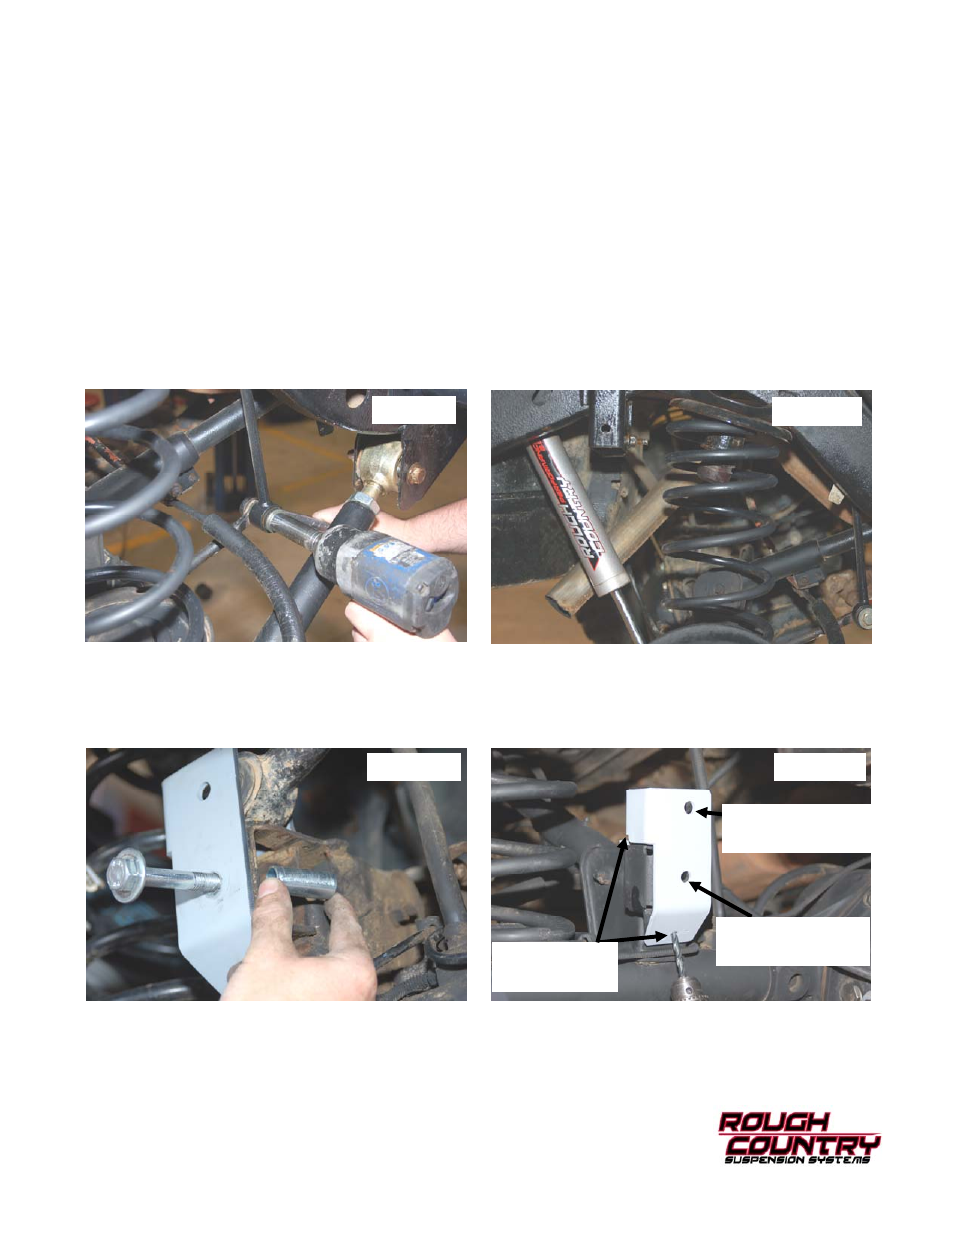
4. Remove the lower sway bar links from the sway bar using a 15mm wrench. See Photo 8 . Retain the factory
hardware for re-installation.
5. Remove the track rod from the axle using a T-55 torx head bit.
3. Carefully lower the axle with the floor jack and remove the coil springs. NOTE: It may be necessary to use a coil
spring or strut compressor to remove the stock coil springs. Be careful not to overextend the vent tube on the
axle. It may be necessary to disconnect the vent tube during installation and reroute the vent tube after
installation to ensure the line does not get damaged.
4. Install the new Rough Country progressive rate coil springs with the 3/4” coil spacer on top of the coil spring mak-
ing sure the stock coil isolator is positioned in the upper mount. It may be necessary to use a coil spring or strut
compressor to install the new coil springs. See Photo 9. Rough Country’s New RCX 2.2 series shock is also pic-
tured and highly recommended for this kit.
5. Install the new track bar relocation bracket in the stock location. Secure using the factory hardware and supplied
sleeve as shown in Photo 10. Tighten using a T-55 Torx Head Bit.
6. Enlarge the 2 holes in the factory lower mount to accommodate the 5/16” bolts, using the bracket hole as a
guide. See Photo 11. Install the 5/16” x 1”bolts, washers, lock washers, nuts and tighten using a 1/2” wrench.
Do not install the track rod in the new bracket at this time.
PHOTO 9
PHOTO 11
12mm x 65mm bolt
installs here
Stock bolt installs
here
5/16” x 1” bolts
install here
PHOTO 10
PHOTO 8