Rough Country PERF644 User Manual
Page 3
1. The front-end components are installed first.
2. Place the vehicle on a level surface. Set the parking brake. Center the front wheels and chock rear wheels.
3. Remove the upper stud nut, retainer and grommet from both of the front shocks using a 15mm socket
4. Jack up the vehicle and place jack stands on the frame rail behind the lower control arm mount on the frame. In-
stallation is done one side at a time.
5. Remove the front tires and wheels.
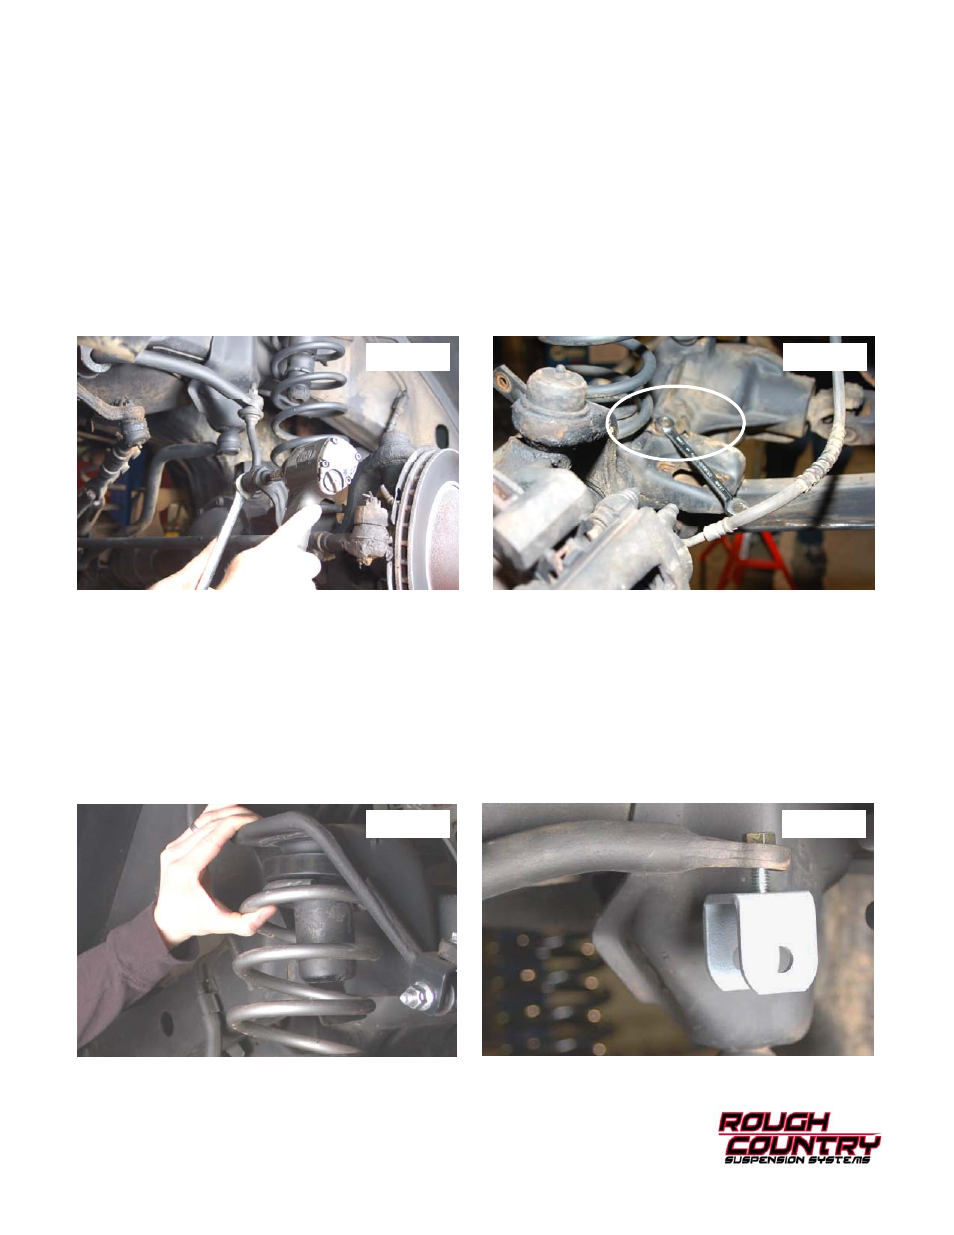
6. Remove the sway bar links from the axle using a 18mm wrench / T55 torx head and a 15mm for the upper and
remove the links. See Photo 1.
7. Place a floor jack underneath the axle for support and complete the removal of the front shock absorbers. Using
a 13mm socket & wrench remove the lower shock hardware. Retain factory lower mounting hardware for re-use.
8. Remove the track rod from the axle using a 15mm wrench. Retain the hardware for reuse.
9. Remove the coil spring clip located on the bottom coil seat as shown in Photo 2 using a 13mm wrench on the
driver side of the vehicle. Lower the axle and remove the coil springs.
10. With the front axle lowered, install the new front progressive rate coil spring with the supplied 3/4” poly isolator
spacer on top as shown in Photo 3. A coil spring or strut compressor may be needed for the new coil spring in-
stallation. Install the new progressive coil spring (with the coil wraps that are closer together to the top) into the
upper and lower spring pockets and carefully remove the compressor. Make sure the coil is seated properly in
the coil seat by rotating the spring so the pig tail end fits in the spring pocket.
11. Install the coil spring clamp with the stock hardware using a 13mm wrench. Torque the spring clip bolt to 16ft.-lbs.
12. Install the front shock absorber in the factory upper & lower mounts with the stock hardware using a 13mm
wrench on the lower mount and a 9/16” on the upper. (RCX 2.2 shocks are highly recommended for this lift).
13. Install the supplied sway bar hoop (u—shaped bracket) on the bottom side of front sway bar where the stock link
was secured with the supplied 3/8” x 1.25” bolt, washer, and flanged lock nut using a 9/16” wrench. See Photo 4.
The bolt will install from bottom to top.
FRONT INSTALLATION INSTRUCTIONS
PHOTO 1
PHOTO 2
PHOTO 3
PHOTO 4