Rough Country 620N2 User Manual
Page 6
REAR INSTALLATION INSTRUCTIONS
1. Chock the front tires and jack up the vehicle. Place safety jack stands under rear frame rails.
2.
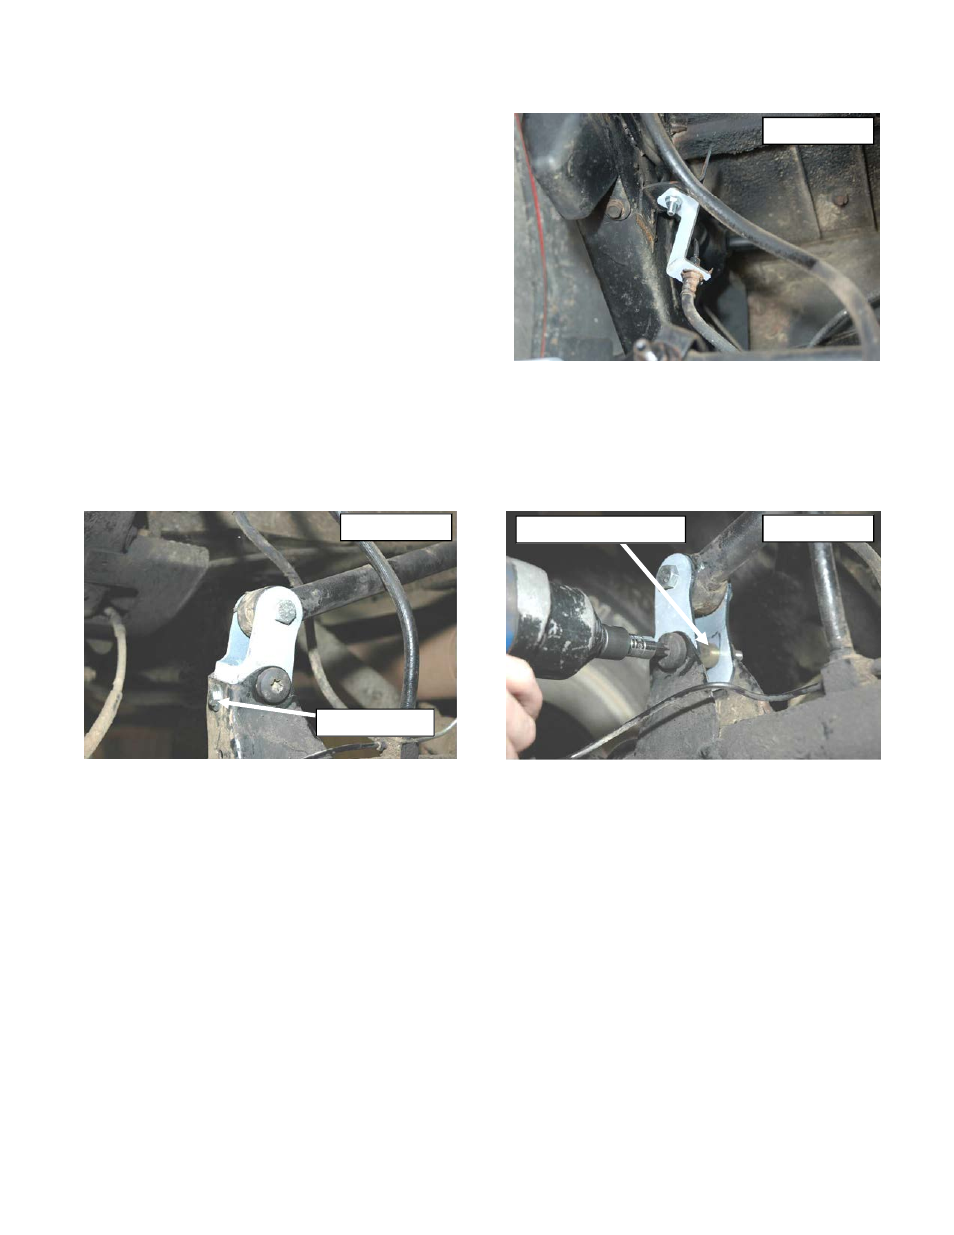
Remove the retainer clip that attaches the stock rubber
brake hose to its upper mount bracket. This is where the
rubber hose ends and the metal line starts on the driver
side frame rail. Insert the new
“Z” bracket in between the
stock mounting bracket and the hose end. The 5/16
” x 1”
bolt and flanged lock nut are used at the bracket to
bracket end. Position the hose/line through the slot and
into the hole on the
“Z” bracket’s opposite end and then
reinstall clip.
See Photo 13.
3.
Remove the stock u-bolts from the axle using a 3/4
”
socket
4. With the axle at full droop. Position a floor jack under the
axle for support and remove the leaf spring hardware se-
curing the springs to the frame and shackles. Retain the
hardware for reuse.
5. Remove the rear springs from the frame mount and the shackles.
6. Disconnect rear track bar from the axle on the driver side of the vehicle using a T55 torx head bit. Retain the hard-
ware for reuse.
7. Install new track bar relocation mounting bracket on the
axle by placing it into the factory mounting point and install-
ing 3/8
” x 1.00” long bolt, flange lock nut and washer into the hole as shown. Use factory hardware & supplied crush
sleeve in stock mounting location. Install the supplied 12mm x 65mm long bolt and flange lock nut in the upper hole
to secure the track rod to the new bracket.
See Photo 14 & 15. Do not tighten at this time.
8. Installation of new rear springs (8011) with the stock bolts in the stock location (unless optional bolt package 1184
was purchased).
9. The bump-stop extension bracket will install under the u-bolts as on the front. When installing the springs the thick
part of shim goes toward front of jeep.
Do not fully tighten the springs and the track bar to factory specs until
the vehicle is on the ground. Tightening before the weight is on the vehicle may prevent the shackles from
moving to their natural position and result in the arched spring being pinned forward against the frame.
10. Install shocks Part # 658700 with the factory hardware. Torque upper and lower mounts to 45-ft. lbs.
11. With the addition of shackles or any other extra lifting device there may not be adequate clearance between the
shock body and the axle tube. In this situation your only option is to relocate the lower shock bracket to gain clear-
ance on the axle tube.
12. Install tires / wheels.
13. Remove jack stands and lower vehicle to floor. Tighten the shackle bolts to 90-95 ft. lbs. and the frame end bolts to
100ftlbs. Install/tighten track bar into drop down bracket with the factory hardware and tighten to factory specs..
Photo 14
Photo 13
Photo 15
CRUSH SLEEVE
3/8” x 1” Bolt