Rough Country 620N2 User Manual
Page 3
INSTALLATION INSTRUCTIONS
1. Raise the front of the vehicle and support with safety stands under the frame rails. Take care not to over extend the
stock brake lines.
2. Remove the front wheels and tires. Remove front stock shocks. Retain the lower shock hardware for reuse.
3. Support the front axle housing with a floor jack (you must have stands under frame supporting vehicle weight).
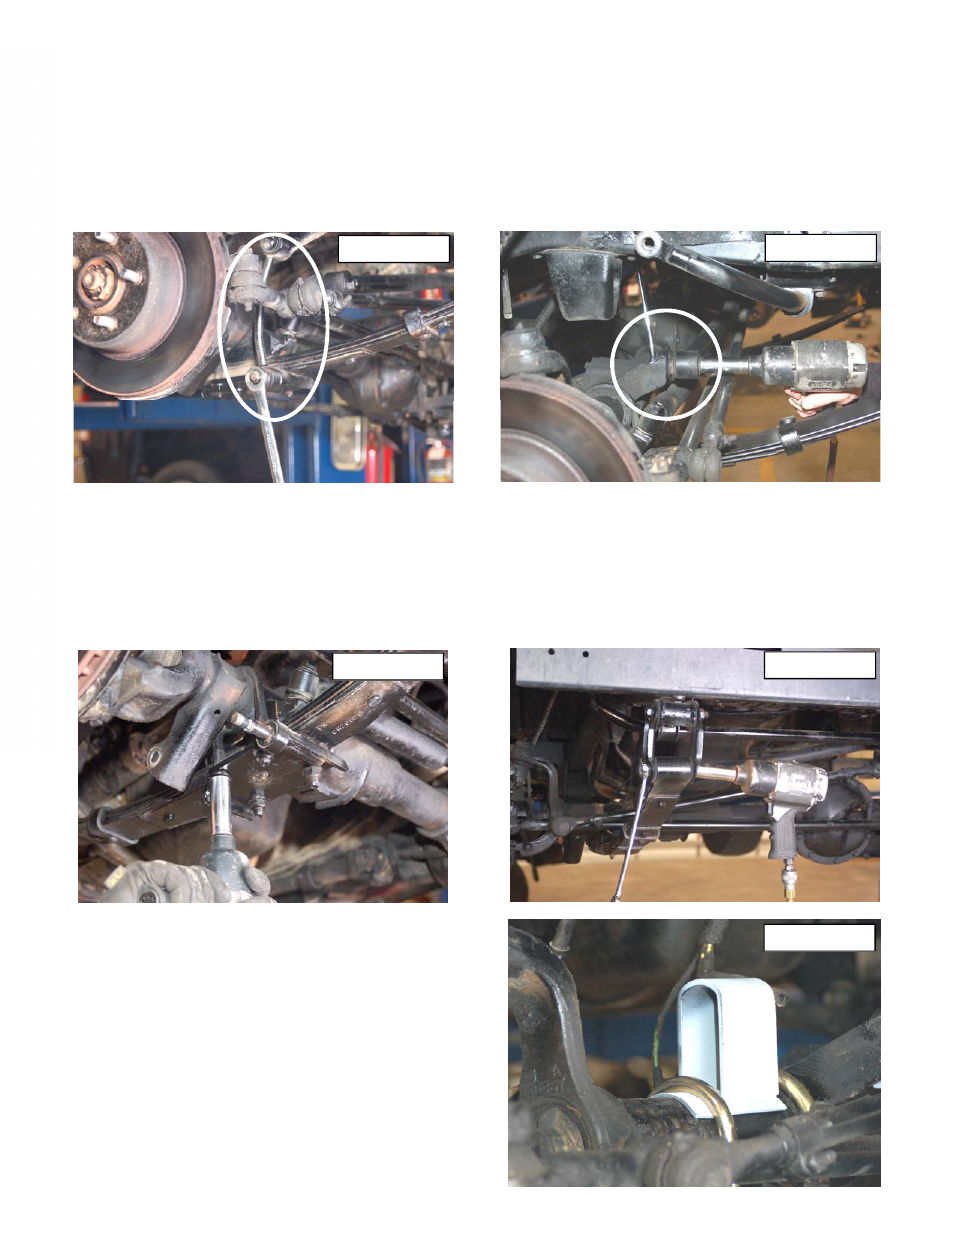
4. Remove the stock sway bar links from the sway bar and the spring pads. It may be necessary to tap the upper link
on the sway bar with a hammer to release the tapered pin.
See Photo 1.
5. Unbolt track bar from the axle mount on the passenger side of the front axle as shown in
Photo 2 and then tie the
bar up and out of the way.
6. Remove the stock brake hose bracket from the top of the frame rail by removing the one bolt located directly behind
the shock towers. (Access can be gained through the engine compartment). Retain the factory torx head bolt for re-
use.
7. Remove the four front spring to axle u-bolts.
See Photo 3. (The remainder of the spring removal and installation is
performed one side at a time.)
8. On the driver side position a floor jack under the axle tube, just inside of the leaf spring. Raise the jack until the axle
just separates from the spring. Now remove the frame bolts and the shackle bolts on the leaf spring. Retain hard-
ware for reuse.
See Photo 4. Remove the stock spring.
9. Repeat on the other side.
10. Loosely attach the spring (front spring part number is
8010) to its hangers with the stock bolts, washers & nuts
(unless optional spring bolt package 1184 was pur-
chased). Note that small spring eye goes to shackle end.
Snug up but do not completely tighten. Make sure
spring tie bolt heads align and seat into spring perch
holes.
11. While installing new u-bolts, place the bump stop exten-
sion brackets on top of the axle tubes.
See Photo 5.
(The bump-stops are captured by the u-bolts). Tighten u-
bolts to 65 ft. lbs. of torque. Tighten spring pivot bolts to
35ft. lbs. on both frame mounts and shackle mounts.
Photo 3
Photo 4
Photo 1
Photo 2
Photo 5