Rough Country 5060 User Manual
Page 2
FRONT INSTALLATION INSTRUCTIONS
1. Lift front of vehicle and place jack stands under front of frame rails. Remove front wheels.
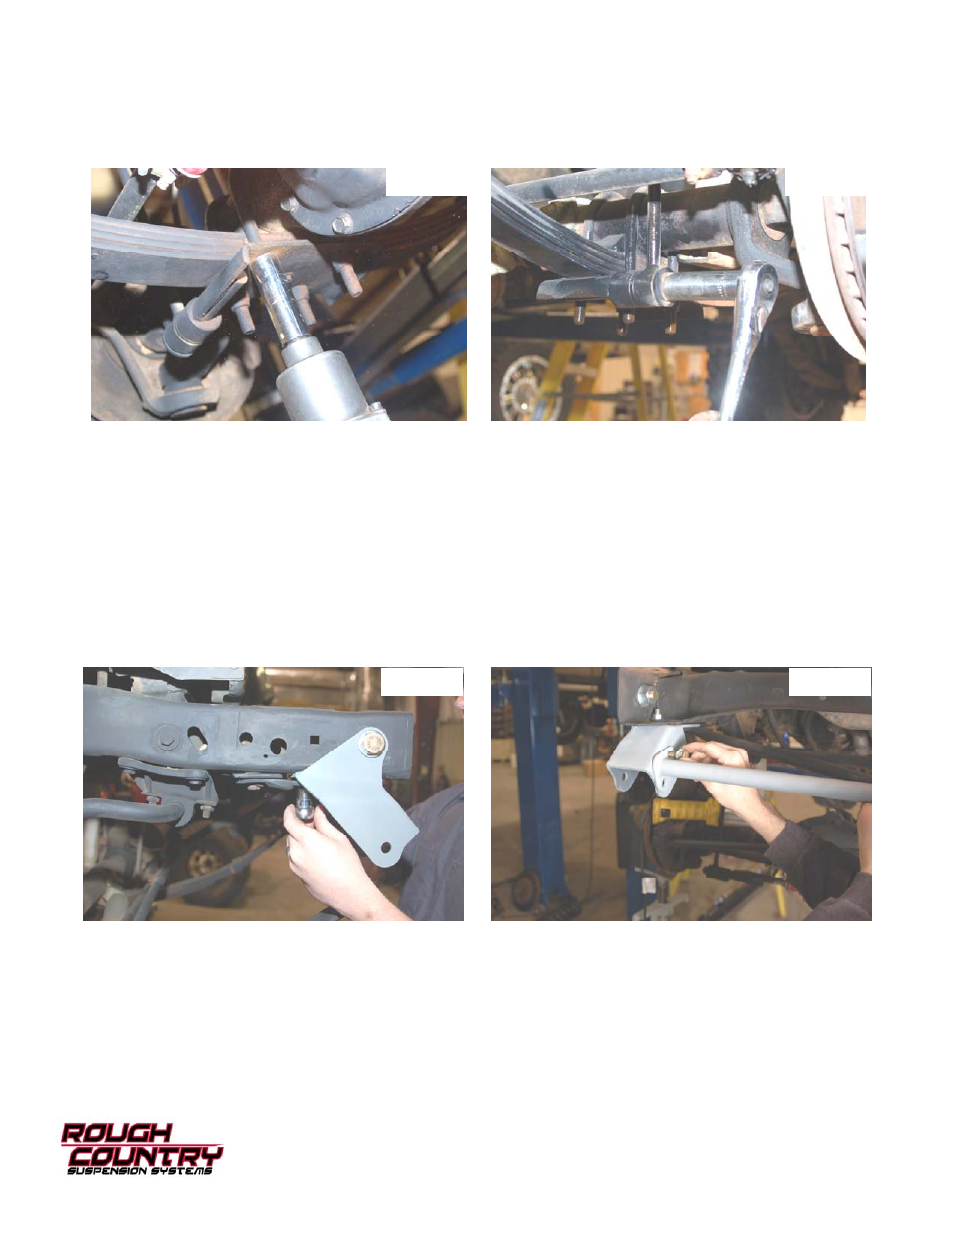
2. Support front axle assembly with stands and remove the spring u-bolts using a 3/4” socket. See Photo 1.
3. Remove springs using a 3/4 socket on the front shackle and the rear using a 13/16 & 7/8 socket.
4. Remove the lower sway bar link from the spring plate using a 3/4” socket. See Photo 2.
5. Remove the front shackle mounts and the frame mounts from the frame rail. To remove rivets, center punch rivet
head and drill 5/16” deep with a 3/8” drill bit. Then using a chisel and hammer, strike the head of the rivet to remove
it. Use a punch to drive the remaining part of the rivet free.
6. Clean the area’s of the frame where you are going to install the new mounts. If any weld or sharp edges exist, grind
down smooth. Take care not to scar frame rails.
7. Install front brackets with the large ¾” side hole on the outside of the front frame rail. Install the ¾” x 1.25 supplied
bolt into the bracket and frame rail. NOTE: It may be necessary to drill the frame to clearance the ¾” bolt. If so drill at
this time using the new bracket as a locator. Install the 3/8 x 1.25 bolt in the lower side of the bracket and the stock
hardware. See Photo 3. This hole will line up with the factory hole on the underside of the frame rail. Repeat steps
on the other side. The entire system must be installed first, then you can proceed to reinstall the leaf springs and
tighten all hardware using a 1 1/8” wrench on the 3/4” bolt and 9/16” wrench on the other bolts.
8. Install the cross tube brace between the two front brackets using only the 3/8” x 1.25 bolts supplied. The factory
bolts will be installed in this bracket in a later step when the leaf springs are reinstalled. See Photo 4.
Photo 1
Photo 2
Photo 3
Photo 4