Rough Country 633XN2 User Manual
Page 6
REAR LIFT INSTALLATION
1. Remove rear factory shocks using a 13mm wrench on top and a 3/4” wrench on bottom and retain hardware.
2. Chock the front wheels and jack up the rear of the vehicle and place the vehicle on jack stands. Remove the wheels
and tires.
3. Working from the drivers side, remove the factory u-bolts and lower the axle with a floor jack. Repeat for passenger
side.
4. Remove the spring from the shackle and from the frame using a 21mm wrench. SEE PHOTO 3.
5. Locate and grind off the excess from the bolt pictured in PHOTO 4. This will allow the shackle to move rearward.
6. Install new rear springs at this time with factory hardware using 21mm wrench and skip to Step 10. The larger spring
eye will bolt back in the stationary mount
7. This kit includes 2 3/4” & 3” diameter u-bolts for rear axle options on the Jeep. Confirm axle diameter and use appro-
priate u-bolt. Install the u-bolts and torque to factory specs using 3/4” wrench.
8. Install the new shocks Part # 658708 with factory hardware. Torque the upper using a 13mm wrench and lower
bolts using 3/4” wrench to factory specs. Repeat for other side.
9. Install the tires and wheels. Jack up the vehicle and remove the jack stands. Lower the vehicle to the floor.
10. Torque the frame bolts, and shackle bolts to factory specs using a 21mm wrench.
11. Install the rear brake line on the axle and the frame with the supplied c-clip.
PHOTO 3
PHOTO 4
1. Inspect the brake system and repair / replace components as necessary.
2. Remove the stock hoses from the frame rail and from the brake calipers. Be sure that the stock crush washers are
removed. New washers are supplied.
3. Thoroughly clean and inspect all mating surfaces.
4. Install the new Rough Country hoses in the stock location using the stock hardware on the axle.
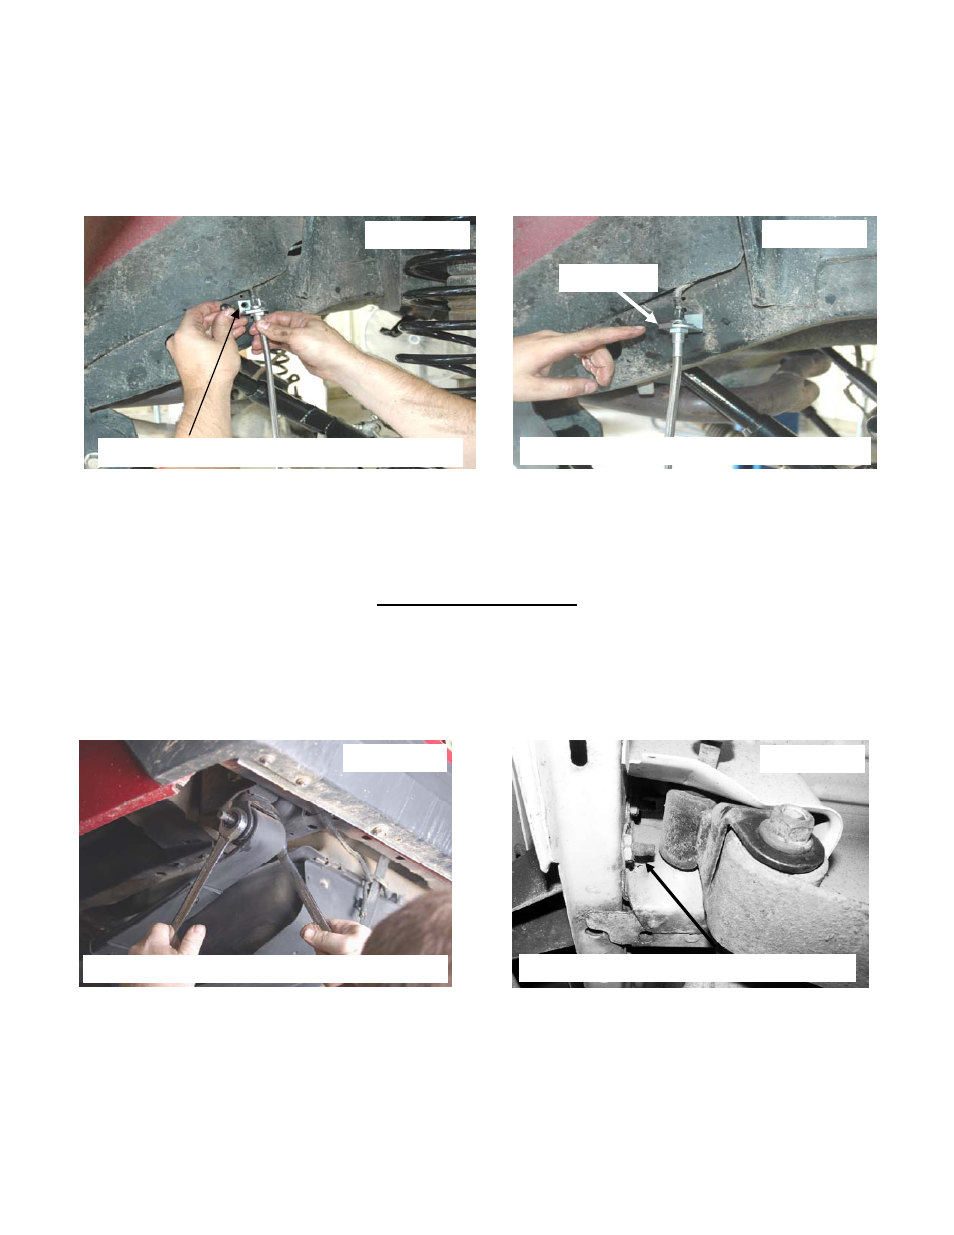
5. Using the supplied brake line mounting bracket and brake clip install in the stock location on the frame rail. See
Photo 1 & 2.
6. With the suspension supporting the vehicle weight and the tires / wheels installed, cycle the steering lock-to-lock
and check for adequate hose length and clearance.
7. Now raise the vehicle and check length / clearance with the suspension hanging at full extension travel.
8. Bleed the air from the system as instructed by the factory service manual. Avoid getting brake fluid on painted sur-
faces.
FRONT BRAKE LINE INSTALLATION INSTRUCTIONS
Install clip
PHOTO 1
PHOTO 2
INSTALL BRAKE LINE BRACKET ON FRAME
INSTALL BRAKE LINE IN BRACKET
REMOVE SPRING FROM SHACKLE & FRAME
GRIND BOLT