Rough Country 633XN2 User Manual
Page 3
PRE-INSTALLATION INSTRUCTIONS
1. Layout product and confirm that you have all needed products and know where they install.
2. Verify before installation rear axle tube diameter is 2 ¾” or 3”. Both sets are included with this kit to accommodate
rear axle options of the vehicle.
INSTALLATION INSTRUCTIONS
1. Secure and properly block the tires on the vehicle on a level concrete surface.
2. Jack up the vehicle and place the front of the vehicle on jack stands.
3. Remove the front wheels and tires.
4. Support the axle with a floor jack.
5. Remove the stock shock absorbers using a 15mm wrench. The stock bolts and nuts on the bottom of the shock will
be reused. Note: Access to the upper shock studs will be obtained through the engine compartment. It also may be
necessary to temporarily remove the washer fluid reservoir to access the driver side upper shock mount nut.
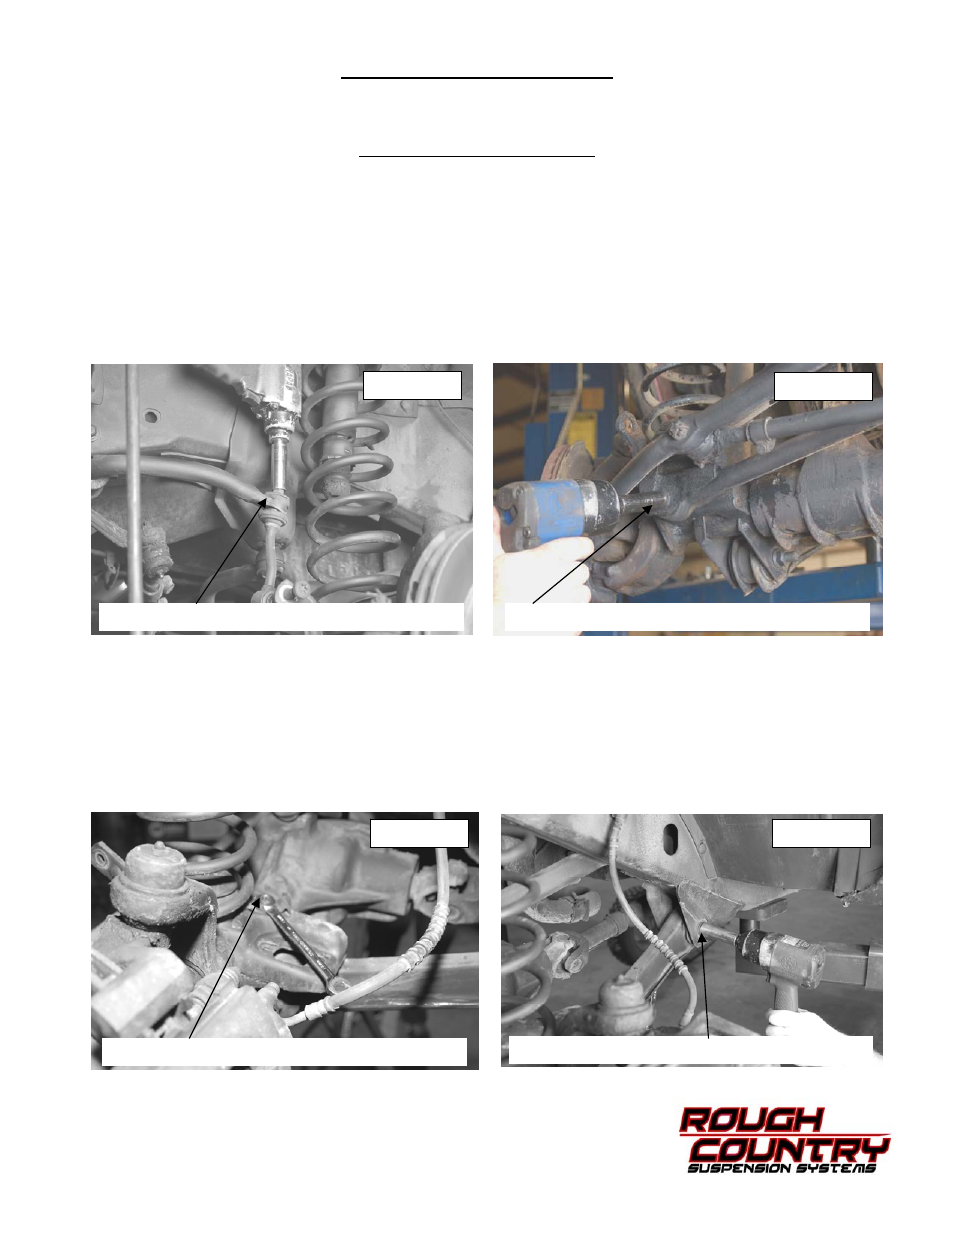
6. Remove the sway bar links on both sides using a T-55 torx bit /19mm wrench and a 15mm for the upper nut . SEE
PHOTO 1.
7. Remove the track bar from the axle housing on passenger side using a 15mm wrench. SEE PHOTO 2. Retain fac-
tory bolt and flag nut for re-use.
8. Locate and remove the coil clip on the driver side lower coil spring seat using a 13mm wrench. Lower the axle to
allow for removal of the coil spring. Do not overextend the brake lines. The caliper can be removed from the rotor to
allow the axle to lower. Do not let the brake caliper hang from the brake line. Remove coil spring. SEE PHOTO 3.
Repeat for opposite side.
9. With the differential supported, remove the driver side lower control arm from the vehicle using a 21mm wrench.
SEE PHOTO 4. Retain factory hardware, as it will be reused. Repeat for opposite side.
10. Lower the axle using the floor jack. With the axle lowered, install coil springs on both sides, making sure the lower
coil wrap is seated in the lower spring cup. Install factory spring retainer and secure with factory hardware using a
13mm wrench.
PHOTO 2
PHOTO 3
PHOTO 4
PHOTO 1
REMOVE THE SWAY BAR HARDWARE
REMOVE THE TRACK BAR
REMOVE THE COIL CLIP ( IF EQUIPPED)
REMOVE THE STOCK CONTROL ARMS