Rough Country 663U User Manual
Page 7
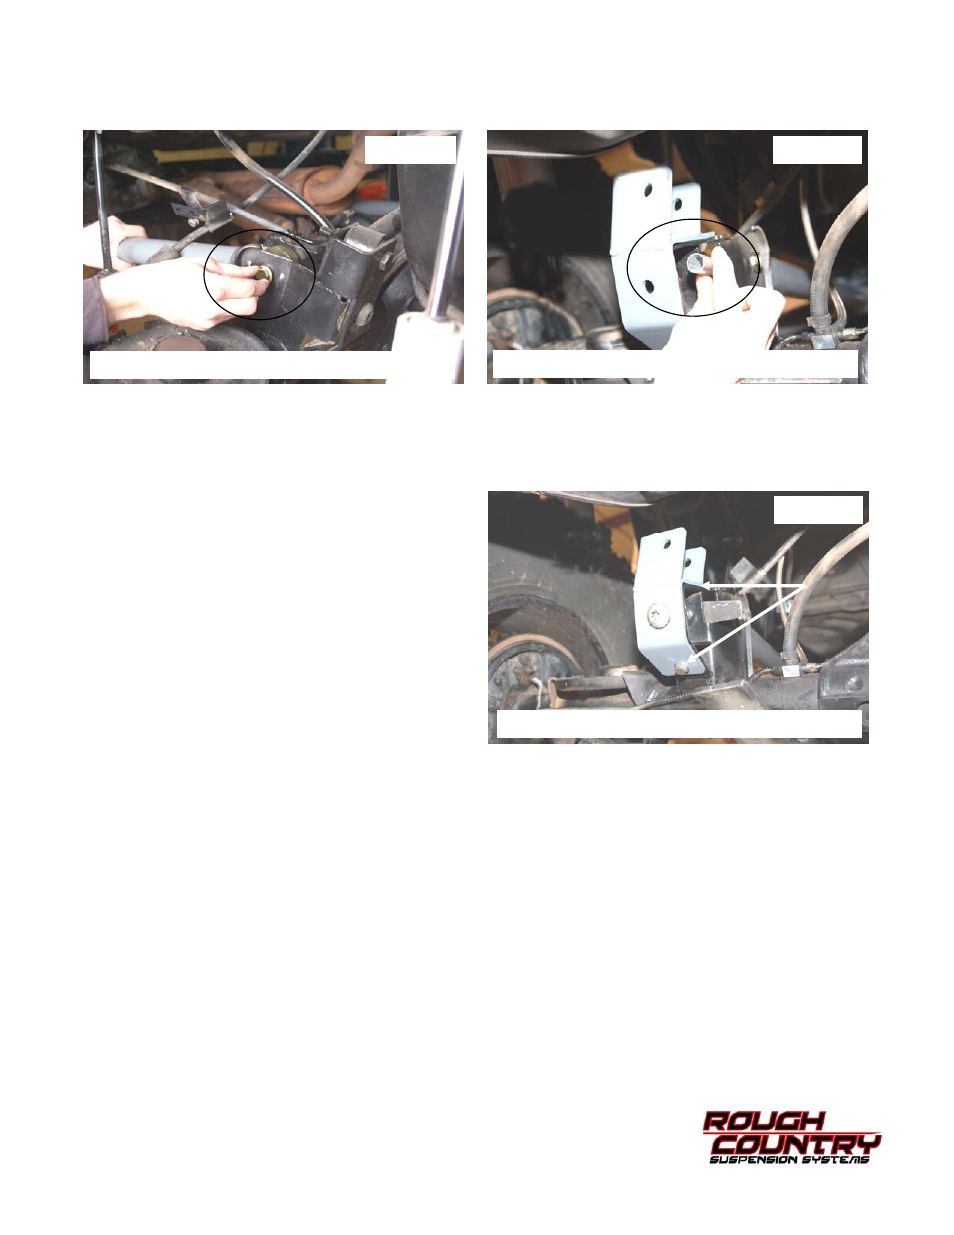
39.Install the upper arm on the axle using the stock hardware. Do not tighten at this time. See Photo 22.
40.Locate the new track rod bracket and install on the rear axle mount as shown in Photo 23 with the supplied crush
sleeve using the stock bolt and flag nut. Tighten using a T55 torque head bit.
41. Install the supplied 5/16” x 1” bolts, washers & nuts in the bracket as shown in Photo 24. Tighten using a 13mm
wrench.
42. The track rod will be tightened on both ends after the vehicle has been lowered to the ground and is supporting it
own weight. This is done to ensure the axle is centered under the body.
43. Install the coil springs making sure the rubber damper in positioned in the upper mount. It may be necessary to
use a coil spring or strut compressor to install the new
coil springs.
44. Install the wheels and tires and tighten the lug nuts to
the factory specifications using crossing pattern (80-
110 ft. lbs).
45.Remove the jack stands and lower the vehicle to the
ground.
46.On the front lower control arms; align the reference
marks on the adjustment cams and lower arm axle
brackets and tighten to 85 ft. lbs using a 21 socket &
wrench. Tighten the upper using a 15mm socket &
wrench. Repeat for the rear of the vehicle.
47. On the rear, make sure the body is centered over the
axle. It is important to center the vehicle over the axle
to ensure proper tracking and alignment.
PHOTO 22
Install the upper arm using stock hardware
PHOTO 23
PHOTO 24
Install supplied sleeve and stock bolt
Install supplied 5/16” x 1” hardware