Rough Country 379.22 User Manual
Page 4
23. Remove the lower shock bolts on the axle, and save for later installation. The shock absorbers will be removed from
the vehicle at the same time the coils are removed from the vehicle.
24. Carefully lower the jack until the coil springs are free (the upper suspension arm will be contacting the axle bracket)
Remove the coil springs and shocks from the vehicle. Note: use of a coil spring compressor may be required for
spring removal.
25. Locate shock absorbers part #658732, and push in sleeves in lower shock mount. Install the shock in the upper
mount using the supplied cup washers, bushings, and nut.
26. Install the Rough Country coil springs in the stock mounts by sliding the shock through the middle of the coil. The
use of a coil spring compressor will be required for installation
27. Lower the axle until the spring can be seated in the mount. Check to be sure the wrap on the coil spring in relation to
the lower mount properly seats the spring by turning the coil spring until it seats.
28. Remove the coil spring compressor at this time.
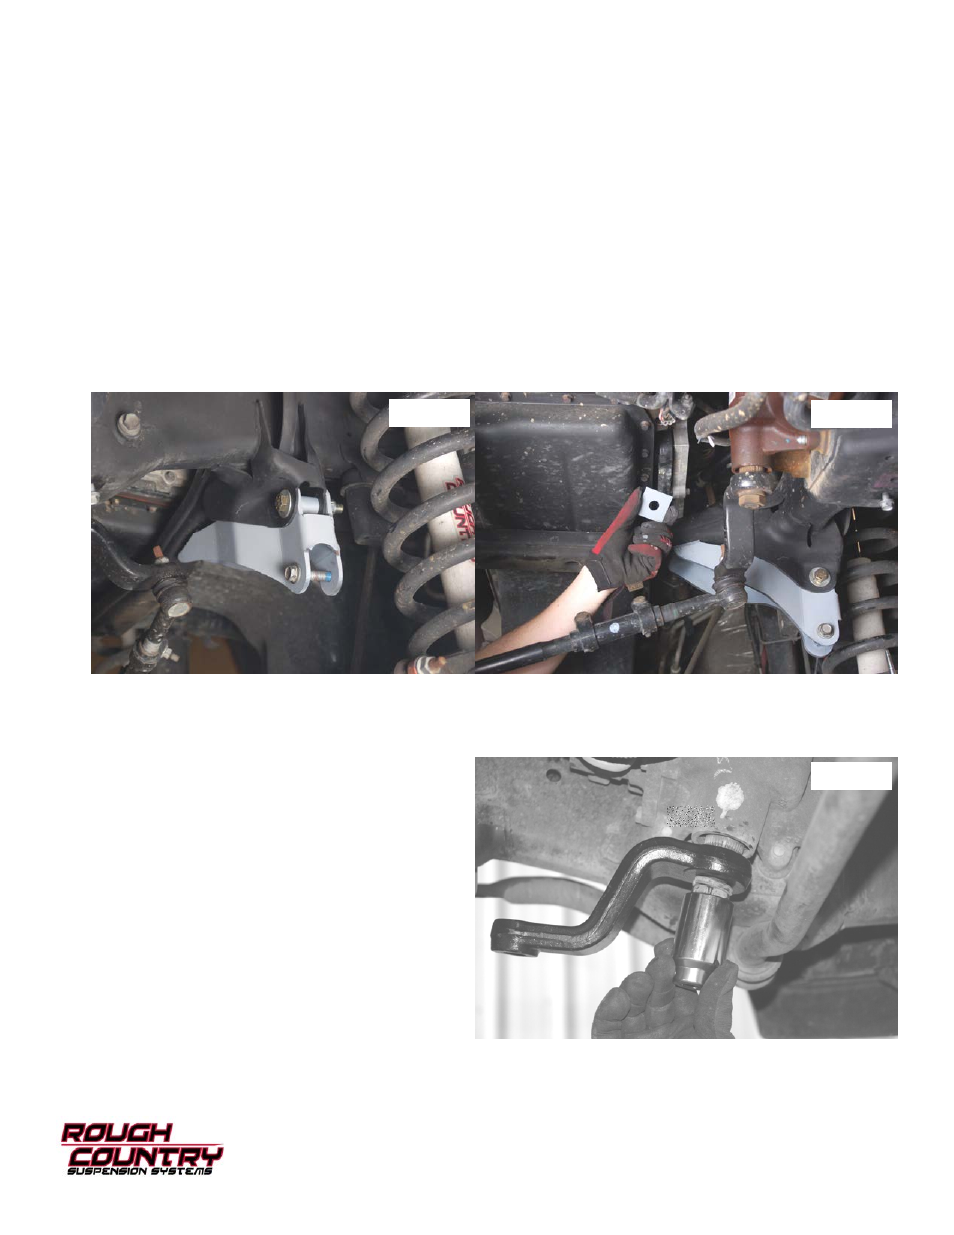
29. Place the track bar bracket on the factory upper track bar mount. Insert
the supplied ¾” x 1 3/8” long sleeve inside
the factory mount and line it up with the mounting hole.
See Photo 10. Install the supplied 16mm x 80mm bolt and
nut through the bracket, sleeve and factory mount. Tighten slightly.
30. Install the 12mm x 3
” bolt through the bracket and slotted existing hole in the frame cross member.
See Photo 11.
The bolt should be installed from the bottom. Install the supplied square washer and lock nut. Tighten track bar hard-
ware. The track rod will be installed into the new mount after the vehicle is on the ground.
31. Install the new pitman arm into the stock location on the sector shaft, using stock hardware and torque nut to 185 ft.
lbs.
See Photo 12.
32. Reinstall the drag link onto the pitman arm using stock hardware.
Photo 7
Photo 10
Photo 11
Photo 12