Rough Country PERF689 User Manual
Page 7
24. Secure the transmission mount to the new cross member with the stock hardware. Tighten using a 1/2” wrench.
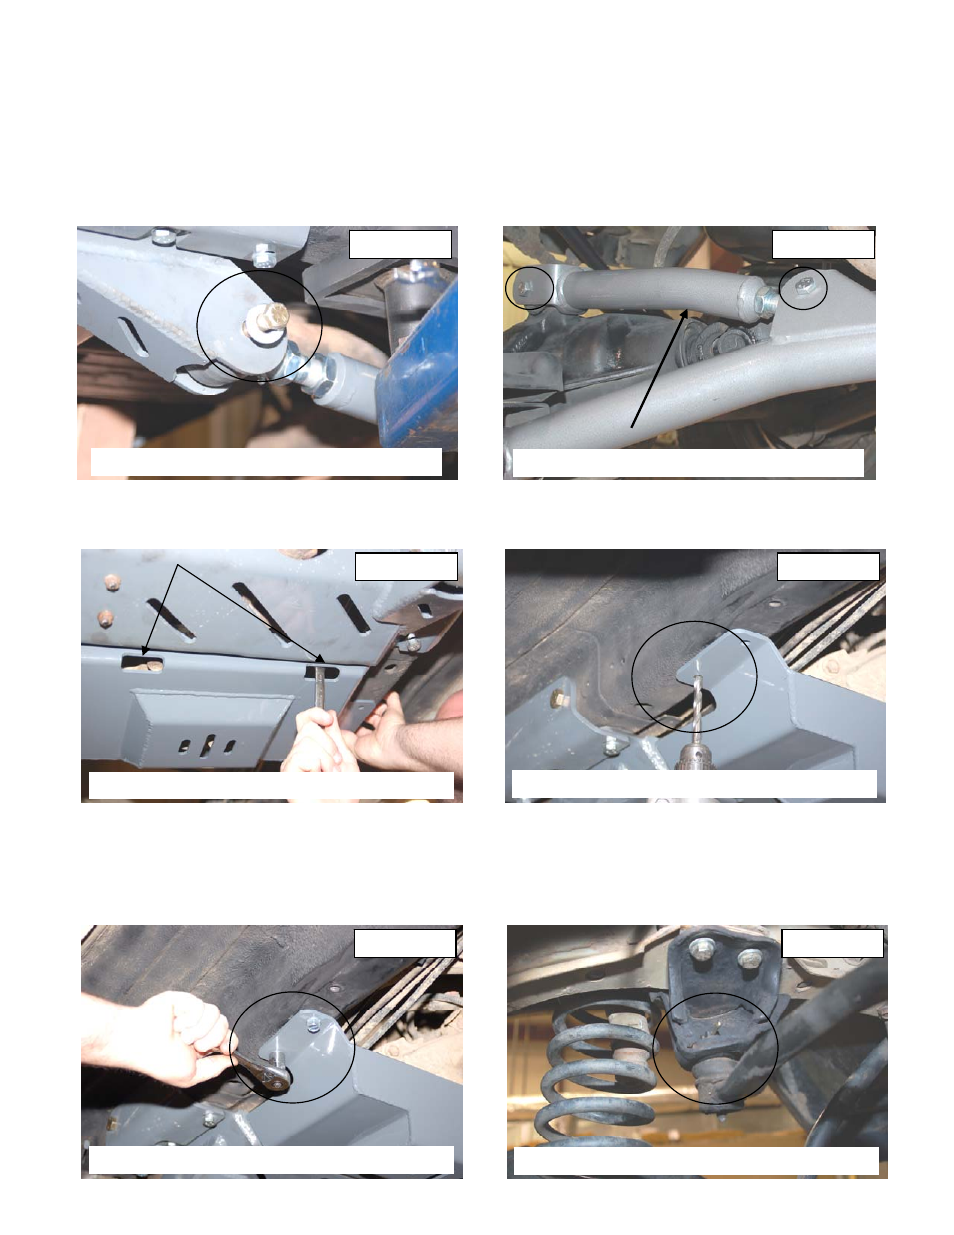
25. Adjust the lower arm to a measurement of 29 3/4” (26 1/4” on 2.8L motor) from eye to eye and install the arm in the
new cross member with the supplied 9/16” x 4” bolts. Do not tighten at this time. See Photo 17.
26. Install the new lower arm on the axle with the stock hardware. Do not tighten the lower control arm at this time.
27. Locate the new adj upper control arm and adjust the arm to a measurement of 15 1/4” from eye to eye.
28. Install the new upper arm on the new lower control arm with the supplied 10mm x 80mm hardware. Do not tighten at
this time.
29. Install the bent driver upper control arm on the axle with the supplied 10mm x 80mm bolts, washers and lock
nuts. Do not tighten at this time. See Photo 18. Install the straight upper control arm on the passenger side.
30. Position the new skid plate in place on the new cross member and install using the supplied 3/8” x 1” bolts, lock
washers and flat washers. Tighten using a 9/16” Socket / Wrench. See Photo 19.
31. Using the bracket as a guide, drill the frame rail using a 23/64” drill bit. See Photo 20.
32. Install the supplied 3/8’” X 1” self tapping bolts. Tighten to 30 ft/lbs using a 9/16” Socket. See Photo 21.
33. Remove the track rod from the axle using a 15mm wrench /socket.
34. Remove the cotter pin from the track rod end on the frame and remove the nut using a xx socket (frame).
35. Remove the stock track rod bracket from the drivers side of the vehicle by removing the two side nuts on the frame
using a 18mm socket and the two lower bolts shown in Photo 22 on the bottom of the frame rail using a 15mm
wrench / socket. Retain the stock hardware for reuse.
PHOTO 17
PHOTO 18
PHOTO 19
PHOTO 20
PHOTO 21
PHOTO 22
Install lower control arm bolts
Install upper control arm
Insert the supplied hardware
Drill the frame using a 23/64” drill bit
Insert the supplied 3/8” x 1” hardware
Remove the track rod bracket