Warrior 30630 LIFT KIT (1987 – 1996 Jeep YJ Wrangler) User Manual
Page 2
Protecting Your Adventure Lifestyle
========================================================================================
QUALITY • INTEGRITY • INNOVATION • SERVICE
Warrior, Inc.
16850 SW Upper Boones Ferry Rd
Ste. A
Durham, OR 97224
Phone: (888) 220-6861
Fax: (503) 692-0364
[email protected]
www.warriorproducts.com
just separates from the spring. Now remove the frame bolts and the shackle bolts on the leaf spring. Repeat on the
other side.
8. Prior to installation of new springs, thoroughly lubricate the new spring poly eye bushings and sleeves with “water
resistant” lithium based grease. Loosely attach the spring to its hangers, snug up but do not completely tighten yet.
Make sure spring centering pin aligns and seas into spring perch hole.
9. While installing new u-bolts, put one bump stop extension snubber on top of axle tubes. (figure 1 shows how the bump-
stops are capture by the u-bolt. Tighten u-bolts to 65 ft. lbs. of torque. Tighten spring pivot bolts to 35ft. lbs. on both
frame mounts and shackle mounts.
10. To install new tracking bar bracket onto front axle housing, refer to instructions with Front Trac Arm Bracket.
11. Assemble and install new front shock absorbers Part #60501 (Boot installation and poly hourglass bushing installation
can made easier with the use of rubbing alcohol sprayed on the poly as a lubricant.). Tighten upper stem type mounts
only until bushings swell slightly, then torque lower mounts to 45 ft lbs.
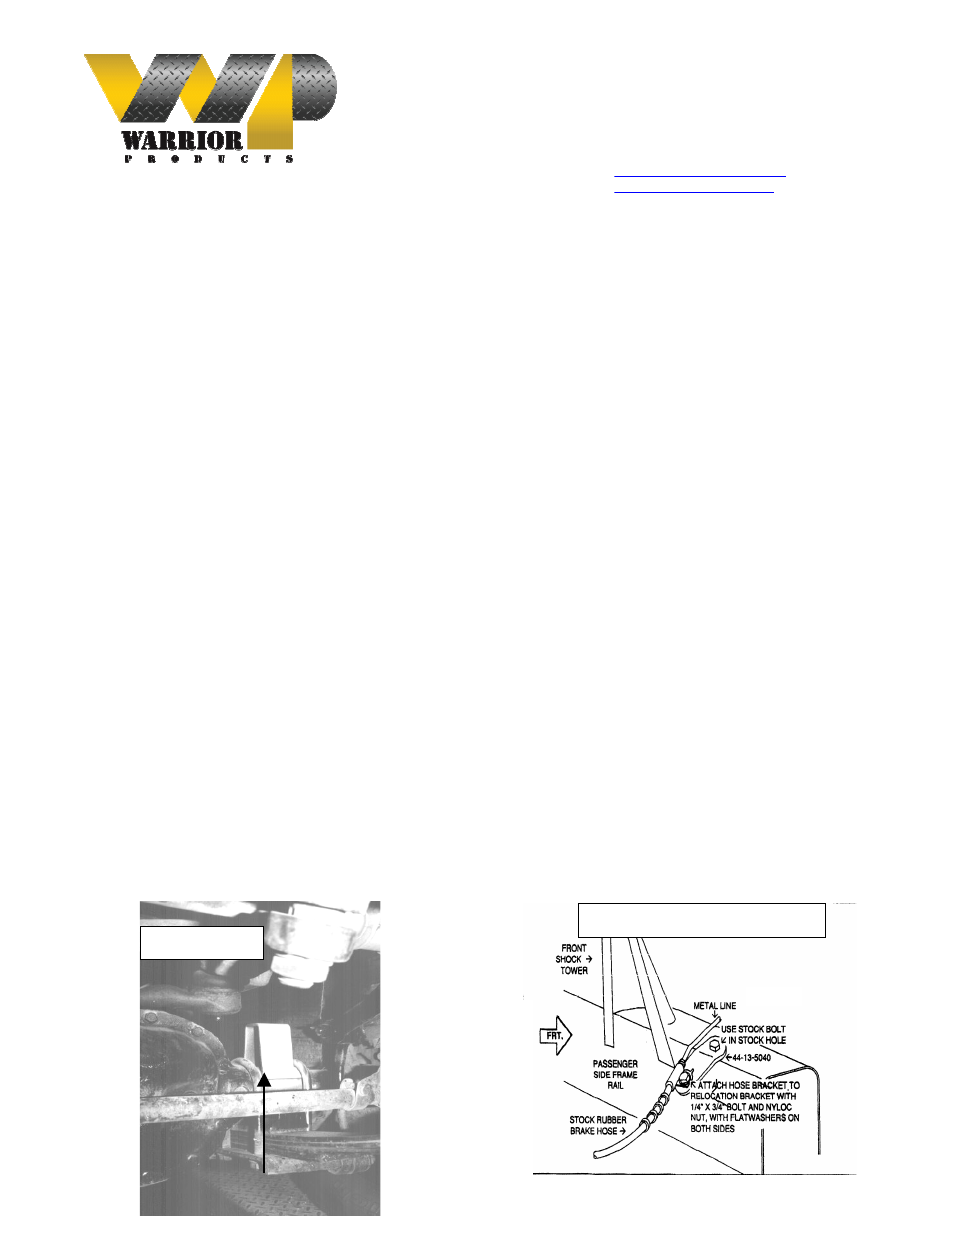
12. Install new front brake line relocating brackets (#700021) in stock holes reusing the bolts on the frame rail. Pull steel line
out from the frame rail (Use caution when rerouting the steel line so you do not kink the line). Mount the line to the
bracket using the 5/16” x 1” bolts, washers and flange lock nut. Note: There is a driver side and a passenger side bracket
as shown in figure 2.
13. Reinstall tires/wheels, remove jack stands and lower vehicle to floor. Tighten the front spring’s shackle to 95 ft. lbs. and
the stationary end to 105 ft. lbs. (If kit includes pitman arm, you may want to do pitman arm instructions before
proceeding to rear of vehicle)
14. Once again as on the front (following same basic steps). Place safety (jack) stands under rear frame rails.
15. Remove the retainer clip that attaches the stock rubber brake hose to its upper mount bracket. This is where the rubber
hose ends and the metal line starts. Insert the new “Z” brackets in between the stock mounting bracket and the hose end.
The 5/16” x 1” bolt and flanged lock nut are used to attach the bracket to the bracket end. Position the hose/line through
the slot and into the hole on the “Z” bracket’s opposite end and then reinstall clip (See figure 5).
16. Disconnect tracking bar from frame rail. Install new drop down tracking bar mounting bracket (#800005) on housing as
shown in figure 4 using provided hardware.
17. Install new springs (#800020) with shims. (torque u-bolts 65 ft. lbs.) Remember to install the bump stop extension
snubber on as you did on the front. When installing the springs the thick part of shim goes toward front of jeep. Attach
tracking bar to drop down bracket using original 12mm bolt and flange-nut. (torque to 45 ft. lbs.)
18. Assemble the rear shock absorbers (Part# 60502) with loop bushings and corresponding sleeves and install shocks.
Torque upper and lower mounts to 45-ft. lbs. On some models there may not be adequate clearance between the shock
body and the axle tube. In this situation your only option is to relocate the shock bracket.
19. Install tires, remove jack stands, and lower vehicle to floor. Tighten the shackle to 95 ft. lbs. and the frame end to
105ftlbs.
20. Install Transfer Case Spacer Kit following instructions packaged with part #800006.
21. Install Pitman Arm Kit following instructions packaged with part #800016
Figure 2 - Brake line bracket
Figure 1