Troubleshooting, Maintenance instructions, Problem possible reasons solution – RIDGID Power-Spin User Manual
Page 10: Cleaning, Installing replacement cable
POWER-SPIN® Drain Cleaner
8
Troubleshooting
PROBLEM
POSSIBLE REASONS
SOLUTION
Cable kinking or
breaking.
Cable is being forced
Do Not Force Cable! Let the auger do
the work.
Cable used in incorrect pipe
diameter.
Do not use in lines over 1
1
/
2
" (40 mm).
Use reverse only if cable gets caught in
pipe or to retract cable.
Motor switched to reverse
Cable exposed to acid.
Clean cables routinely.
Cable worn out or damaged.
If cable is worn or damaged, replace it.
Cable not properly supported.
Support cable properly, see instructions.
Cable won’t feed.
Cable bearings are dirty or
greasy.
Clean cable and bearings with hot, soapy
water.
AUTOFEED not fully engaged.
Be aware and squeeze trigger harder.
Maintenance Instructions
WARNING
Always wear safety glasses and leather
gloves when performing any maintenance.
Drill should be removed from drain cleaner
before any maintenance is performed.
Cleaning
Cable, drum and AUTOFEED should be thor-
oughly flushed with water after every use to
prevent the damaging effects of chemicals
and sediment. Clean exterior as needed with
hot soapy water and/or disinfectants. Drain
drum by tipping forward after every use and
cleaning.
Installing Replacement Cable
To Remove Cable From Drum
1. Pull out excess cable from drum.
2. Remove 4 screws on back of drum.
3. Loosen clamp screw and pull end of old
cable from drum and discard.
To Install Replacement Cable
1. Replacement
1
/
4
" (6 mm) x 25' (7,6 m)
MAXCORE® cables are available under
catalog number 42163.
2. To make cable installation easier, com-
pletely uncoil new cable before proceed-
ing. Use caution when removing the ca-
ble from the package. The cable is under
tension and could strike the user.
3. Insert about 12" (0,3 m) of cable through
the front rollers and guide tube into the
drum.
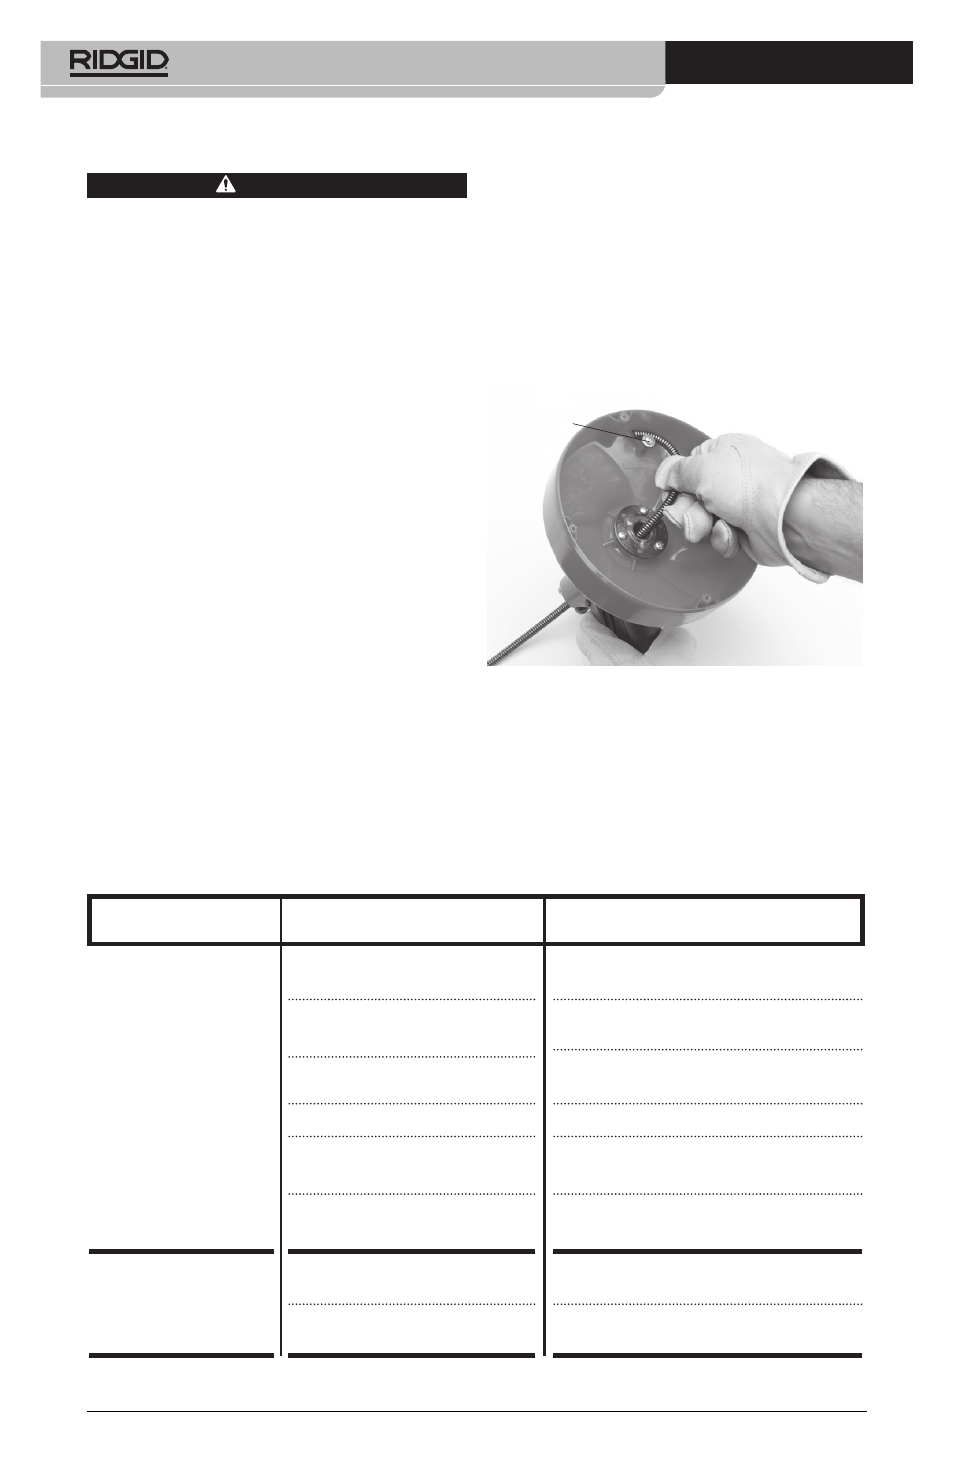
4. Push end of cable into holder and under
clamp screw and washer. Tighten clamp
screw (see Figure 9).
Clamp Screw
Figure 9 – Installing Cable End Into Holder
5. Replace drum back and retighten the 4
screws.
6. Feed cable into drum.