Warning, Removing the oven door components – Whirlpool 1997 "E" User Manual
Page 15
2-5
© 1997 Whirlpool Corporation
Cooking Products Service Manual
Original March, 1997 4322167
Page 2-5
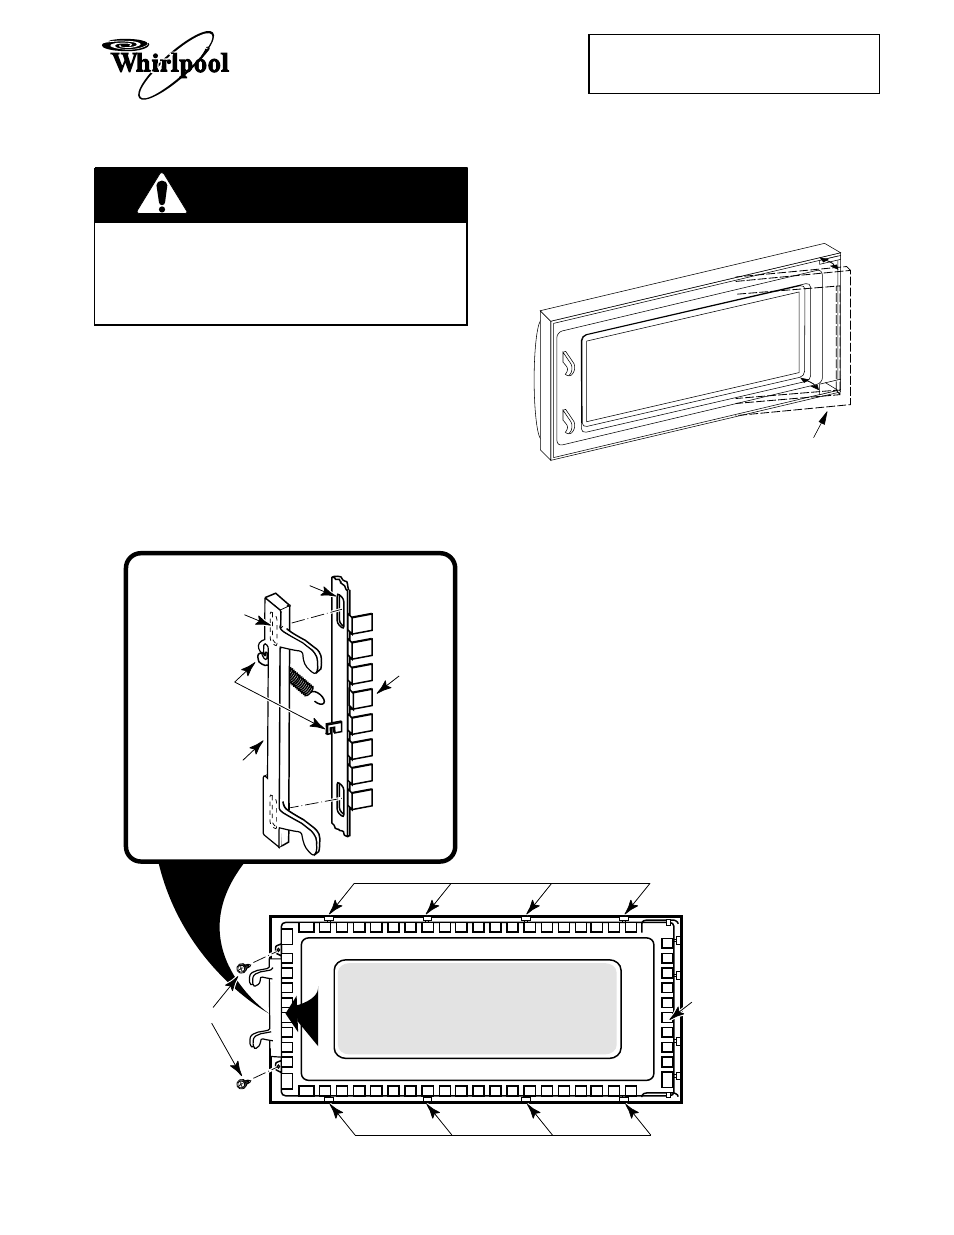
REMOVING THE OVEN DOOR COMPONENTS
WARNING
Personal Injury Hazard
Disconnect from the electrical supply be-
fore servicing the unit. Failure to do so
could result in death or electrical shock.
1.
Disconnect the electrical supply to the
microwave oven.
2.
Remove the two screws from the top of
the cabinet for the vent grille and remove
the grille (see the illustration on page 2-3).
3.
Open the oven door all the way, then lift
the door pins out of the hinge holes and
remove it (see the illustration on the pre-
vious page).
4.
To remove the oven door choke, use a
putty knife along the edges, and pry the
choke out from around the inside window
frame.
OVEN DOOR
PRY OUT CHOKE
5.
To replace the latches and door glass
assembly, remove the two mounting
screws from the end of the glass frame,
then push the top and bottom edges of the
door out and unsnap the locking tabs from
the frame and remove the assembly.
6.
Slide the latches down and remove the
hooked tabs from the slots in the door
frame, then unhook the ends of the spring
from the door, and remove the latches.
7.
Reassemble the oven door.
8.
Reinstall the oven door and vent grille on
the microwave oven.
HOOK SPRING
OVER TABS
HOOKED TAB
LATCHES
BOTTOM LOCKING TABS
TOP LOCKING TABS
SLOT
GLASS
FRAME
GLASS
FRAME
FRAME SCREWS