Cooktop chimney hood installation, Island hood installation – Wolf Ventilation Hood User Manual
Page 14
Cooktop Chimney Hood Installation
14
UPPER FLUE
SECTION
SCREW
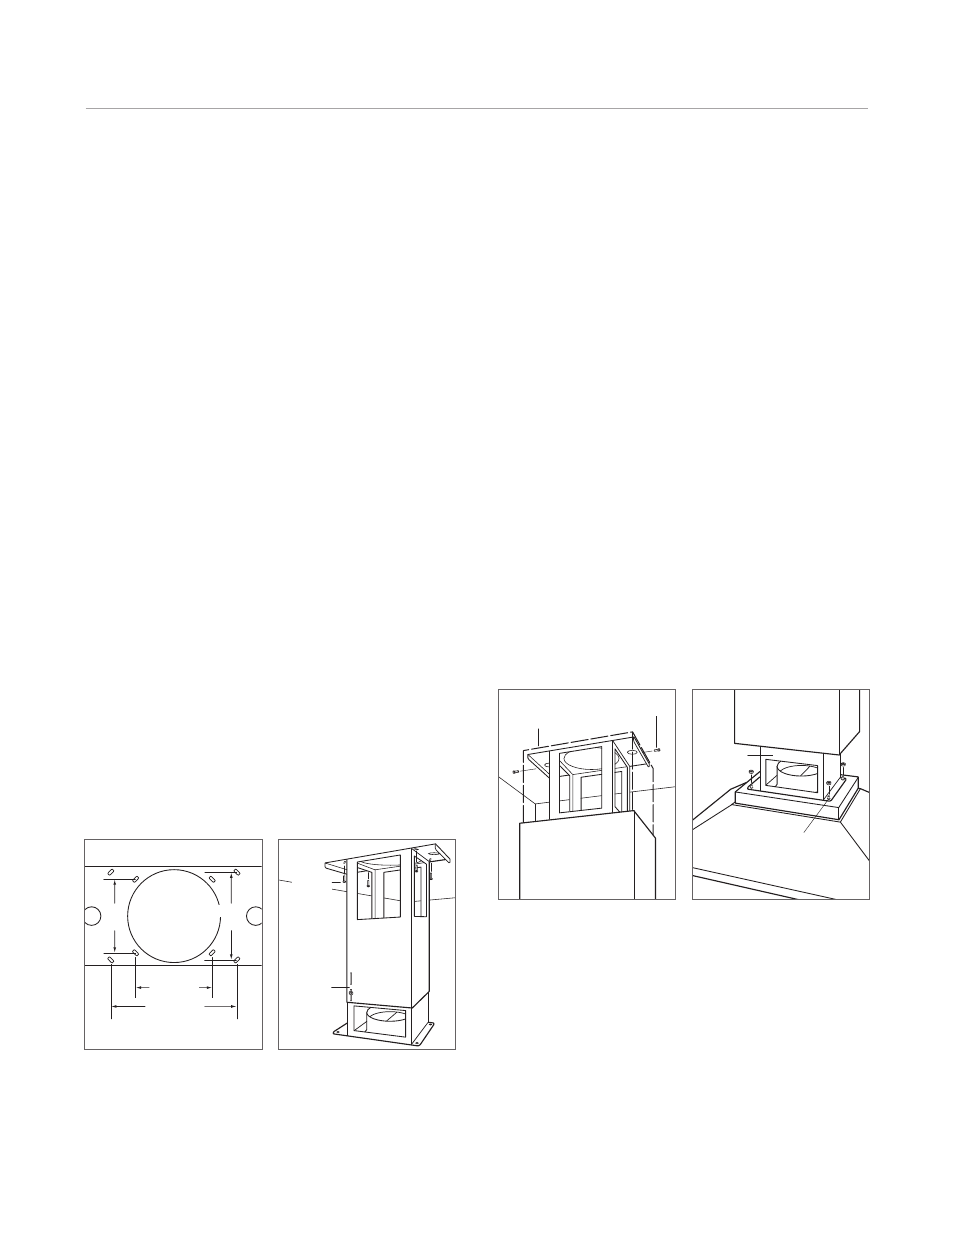
Upper flue section.
Mount hood to support frame.
SUPPORT
FRAME
WELD SCREW
Island Hood Installation
Locate the electrical supply for the island hood through
the ceiling within the dimensions of the chimney flue.
Install ductwork as specified on pages 10–11.
INSTALL SUPPORT SYSTEM
IMPORTANT NOTE:
Wolf recommends that the bottom
of the ventilation hood be installed 24"
(610)
to 30"
(762)
above the countertop.
At the island hood installation location, install 2"
(51)
x 4"
(102)
or
3
/
4
"
(19)
plywood cross framing between ceiling
joists. Refer to the island hood mounting pattern dimen-
sions below.
Finish the ceiling surface. Be sure to mark the location of
the ceiling joists and cross framing.
Determine the desired orientation of the island hood. Note
that the front designates the control side of the hood.
Secure the upper half of the support frame to the joists
and cross framing with four screws (provided). Make sure
that the screws are driven into the center of the joists and
framing for maximum strength. Ensure the correct orienta-
tion of the support frame. Refer to the illustration below.
Adjust the overall height of the support frame. Loosen and
retighten the screws in the height adjustment slots as
necessary.
IMPORTANT NOTE:
The hood height is 11
1
/
4
"
(286)
from
the support frame attachment point.
CONNECT CHIMNEY FLUE
Secure the upper chimney flue section to the upper
support frame with the screws provided. Refer to the
illustration below.
Temporarily hold the lower chimney flue section over the
upper flue section.
MOUNT HOOD TO SUPPORT FRAME
Mount the hood to the support frame by aligning the four
weld screws on the hood to the four holes on the support
frame. Use four nuts (provided) to secure the hood to the
support frame. Refer to the illustration below.
Nest the bottom of the telescopic chimney flue into the
relief in the hood shell. Make electrical connections.
6
1
/
2
"
(165)
10
7
/
8
"
(276)
6
1
/
2
"
(165)
7
13
/
16
"
(198)
FRONT OF HOOD (TOP VIEW)
Mounting pattern.
Support frame.
SUPPORT
FRAME
(FRONT)
HEIGHT
ADJUSTMENT
SLOTS
SCREW