Cooktop chimney hood installation, Wall hood installation – Wolf Ventilation Hood User Manual
Page 13
Cooktop Chimney Hood Installation
13
wolfappliance.com/specs
Wall Hood Installation
WIRING CONNECTIONS
Electrical connection at the hood:
1) Remove the cover from the rear electrical box. Remove
the electrical box knockout that faces the hood's
discharge collar.
2) Insert 6"
(152)
Romex
®
wire through the knockout
opening. Secure the Romex
®
wire to the electrical box
with an appropriate connector. Use wire connectors or
wire nuts approved by UL or C/UL.
3) Make electrical connections at the hood. Connect
black to black, white to white and green/yellow to
green or bare wire.
4) Place all wiring connections inside the electrical box
and reinstall the cover. Make sure all wires are secure
and that no wires are pinched between the cover and
electrical box.
Refer to page 13–15 for internal blower installation and
remote blower wiring.
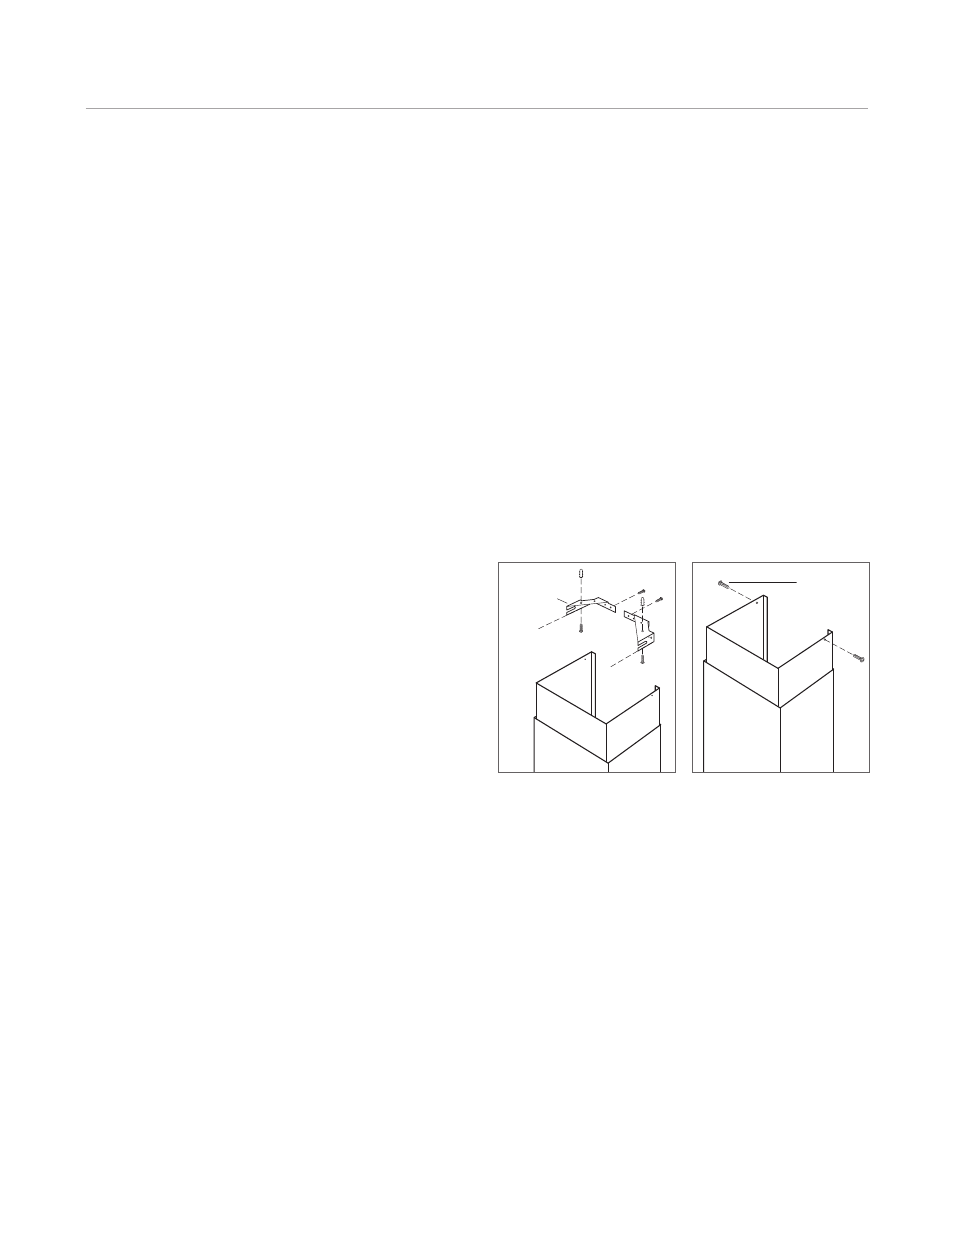
UPPER
BRACKET
Upper brackets.
Chimney flue.
SCREWS
ATTACH CHIMNEY FLUE
Use the screws and wall anchors provided to secure the
upper brackets for the chimney flue to the ceiling. Position
the upper brackets based on the dimensions of the
chimney flue. Refer to the illustration below.
Use 8"
(203)
round metal duct to connect the duct collar
on the hood to the ductwork above. Use duct sealing tape
to make all joints secure and air tight.
Fasten the upper section of the telescopic chimney flue to
the brackets with the screws provided. Refer to the illus-
tration below. Nest the bottom of the chimney flue into the
relief in the hood shell.