Wayne-Dalton TORSION SPRING 9100 User Manual
Page 27
27
Please Do Not Return This Product To The Store. Contact your local Wayne-Dalton dealer. To find your local Wayne-Dalton dealer, refer to your
local yellow pages/business listings or go to the Find a Dealer section online at www.wayne-dalton.com
Tools Needed:
INST
ALLA
TION
winding bar while carefully loosening
the set screws in the winding cone.
BE PREPARED TO SUPPORT THE FULL
FORCE OF THE TORSION SPRING ONCE
THE SET SCREWS ARE LOOSE. Carefully
adjust spring tension 1/4 turn. Retighten
both set screws in the winding cone and
repeat for the other side. Recheck door
balance DO NOT ADJUST MORE THAN
1/2 TURN FROM THE RECOMMENDED
NUMBER OF TURNS. If door still does
not balance correctly, contact a qualifi ed
door agency.
If the door still does not operate easily,
lower the door into the closed position,
UNWIND THE SPRING(S) FULLY (Refer
to “P1” on page 6 “Torsion Spring
Removal For Standard Lift”) and
recheck the following the items:
1.) Check the door for level.
2.) Check the torsion tube for level.
3.) Check the track spacing.
4.) Check the counterbalance cables for
equal
tension.
5.) Check the track for potential
obstruction of the rollers.
6.) Clamp locking pliers onto track and
rewind
springs
IMPORTANT: IF DOOR STILL DOES NOT
OPERATE PROPERLY, THEN CONTACT A
QUALIFIED DOOR AGENCY.
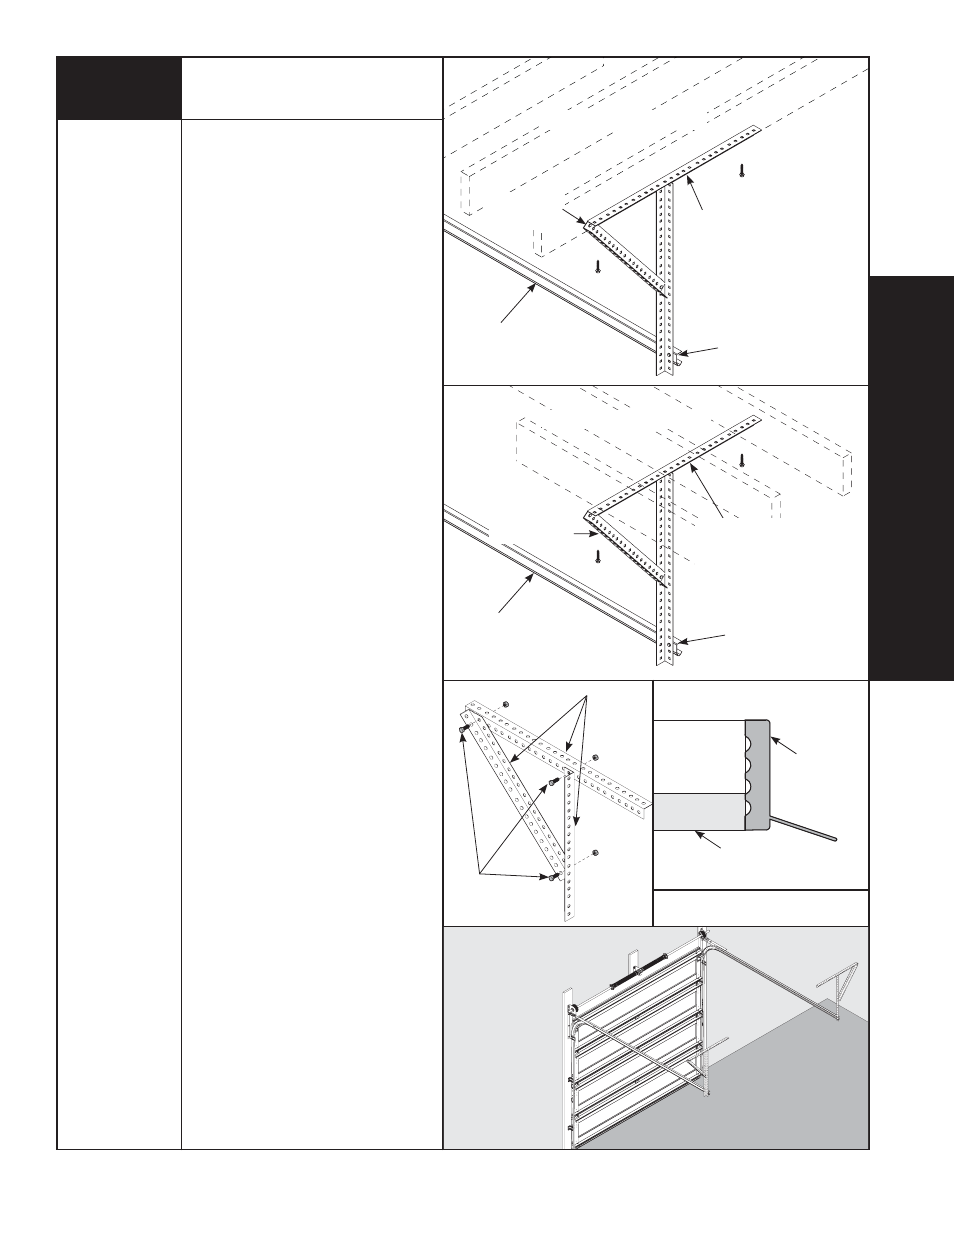
Rear Support Continued...
PERFORATED ANGLE
(3) 5/16” BOLTS
& NUTS
HORIZONTAL TRACK
BOLT MUST EXTEND INTO
THE TRACK TO SERVE AS
A ROLLER STOP
PERFORATED
ANGLE BRACE
PERFORATED ANGLE -BOLTED
USING (2) 5/16” X 1-5/8”
HEX HEAD LAG SCREWS
TO CEILING MEMBER AND
PARALLEL TO WIDTH OF DOOR
SOUND FRAMING MEMBERS
SOUND FRAMING MEMBERS
HORIZONTAL TRACK
BOLT MUST EXTEND INTO
THE TRACK TO SERVE AS
A ROLLER STOP
JAMB
WEATHER
SEAL
PERMANENTLY ATTACHED
WEATHER SEAL
ANGLE BRACE
PERFORATED ANGLE -BOLTED
USING (2) 5/16” X 1-5/8”
HEX HEAD LAG SCREWS
TO CEILING MEMBER AND
PARALLEL TO WIDTH OF DOOR