Fig.17: connecting starter kit – Quantum Instruments Cascade Laser Starter Kit User Manual
Page 30
Starter Kit Instruction Manual
Installation
29
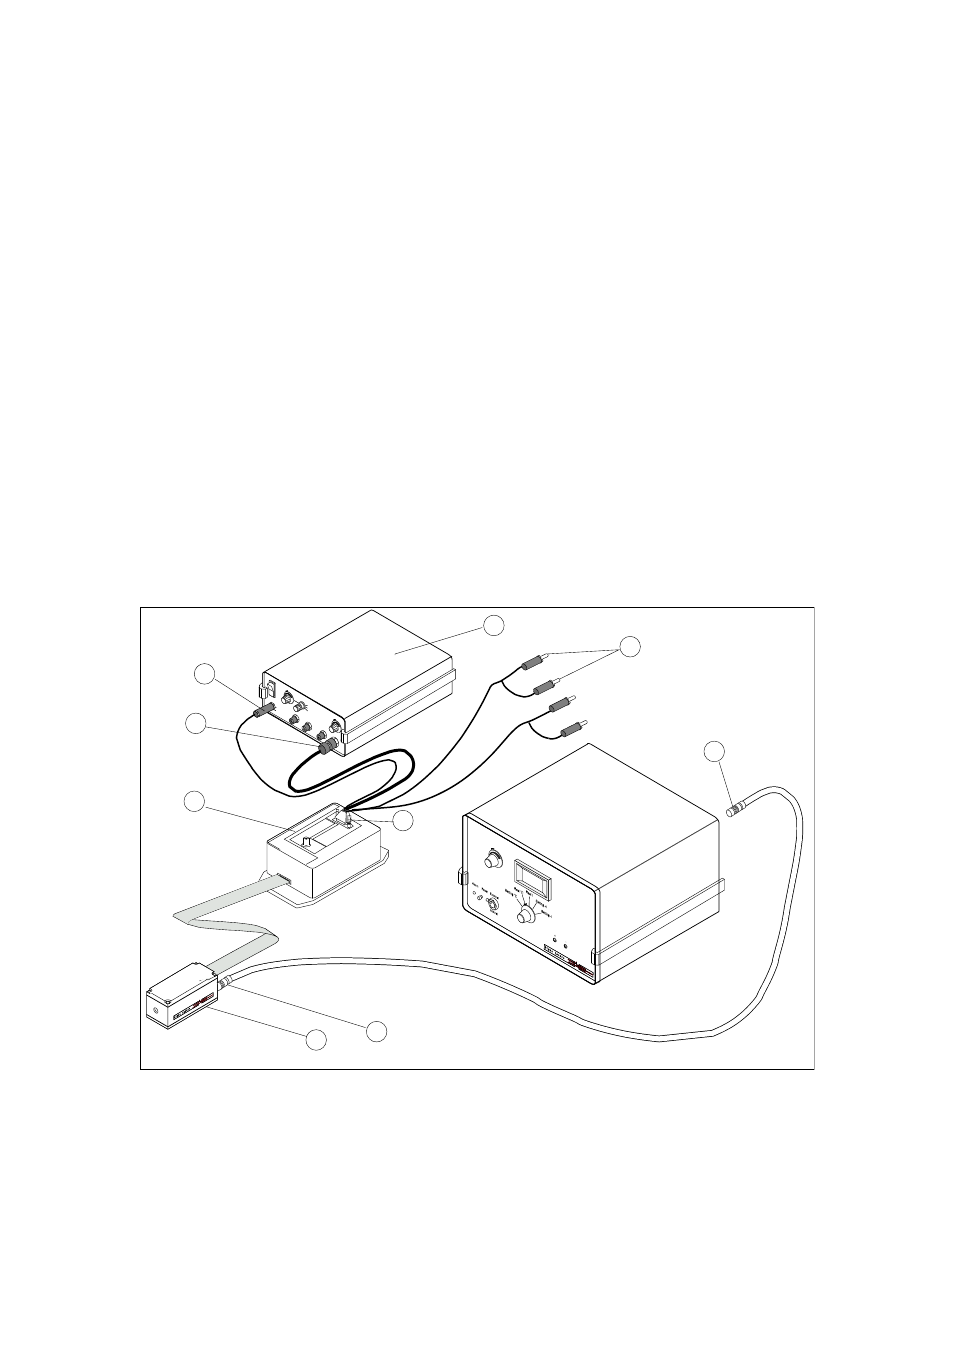
[3] Plug the cable (3) onto the LDD100(4).
[4] Plug the +12VDC connector (1) into the
TPG128 (9).
[5] Plug the trigger BNC connector (2) into
the TPG128 (9) Out 1 or Out 2 outptut.
CAUTION ! The unit must be floating.
[6] Plug the banana cables (8) (red and black)
into the DC power supply unit.
[7] Plug the LEMO connector (6) onto the
LLH100 module (5) and the connector (7) onto
the TCU151 unit.
[8] Plug the cooling water tubing if available.
CAUTION ! If no water cooling is avail-
able, pay attention to the LLH100 module case
temperature, and be careful of either reducing
heat dissipation or providing air cooling to the
unit.
TPG
128
−TT
L Pu
lse
Gen
erato
r
O
TCU151
FF
ON
Po
T
w
e
e
m
r
pera
ture
0
C
.
o
2
n
t
t
o
r
2
o
.
l
2
l
m
e
s
r
0.5
to
10.5
ms
5 to
105
m
s
0 to
200
ns
−−−
− −
−−−
−Pe
riod
−−−
−−−
−−−
−D
urati
on
−
Gate
IN
Trig
OU
T
Out
1
Out
2
50
ohm
s
50
ohm
s
50
ohm
s
max
60m
A
+12
V
0 V
connected to + hi High Voltage
Pulse on top, Bottom
Output
Current control Max 60V
Power supply 12V
Input
LDD 100
Monitor 20 A/V, Z50 Ohm
6
9
8
7
3
1
2
3
5
Fig.17: Connecting Starter Kit