Ricoh PRIPORT JP1250 User Manual
Page 15
xi
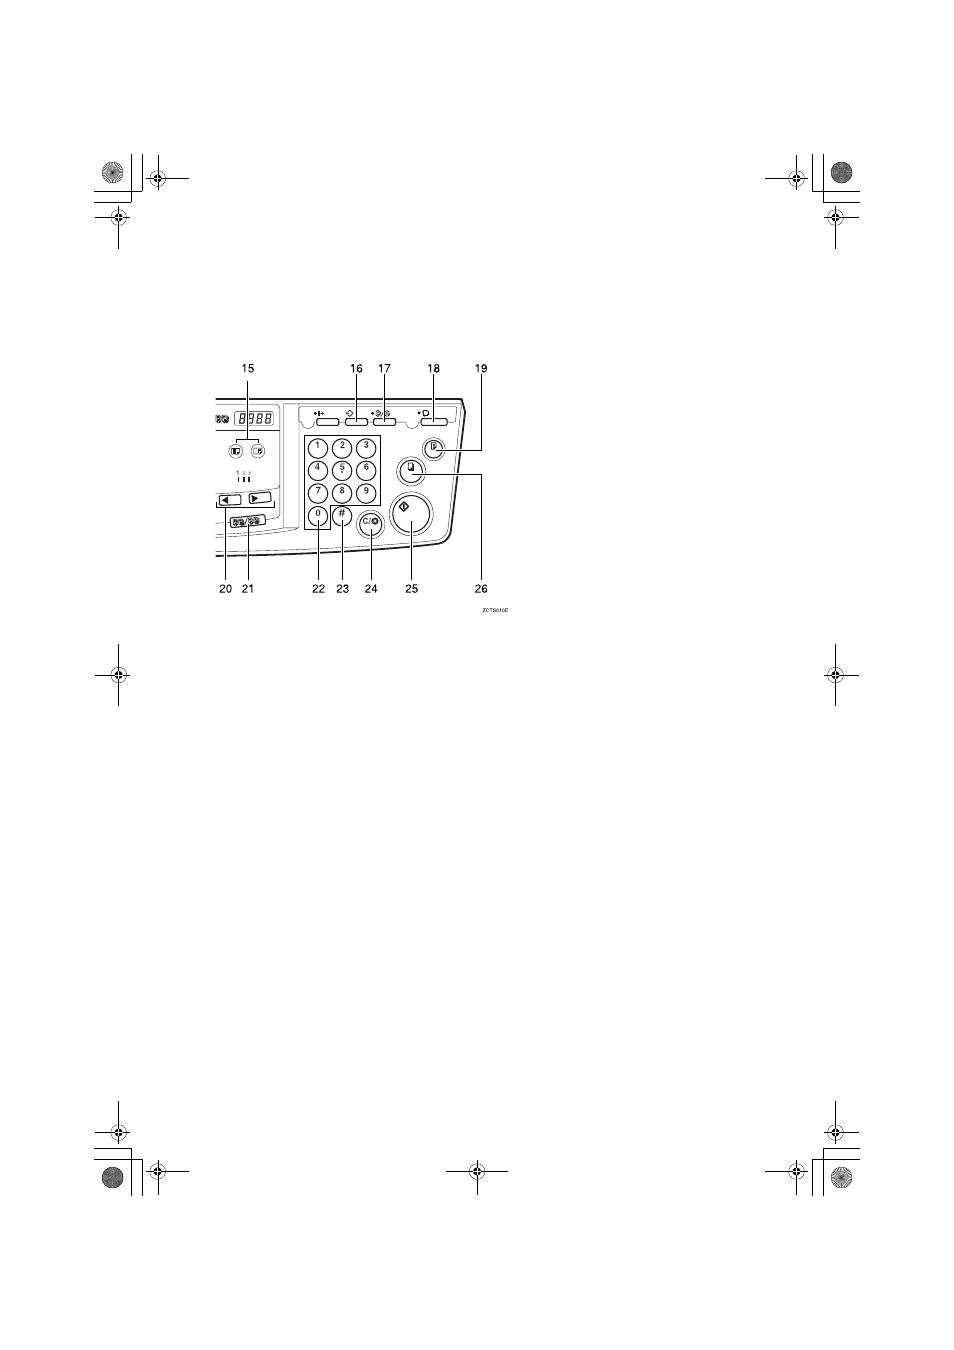
14.
{{{{
Fine
}}}} key
Press to select the fine image. See
⇒
P.13
“Fine Mode—Making Clear Prints”.
15.
{{{{
Image Position
}}}} key
Press to shift the image forwards or back-
wards. See
⇒
P.9 “Adjusting the Print Image
Position”.
16.
{{{{
Program
}}}} key
Press to input or recall user programs. See
⇒
P.38 “Program—Storing Your Print Set-
tings in Memory”.
17.
{{{{
Clear Modes/Energy Saver
}}}} key
• Clear Modes
Press to clear the previously entered job
settings.
• Energy Saver
Press to switch to and from Energy Sav-
er mode.
⇒
P.8 “Energy Saver Mode —
Saving Energy”.
18.
{{{{
Auto Cycle
}}}} key
Use to process the master and make prints
automatically. See
⇒
P.26 “Auto Cycle—
Printing from Several Originals at Once”.
19.
{{{{
Proof
}}}} key
Press to make proof prints.
20.
{{{{W
W
W
W}}}} and {{{{V
V
V
V}}}} keys (Speed keys)
Press to adjust the printing speed. See
⇒
P.14 “Changing the Printing Speed”.
21.
{{{{
Memory/Class
}}}} key
Press to select Memory or Class mode. See
⇒
P.28 “Class Mode—Group Printing from
the Same Original”or
⇒
P.30 “Memory
Mode—Group Printing from Different Origi-
nals”.
22.
Number keys
Press to enter the desired number of prints
and data for selected modes.
23.
{{{{q
q
q
q}}}} key
Use to enter data in selected modes.
24.
{{{{
Clear/Stop
}}}} key
While entering numbers, press to cancel a
number you have entered.
While copying, press to stop copying.
25.
{{{{
Start
}}}} key
Press to make a master.
26.
{{{{
}}}} key
Press to start printing.
SilverV-gb.book Page xi Monday, May 15, 2000 3:32 PM