Installing the socket – Raymarine autopilot + ST4000+ User Manual
Page 84
Chapter 5: Installing the ST4000+
69
5
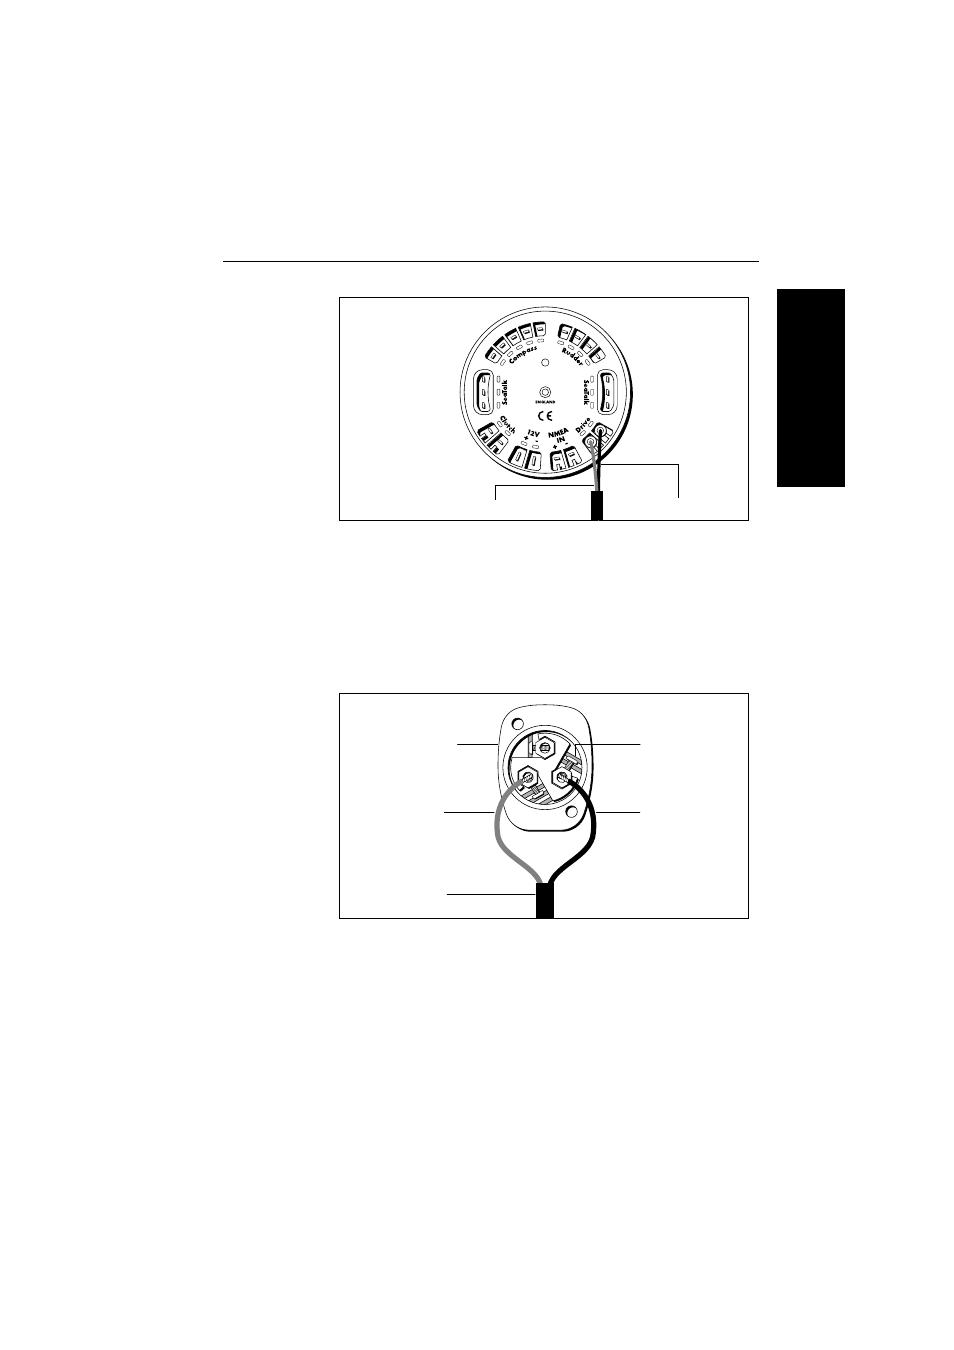
Installing the socket
1. Apply the template (supplied at the rear of this handbook) to the
bulkhead.
2. Carefully drill a 18 mm (
23
/
32
in) clearance hole and two 2.5 mm
(
3
/
32
in) pilot holes. Remove the template.
3. Pass the cable through the bulkhead and attach to the socket,
making sure you connect each core to the correct pin (as shown).
4. Attach the socket to the bulkhead using the two self-tapping
screws. Use cable clamps to secure the drive cable at regular
intervals.
Brown
Blue
D3284-2
D383-5
Drive (brown)
2 stripe terminal
Drive (blue)
3 stripe terminal
To the
control unit
Terminal
identification
stripes
Rear of socket
See also other documents in the category Raymarine GPS receiver:
- RAYTHEON E32001 (13 pages)
- RAYCHART 420 (101 pages)
- L365 (83 pages)
- SR50 (48 pages)
- A65 (100 pages)
- RS12 (50 pages)
- DSM300 (82 pages)
- NMEA Multiplexer (16 pages)
- Pathfinder (111 pages)
- Pathfinder Radar (244 pages)
- autopilot control unit (111 pages)
- VolvoPenta IPS Autopilot System DPU (16 pages)
- stand-alone master instrument (45 pages)
- ST80 (15 pages)
- Raystar 125 (8 pages)
- RS12 (38 pages)
- ST6001 (48 pages)
- Pathfinder Radar Scanners (66 pages)
- Chartplotter (101 pages)
- Heading Sensor (24 pages)
- Ray430 (54 pages)
- Viewable Marine Displays (38 pages)
- Marine GPS System (188 pages)
- C Series (244 pages)
- ST8001 (48 pages)
- hsb2 PLUS Series (246 pages)
- 631 PLUS (170 pages)
- navigation system (17 pages)
- ST8002 (48 pages)
- PowerPilot (18 pages)
- ST7002 (52 pages)
- GPS Kit (24 pages)
- 465 (107 pages)
- Ray54E (116 pages)
- GPS Plotter (131 pages)
- GPS navigation (75 pages)
- ST7001 (48 pages)
- 300 (136 pages)
- Raystar 120 (30 pages)
- autopilot (137 pages)
- DSM30 (34 pages)
- Platinum Chart Card (29 pages)
- ST6002 (56 pages)
- 320 (139 pages)