Ricoh AP505 User Manual
Page 30
Installing Options
12
2
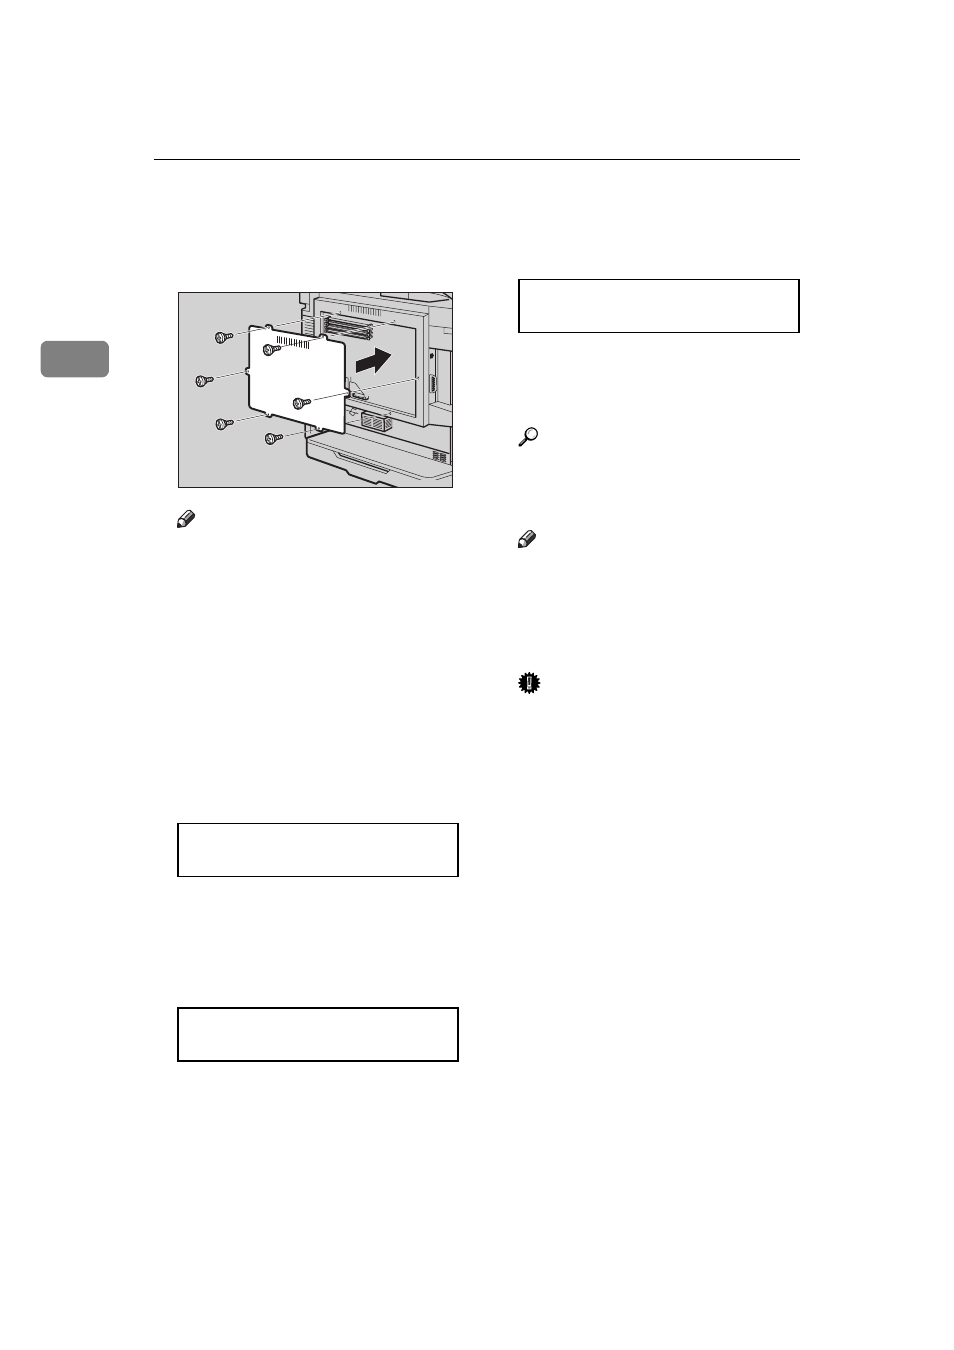
F
Attach the back plate to its origi-
nal position, and fasten it with
screws that were removed in step
C.
Note
❒ A coin can be used to fasten the
screws.
G
Plug the printer's power cord
back into the printer and the wall
socket. Turn on the printer's pow-
er switch.
H
After installing the hard disk, ini-
tialize it using the operation pan-
el.
The following message appears on
the panel display.
PRESS ENTER TO
INITIALIZE DISK
I
Press {
Enter
}.
The printer starts initializing the
hard disk. The following message
appears on the panel display.
INITIALIZING
J
When initialization finishes, the
following message appears on the
panel display.
READY
K
Print a configuration page to con-
firm that the hard disk is properly
installed.
Reference
For more information on the
configuration page, see the
“Getting Started”.
Note
❒ If the hard disk is not properly
installed, repeat steps
B to K
again. If you fail again, contact
your sales or service representa-
tive.
Important
❒ To make the printer recognize
the installed option properly,
you must set up the option with
the printer driver. See the “Us-
er's Guide” for further details.
TFWX196E