Chapter 5 preparation – Panasonic AJ-HDX400E User Manual
Page 61
Chapter 5 Preparation
5
61
1
Attach the lens to the camera.
At this stage, do not forget to connect the lens cable.
2
Set the lens aperture to manual and open the aperture.
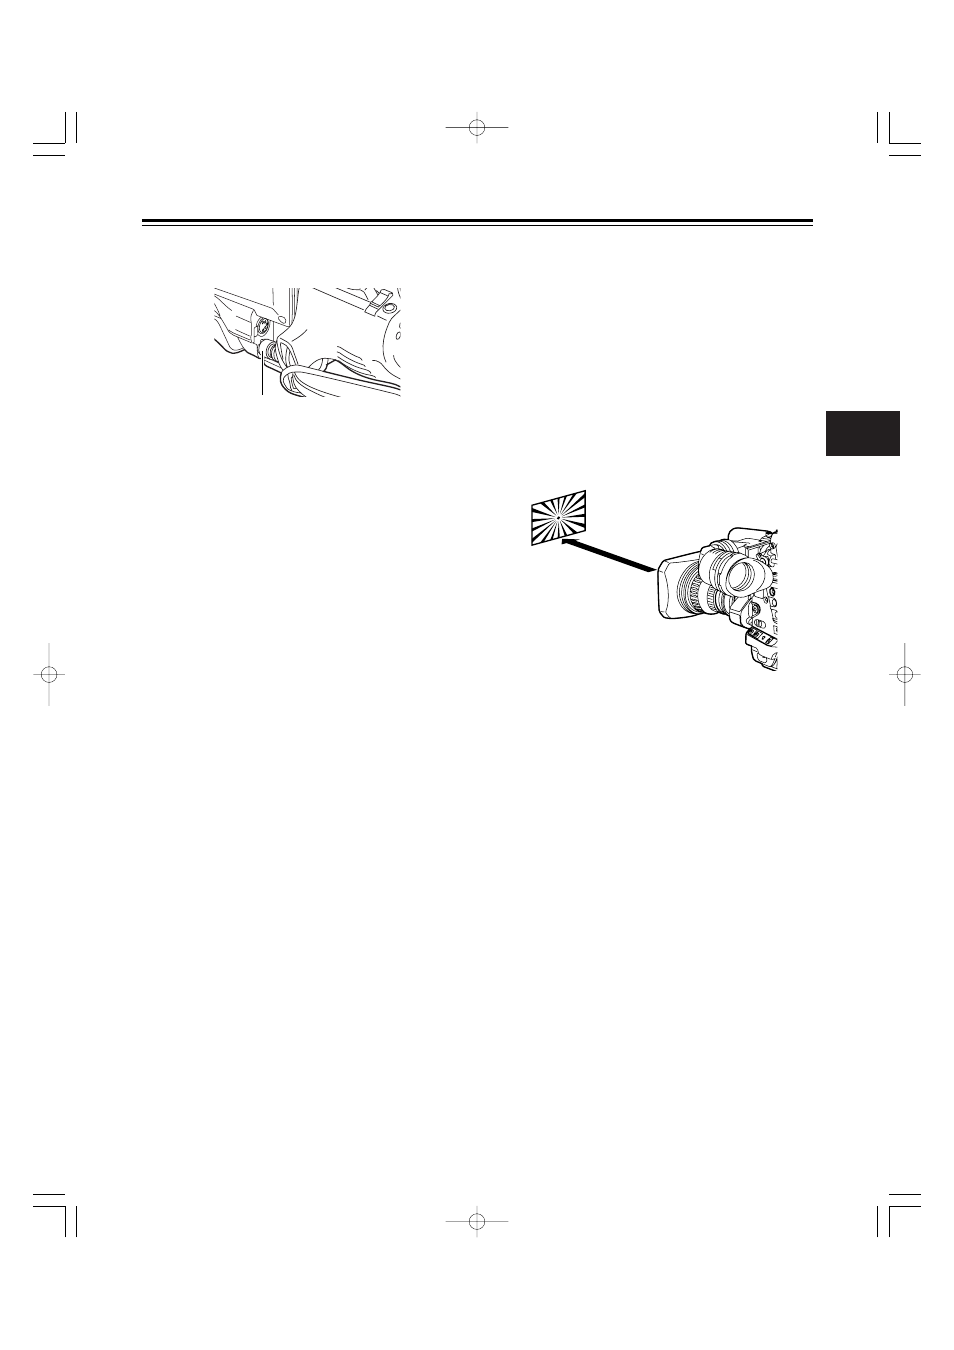
3
Set the lighting in such a way that the appropriate video
output level is achieved at a distance of about 3 meters
away from the chart used for the flange back adjustment.
If the video level is too high, use the filters and shutter.
5
Set the zoom ring to the telephoto position either
manually or electrically.
6
Shoot the chart used for the flange back adjustment, and
turn the distance ring to adjust the focus.
8
Repeat steps 5 to 7 until the focus is adjusted at both the
telephoto and wide-angle positions.
9
Tighten the screw securing the F.f ring.
7
Set the zoom ring to the wide-angle position, and turn the
F.f ring to adjust the focus.
Take care not to move the distance ring during this
process.
4
Loosen the screw securing the F.f (flange focus) ring.
ring.
Approx.
3 meters
Adjusting the lens flange
If the subject is not focused properly in the telephoto and
wide-angle modes during zoom operations, adjust the flange
back (distance from the lens mounting surface to the image-
forming surface).
Once this adjustment is done, it need not be redone unless
the lens is replaced.
also to the operating instructions that accompany the lens.
5
Proceed with the flange back adjustment for the lens.
For details on how to handle the lens, refer to the
operating instructions of the lens.
≥
While the lens is removed, attach the mount cap to
protect the unit.
4
Push the cable into the cable clamp, and connect it to the
LENS socket.
LENS socket