P2 cards, Inserting p2 cards, Removing p2 cards – Panasonic AG-HPX300P User Manual
Page 28: Inserting p2 cards removing p2 cards
Chapter
Recording
and
Pla
ybac
k
P2 Cards
Inserting P2 Cards
NOTE
When using the camera recorder for the first time, be sure to
set the time data beforehand.
For details, refer to [Setting Date and Time of Internal Clock]
(page 26).
1
TurnonthePOWERswitch.
2
Openthecardslotcover.
Slotcover
3
InsertaPcardinaPcardslot.
• Press in the card until the eject button pops up.
Insertthecardwiththe
logofacingup.
EJECTbutton
4
Pushtheejectbuttonthatpopsuptotheright.
• Insert a P2 card into the AG-HPX300P. The P2
CARD ACCESS LED for the appropriate slot
indicates the status of the P2 card.
For details, refer to [P2 CARD ACCESS LED and
status of P2 cards] (page 29).
PCARDACCESSLED
5
Closethecardslotcover.
NOTE
• To prevent cards from falling out, dust from entering and
reduce the risk of exposure to static electricity, close the card
slot cover before moving the camera.
• Format P2 cards only on a P2 card device.
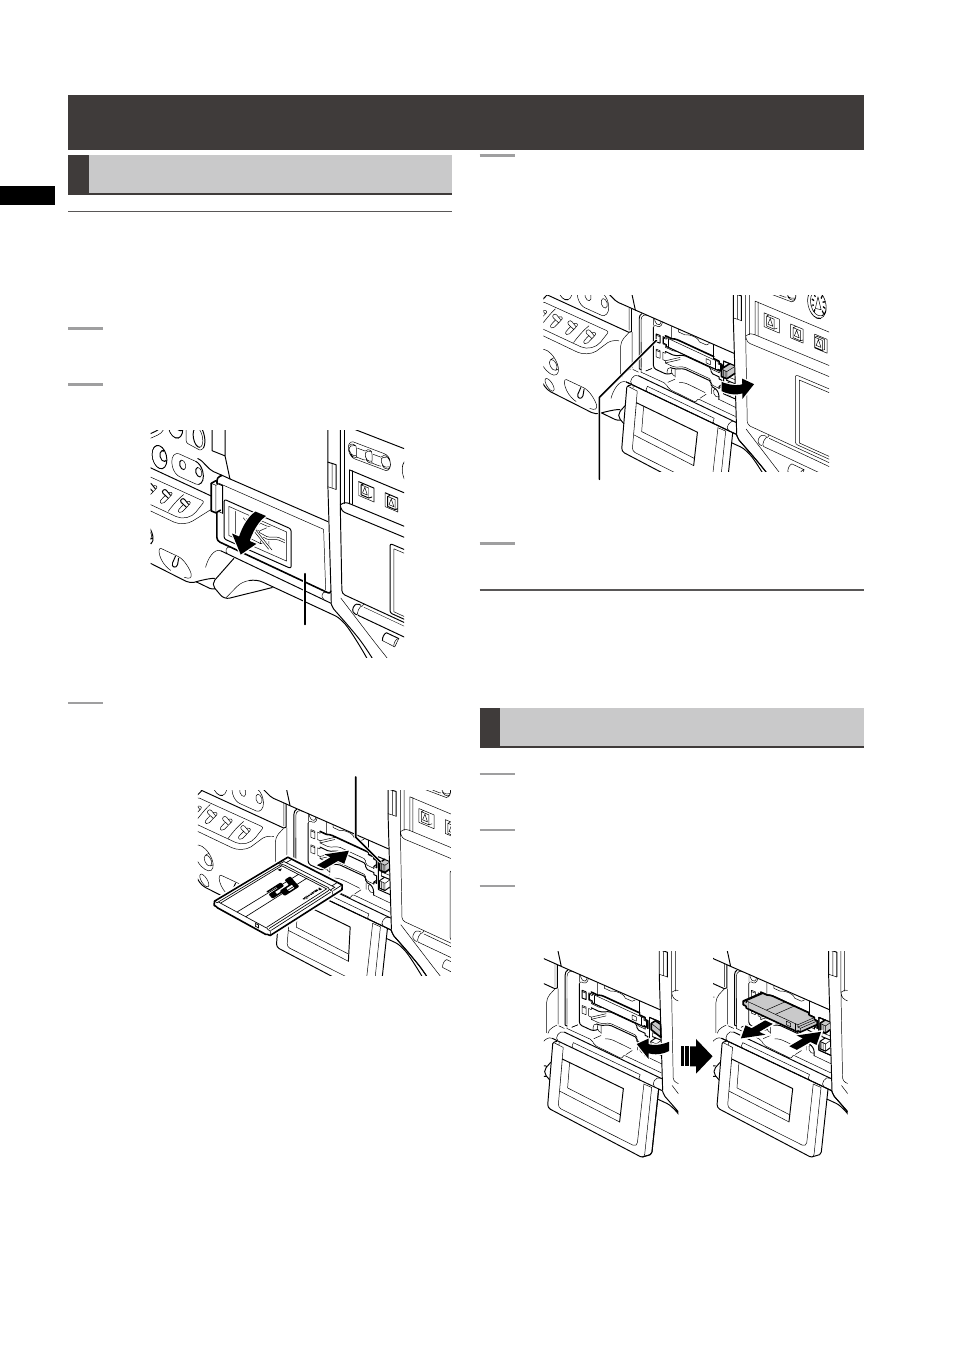
Removing P2 Cards
1
Openthecardslotcover.
2
Raisetheejectbutton.
3
ThendepresstheejectbuttontoreleasetheP
card.
Raisetheejectbutton.
Presstheraisedeject
buttontoremoveaP
card.