Appendix a: printer setup, Printer hardware setup, 68 printer connection – Pelco DX8100 User Manual
Page 56: Figure 68. printer connection
56
C2629M-A (6/07)
Appendix A: Printer Setup
This sections describes how to set up printer hardware and software.
PRINTER HARDWARE SETUP
Only printers listed on the Microsoft Windows 2000 Hardware Compatibility List and exhibiting the Designed for Microsoft Windows XP logo are
supported by the DX8100. If installing a network printer, consult your network administrator for directions.
To print still images of recorded video from the DX8100 DVR, you must install a Windows-compatible printer using the procedure below.
Ensure that a printer has been connected to the LPT1 printer port or a USB port of the DVR or that a shared printer is available on the network.
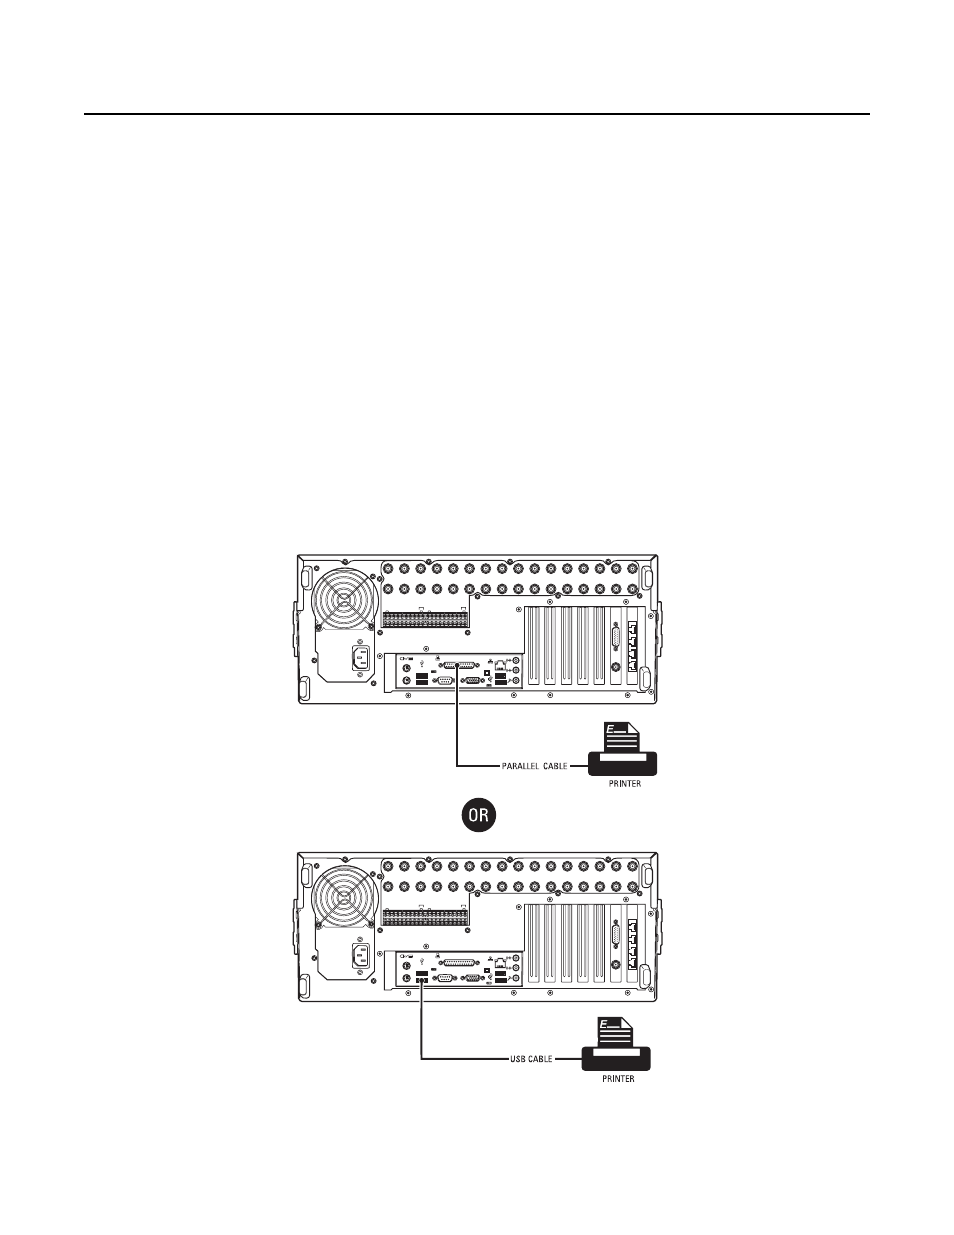
To connect a printer to the DVR:
1. Shut down the DX8100. For more information about shutting down the DX8100, refer to Shutting Down for instructions.
2. Connect the printer to the DX8100 using a standard parallel printer cable connected to the LPT1 port on the back panel of the DVR.
or
Connect the printer to the DX8100 using a standard USB cable connected to one of the four USB 2.0 ports on the back panel of the DVR.
3. Connect the printer’s power cord.
4. Restart the DX8100.
5. Set the printer’s power switch to On.
IN1
IN2
IN3
IN4
IN5
IN6
IN7
IN8
IN9
IN10
IN11
IN12
IN13
IN14
IN15
IN16
OUT16
OUT15
OUT14
OUT13
OUT12
OUT11
OUT10
OUT9
OUT8
OUT7
OUT6
OUT5
OUT4
OUT3
OUT2
OUT1
ALARM INPUTS
RELAY OUTPUTS
1 2 2 4 5 6 7 8 GND
9 10 11 12 13 14 15 16
1 2 2 4 5 6 7 8 GND
9 10 11 12 13 14 15 16
IN1
IN2
IN3
IN4
IN5
IN6
IN7
IN8
IN9
IN10
IN11
IN12
IN13
IN14
IN15
IN16
OUT16
OUT15
OUT14
OUT13
OUT12
OUT11
OUT10
OUT9
OUT8
OUT7
OUT6
OUT5
OUT4
OUT3
OUT2
OUT1
ALARM INPUTS
RELAY OUTPUTS
1 2 2 4 5 6 7 8 GND
9 10 11 12 13 14 15 16
1 2 2 4 5 6 7 8 GND
9 10 11 12 13 14 15 16
Figure 68. Printer Connection