Planar PR Line PR9020 User Manual
Page 58
56
NETWORK Menu
NETWORK Menu (continued)
Item
Description
SETUP
(continued)
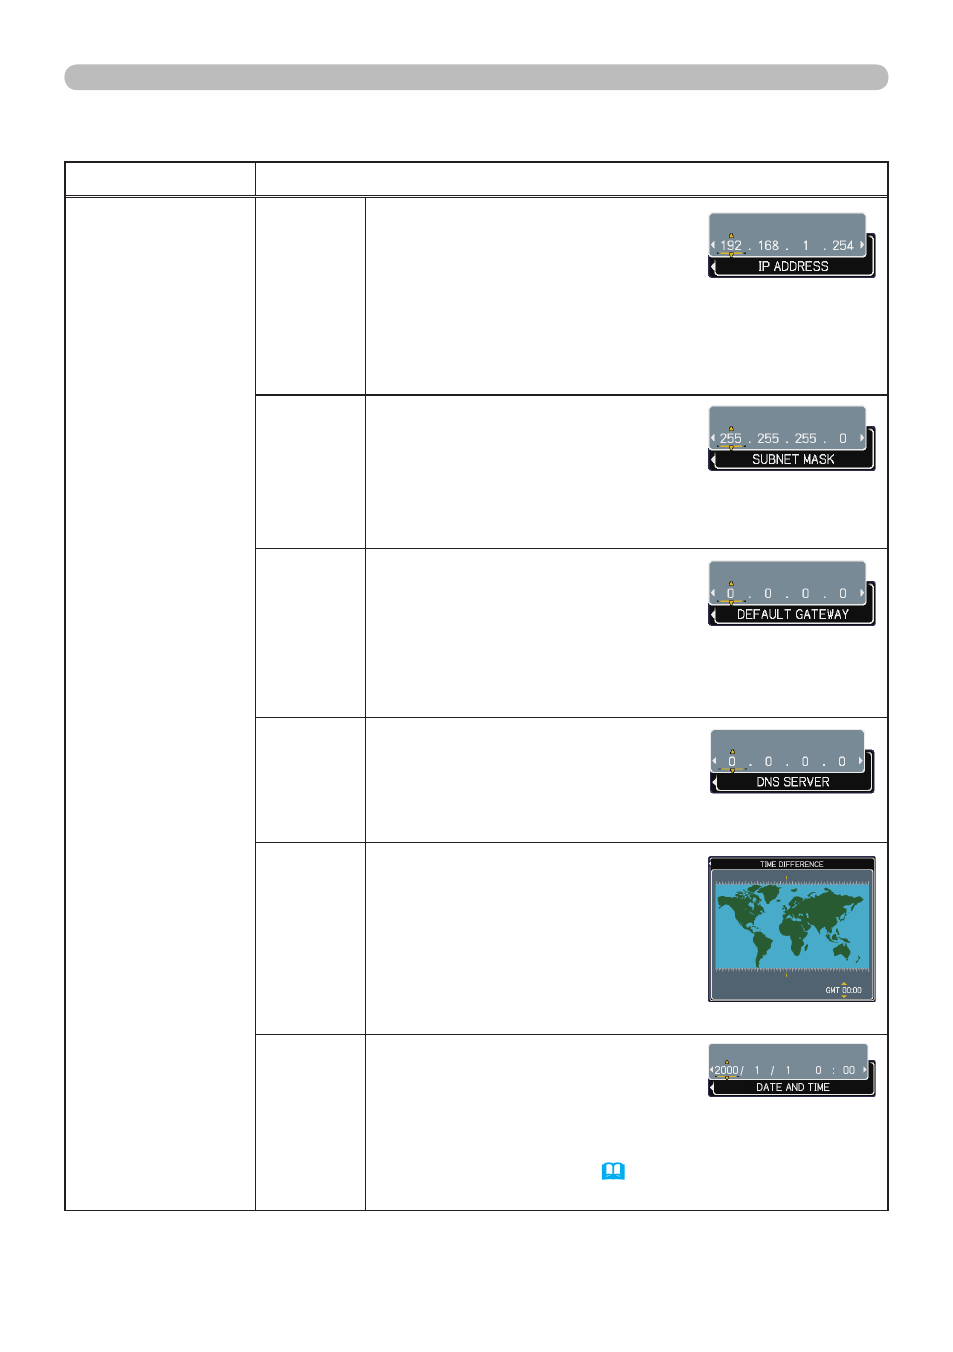
IP
ADDRESS
Use the ▲/▼/◄/► buttons to
enter the IP ADDRESS. This
function can only be used when
DHCP is set to OFF.
• The IP ADDRESS is the number that identifies this
projector on the network. You cannot have two devices
with the same IP ADDRESS on the same network.
• The IP ADDRESS “0.0.0.0” is prohibited.
SUBNET
MASK
Use the ▲/▼/◄/► buttons to
enter the same SUBNET MASK
used by your PC. This function
can only be used when DHCP is
set to OFF.
• The SUBNET MASK ”0.0.0.0” is prohibited.
DEFAULT
GATEWAY
Use the ▲/▼/◄/► buttons to
enter the DEFAULT GATEWAY
(a node on a computer network
that serves as an access point to
another network) address.
This function can only be used when DHCP is set to
OFF.
DNS
SERVER
Use the ▲/▼/◄/► buttons to
input the DNS server address. The
DNS server is a system to control
domain names and IP addresses
on the Network.
TIME
DIFFERENCE
Use the ▲/▼ buttons to enter the
TIME DIFFERENCE.
Set the same TIME DIFFERENCE
as the one set on your PC. If
unsure, consult your IT manager.
Use the ◄ button to return to
the menu after setting the TIME
DIFFERENCE.
DATE
AND
TIME
Use the ▲/▼/◄/► buttons to
enter the Year (last two digits),
Month, Date, Hour and Minute.
• The projector will override this setting and retrieve
DATE AND TIME information from the Time server
when SNTP is enabled.
( Date/Time Settings of the
User’s Manual - Network Guide)
(continued on next page)