Assembly procedures – Philips 27964-01A User Manual
Page 9
27964-01A
4
Installation - Assembly Procedures
Assembly Procedures
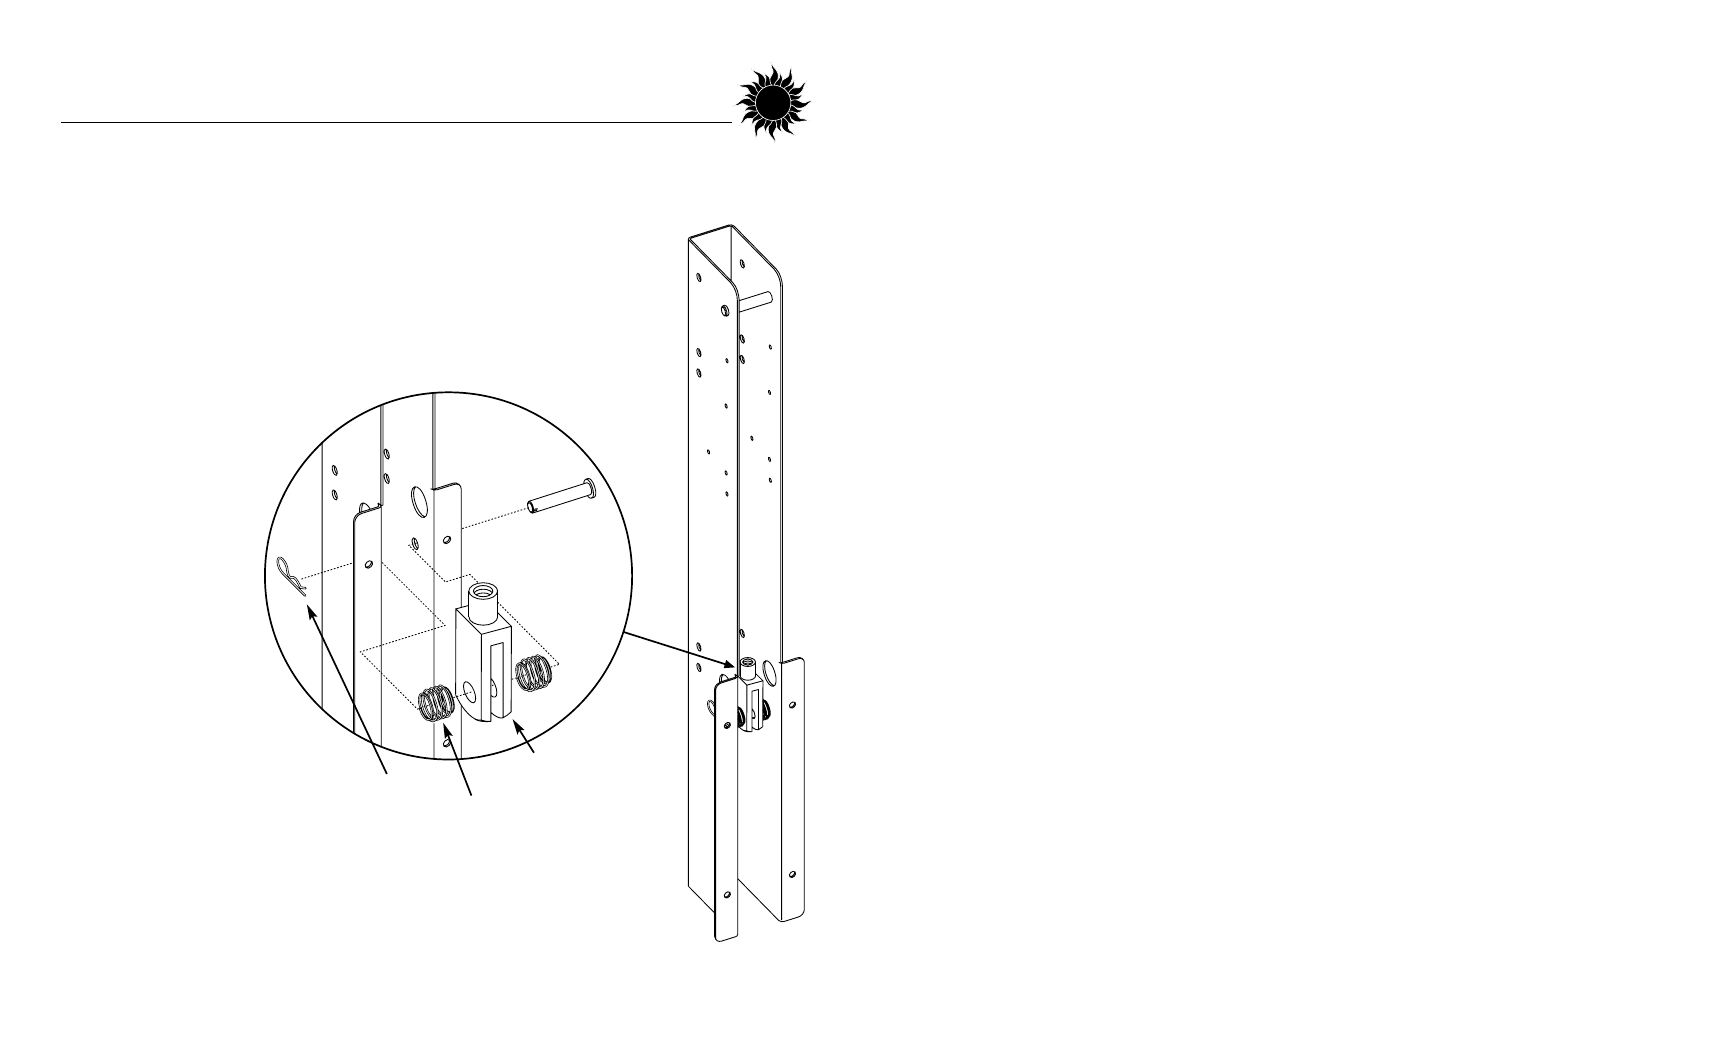
Lower Clevis Fork Assembly
1. Insert the larger clevis pin (3/8” x 2
1/64”) through the hole directly below
the large hole in one of the stand
uprights, as shown.
2. Slide a centering spring, a clevis fork
and then another centering
spring onto the clevis pin
and insert the pin the
rest of the way
through the upright.
3. Secure the clevis
pin by inserting
the straight portion
of a bridge pin
through the small
hole in the end of
the clevis pin.
4. Repeat for the other
stand upright. Make sure
the clevis forks point upwards
as shown.
STAND UPRIGHT
CLEVIS PIN
CENTERING SPRING
CLEVIS FORK
BRIDGE PIN
See also other documents in the category Philips Projectors:
- PPX2055 (60 pages)
- PICOPIX PPX1020 (56 pages)
- PROJECTION 9P5514C1 (40 pages)
- Matchline 46PP9501 (2 pages)
- Cineos 55PL9774 (2 pages)
- 64PP 9901 (2 pages)
- 28PW778A (50 pages)
- cBright XG2+ (2 pages)
- 50PL9220D (3 pages)
- HD6400W (8 pages)
- HD6400W (60 pages)
- 52PFL7432/98 (3 pages)
- 48PP9103 (100 pages)
- bSure 1 (47 pages)
- LC4242 (23 pages)
- 50P 8341 (60 pages)
- Cineos MatchLine 62PL9774 (2 pages)
- 8P5434C (50 pages)
- 41CE8746 (25 pages)
- Garbo (33 pages)
- 9P5044C1 (60 pages)
- MatchLine 60PP9502 (72 pages)
- LC4341 (23 pages)
- ProScreen PXG10 (6 pages)
- 60P8342 (58 pages)
- 8P6041C (59 pages)
- 2 Series (23 pages)
- 43P 8341 (2 pages)
- 50PP7445 (2 pages)
- 60P 8341 (58 pages)
- LC5141 (24 pages)
- 51PW9363 (65 pages)
- 60PP 9601 (60 pages)
- Match Line 60PP9753/17 (2 pages)
- 64PH9905 (58 pages)
- 64PH9905 (2 pages)
- 64PH9905 (8 pages)
- 64PH9905 (60 pages)
- 7P5441C (56 pages)
- 8P5441C (2 pages)
- cClear XG1 Brilliance (2 pages)
- 60PP9200D (3 pages)
- SV2 (2 pages)
- 55PP9753/17 (8 pages)
- Hopper LC4043 (22 pages)