Lexmark 5025 User Manual
Page 104
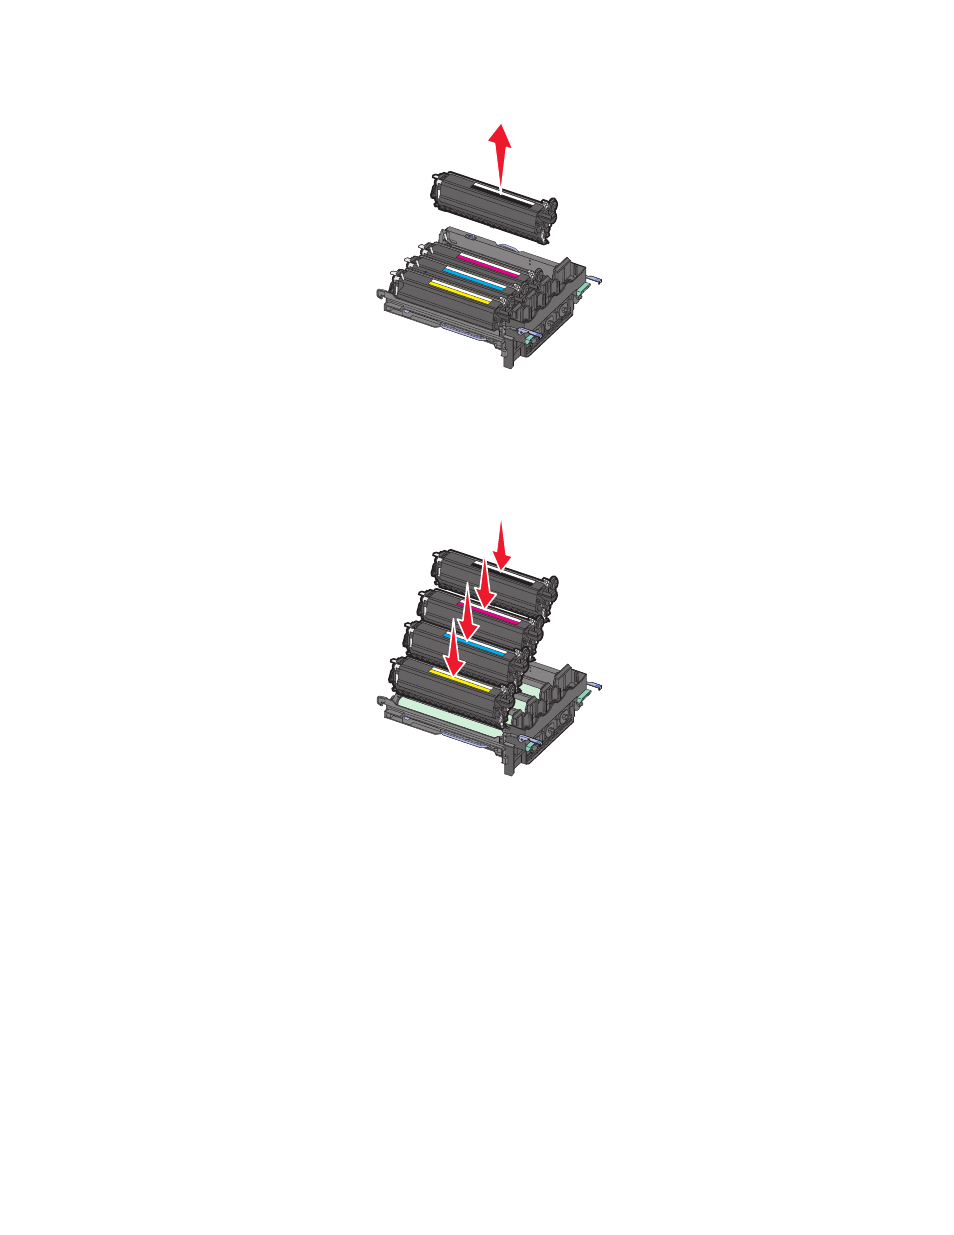
8
Remove the yellow, cyan, magenta, and black developer units.
9
Unpack the replacement black and color imaging kit, and leave the packaging on the developer units.
10
Gently shake the yellow, cyan, magenta, and black developer units side to side.
11
Remove the packaging from the developer units.
12
Insert the yellow, cyan, magenta, and black developer units.
Note: Make sure each developer unit is inserted into a matching color slot.
13
Place the used black and color imaging kit in the enclosed package.
For more information, see “Recycling Lexmark products” on page 38.
Maintaining the printer
104
See also other documents in the category Lexmark Printers:
- E260d (142 pages)
- 6600 Series (173 pages)
- 10N0227 (1 page)
- Z12 (2 pages)
- 301 (144 pages)
- NO. 35 (1 page)
- Z65n (111 pages)
- dn2 (217 pages)
- 10E (144 pages)
- Z2300 (54 pages)
- 230 (213 pages)
- 310 Series (2 pages)
- PRO700 (24 pages)
- C 720 (18 pages)
- C520 (145 pages)
- X656 MFP (104 pages)
- Prospect Pro207 (27 pages)
- 337 (258 pages)
- OptraImage 242 (207 pages)
- T64x (6 pages)
- C524 (146 pages)
- 4098-001 (70 pages)
- 1200 Series (21 pages)
- X650 Series (8 pages)
- 5300 (179 pages)
- 302 (274 pages)
- 4549 (235 pages)
- 202 (320 pages)
- 4076-0XX (89 pages)
- 10N0016 (1 page)
- 1361760 (1 page)
- C 546dtn (6 pages)
- Interpret S400 (40 pages)
- x6575 (2 pages)
- 27S2156-001 (2 pages)
- MENUS AND MESSAGES C522 (55 pages)
- Z25 (24 pages)
- Z35 (101 pages)
- series x5100 (77 pages)
- Z82 (105 pages)
- 2500 Series (76 pages)
- 1200 (208 pages)
- Z33 (114 pages)
- 7600 Series (181 pages)