Replacing an optical drive – Lenovo J SERIES 3000 User Manual
Page 95
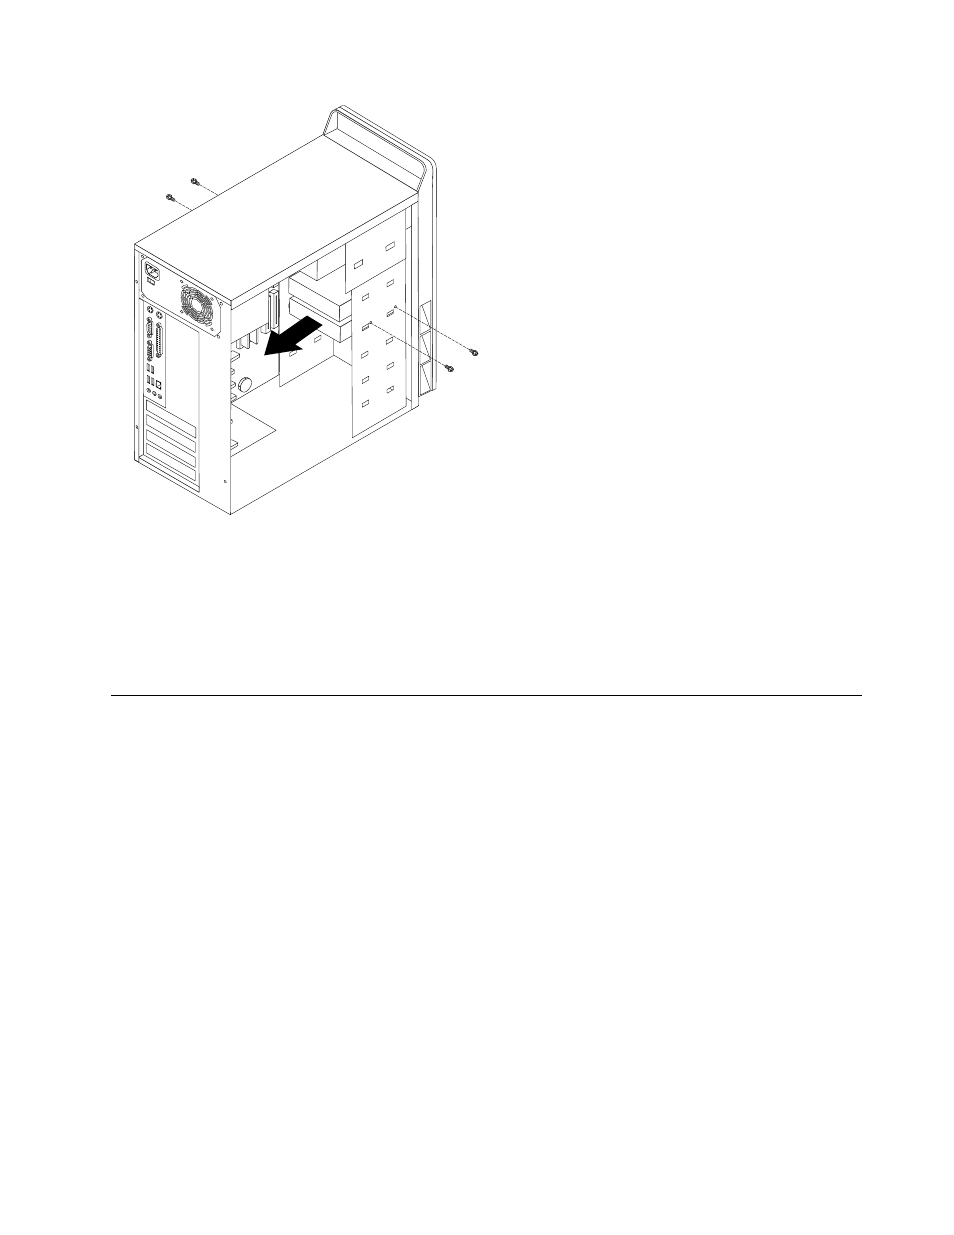
4. Slide the drive toward the rear of the chassis until it can be removed.
5. If the drive you are replacing has jumpers on the rear, make sure the jumpers on the new drive are in the
same exact position as the drive being replaced.
6. Slide the new drive into the bay until the screws holes on each side are aligned and install two screws in
each side of the drive.
7. Reconnect the signal and power cables to the rear of the hard disk drive.
8. Go to “Completing the FRU replacement” on page 92.
Replacing an optical drive
1. Remove the left-side and right-side covers. See “Removing the covers” on page 70.
2. Disconnect the power cable and signal cable from the optical drive.
3. Remove the two screws that secure the drive on each side.
Chapter 8
.
Replacing FRUs (Types 7387, 7388, 7389, 7393, 7394, and 7395)
89
- THINKCENTRE 8813 (48 pages)
- THINKCENTRE 6393 (164 pages)
- 40Y8692 (78 pages)
- 8791 (86 pages)
- 104 (86 pages)
- 7630 (52 pages)
- 9344 (480 pages)
- THINKSERVER TD230 (26 pages)
- THINKSERVER TD230 (32 pages)
- THINKSERVER TD230 (150 pages)
- THINKCENTRE 4471 (492 pages)
- ThinkPad 43R2019 (1 page)
- ThinkPad 43N3218 (34 pages)
- 3425 (68 pages)
- ThinkPad 43N3224 (48 pages)
- ThinkPad 43N3201 (46 pages)
- ThinkCentre 41N5626 (72 pages)
- 6531 (240 pages)
- TS100 (284 pages)
- THINKSERVER 3779 (266 pages)
- ThinkPad 40Y8710 (68 pages)
- ThinkCentre 41N5583 (72 pages)
- 4304493 (71 pages)
- ThinkPad 41N5647 (46 pages)
- ThinkPad 40Y8706 (62 pages)
- 3000 C200 (104 pages)
- ThinkPad 45K1610 (1 page)
- 41N5631 (68 pages)
- ThinkPad 40Y8626 (58 pages)
- 3658 (82 pages)
- U510 (89 pages)
- J SERIES 8253 (24 pages)
- THINKCENTRE 4468 (142 pages)
- V100 (126 pages)
- X301 (180 pages)
- ThinkCentre 41N5624 (66 pages)
- 3000 N500 (124 pages)
- ThinkPad 41N5653 (62 pages)
- 40Y8699 (72 pages)
- Gemplus 41N3005 (42 pages)
- F3507g (4 pages)
- Q180 (43 pages)
- 3980 (110 pages)
- ThinkCentre 41N5622 (70 pages)