S ca le la ser 2 0 0 a r f – Lanier LASER 200 User Manual
Page 6
LANIER
– 1 /3
rd
S ca le La ser 2 0 0 A R F -
INSTRU CTIO NS
© 2002 Lanier R/C
Page -6
and a paper tow el. Let set until cured.
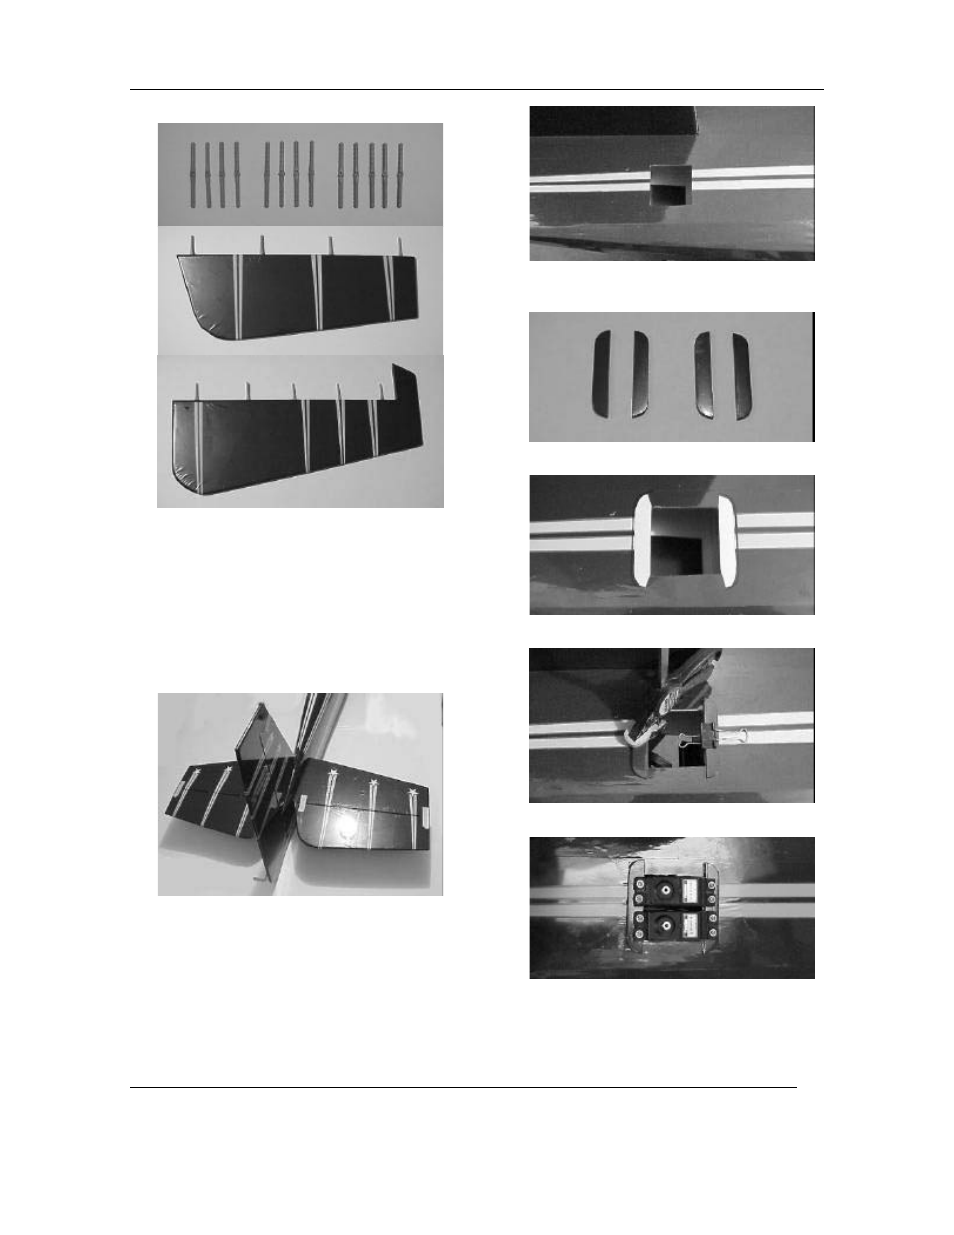
30. Locate the (4) hinge holes in each of the elevator
halves,
(5) in the rudder, and corresponding
holes on the stabilizers, then open the covering
w ith a sharp hobby blade. Test fit one of the
(13) hinges in each of the holes. Put a sm all
drop of oil on each of the hinges. Install the
hinges in the control surfaces only, using 30
m inute
epoxy,
then
align
them
by
pressing
onto
a
flat surface. Clean up any excess glue w ith
alcohol. D o not install the surfaces on the
stabilizers until the epoxy has cured.
31. Install the surfaces on the rear of the fuselage
using 30 m inute epoxy. Press in place and leave
a 1/32” gap. W ipe off any excess glue w ith
alcohol and a paper tow el. Let set until cured.
32. Locate the servo openings on the sides of the
fuse and cut the covering aw ay w ith a sharp
knife.
33. Locate
the
tail
servo
ply
plates
and
position
them
on both sides of the servo openings.
34. M ark the ply plate positions w ith a m arker, then
rem ove the covering w ith a sharp knife.
35. G lue the ply plates in place w ith 30 m inute
epoxy, and clam p in place until cured.
36. Locate your tail servos and install 24” extension
w ires on the leads (secure them together w ith
tape). Install the servos w ith the hardw are
included, then center them w ith your radio.