Mounting – Kicker SX900.4 User Manual
Page 7
7
SX .4 Series Amplifiers
Installa
tion
Mounting
When selecting a location to mount your Kicker amplifier be
sure it is structurally sound and that there are no items behind
the area that could be damaged by the screws. Check for wiring,
brake lines, fuel lines, gas tanks, etc.
All amplifiers generate heat under normal operation. Be sure to
choose a location that allows adequate ventilation for the
amplifier. Also consider that the air temperature inside an
automobile’s trunk can reach upwards of 140 degrees fahrenheit.
An amplifier mounted in the trunk may require additional
cooling such as extra fans moving air around the amplifier’s
chassis or ventilating the trunk to exchange the hot air in the
trunk for cooler air outside. If possible, mounting the amp in the
passenger compartment will allow cooler operation.
Remember that the controls on top of the amp will need to be
accessible for adjustment later. Keep this in mind as you choose
your amplifier’s mounting location.
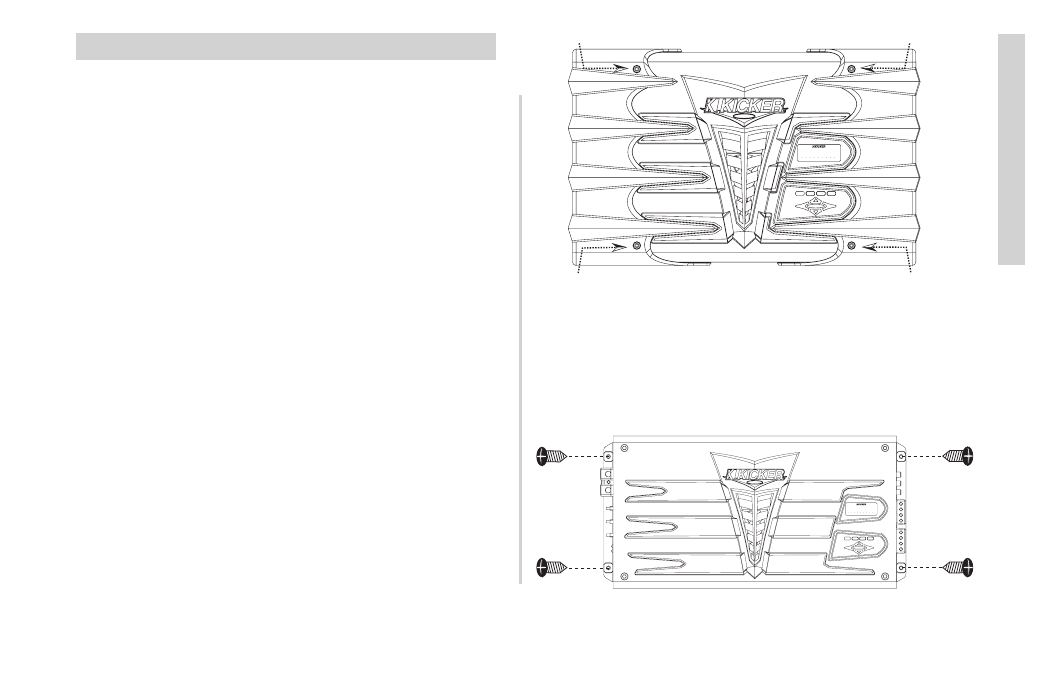
Now that you are ready to mount your amplifier, use the
supplied 3mm allen wrench to remove the amplifier EndKaps.
This will give you access to the mounting holes in the amplifier
and all wiring connections.
See Fig. 1
Remove
Remove
Remove
Remove
M1 M2 M3 M4
ESC
ENT
HOME
R
SYS
MEM-1
GAIN EQ LPF HPF
KOMP
AMP1
LOCK
MEM-2
MEM-3
MEM-4
PHASE
MUTE
AMP2
LEFT
RIGHT
*
*
kicker
With the EndKaps removed, you now have access to the four
mounting holes in the mounting feet and all wiring connections.
Drill 4 holes using a 7/64” drill bit and use the supplied #8 screws
to mount the amplifier.
See Fig. 2
R
M1 M2 M3 M4
ESC
ENT
HOME
SYS
MEM-1
GAIN EQ LPF HPF
KOMP
AMP1
LOCK
MEM-2
MEM-3
MEM-4
PHASE
MUTE
AMP2
LEFT
RIGHT
*
*
kicker
Fig. 1
Fig. 2