Sampling mode, Auto sampling setup, Initialize – KORG TRITON STUDIO V2 User Manual
Page 63: Rec audio input, Initialize 2. rec audio input, P.58, 63, 67)
58
Sampling mode
An “Auto Sampling Setup” page menu command has been
added to the Sampling P0: Recording page and P4: Selector
Setup page.
0–1O: Auto Sampling Setup
This command automatically sets sampling-related parame-
ters to the optimal settings for specific Sampling mode oper-
ations. (For the automatically-set parameters and their
values,
When you execute this command, the applicable
parameters will be set automatically. You cannot use the
[COMPARE] key to recall the previous settings.
The settings are automatically made for the most typi-
cal applications. After executing the auto setup opera-
tion, you can further adjust any of the settings to suit
your needs as described in the
paragraphs of each
section.
1. Initialize
This sets sampling-related parameters to their default state.
1
Select “Auto Sampling Setup” to open the dialog box.
2
Use the radio buttons to select Initialize.
3
Press the OK button to execute “Auto Sampling Setup.”
If you decide to cancel, press the Cancel button.
Sampling-related parameters will automatically be set to
their default settings. (For the automatically-set parame-
ters and their values,
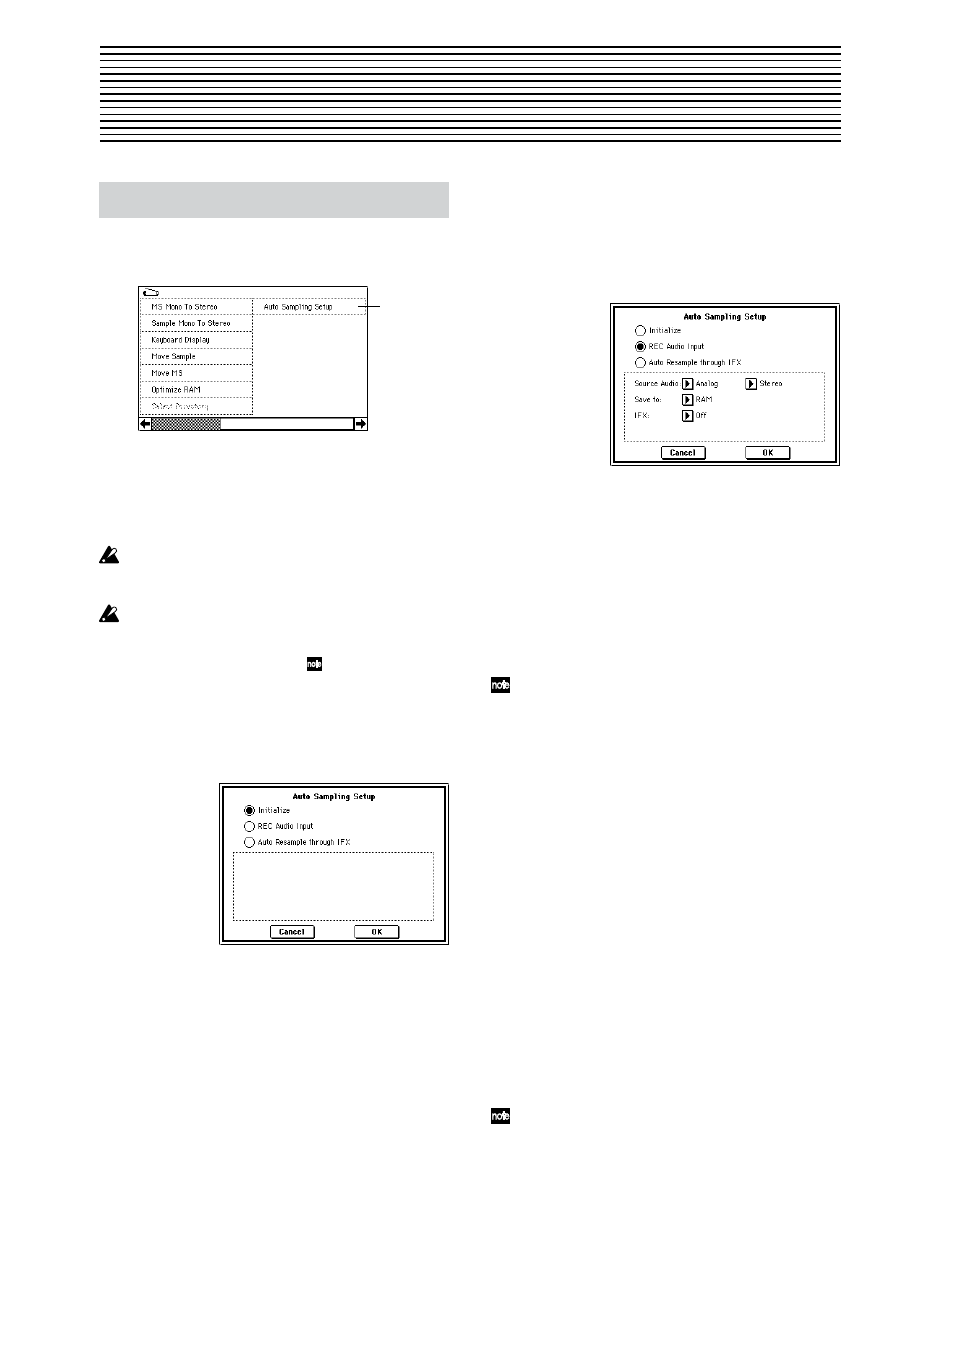
2. REC Audio Input
This automatically makes the appropriate settings for sam-
pling an external audio source.
■ Setup
1
Select “Auto Sampling Setup” to open the dialog box.
2
Use the radio buttons to select REC Audio Input.
3
Use “Source Audio” to select the external audio input
source. (
☞PG p.96 “Input”)
Analog:
Selects the analog audio output of an instrument
or other audio source connected to the AUDIO INPUT 1
and AUDIO INPUT 2 jacks.
S/P DIF:
Selects the digital audio output from an instru-
ment or DAT etc. connected to the S/P DIF jack.
mLAN:
Selects the digital audio output of an instrument
or other device connected to the mLAN connector (if the
optional EXB-mLAN is installed).
If you select S/P DIF or mLAN for “Source Audio,”
you must set “System Clock” (Global P0 0–2a
☞PG
p.138) to the appropriate system clock setting.
4
Use “Mono-1/Mono-2/Stereo” to specify whether the
input source is mono or stereo. (
☞PG p.96)
Mono-1:
Input 1 will be used.
Mono-2:
Input 2 will be used.
Stereo:
Input 1 and 2 will be used in stereo.
5
Use “Save to” to select the destination where the sam-
pled data will be written. (
☞PG p.90 “Save to”)
RAM:
The data will be written into sample memory
(RAM).
DISK:
The sampled data will be saved as a WAVE file on
the internal hard drive or an external SCSI hard drive.
6
If you want to apply an insert effect to the external audio
input source while it is being sampled, use “IFX” to spec-
ify the insert effect that you want to use. If you don’t
want to use an insert effect, set this Off.
7
Press the OK button to execute “Auto Sampling Setup.”
If you decide not to execute, press the Cancel button.
(For the automatically-set parameters and their values,
☞p.60. For examples of using the automatically-set
parameters, refer to
☞BG p.37, BG p.39, BG p.42)
If “Save to” is set to RAM and you want to change the
RAM bank, set “Bank” (0–1c PG p.90) to the desired
sampling-destination memory (RAM).
Auto Sampling Setup
0–1O