Drive – self-timer – Konica Minolta 9 User Manual
Page 30
DRIVE – Self-Timer
57
56
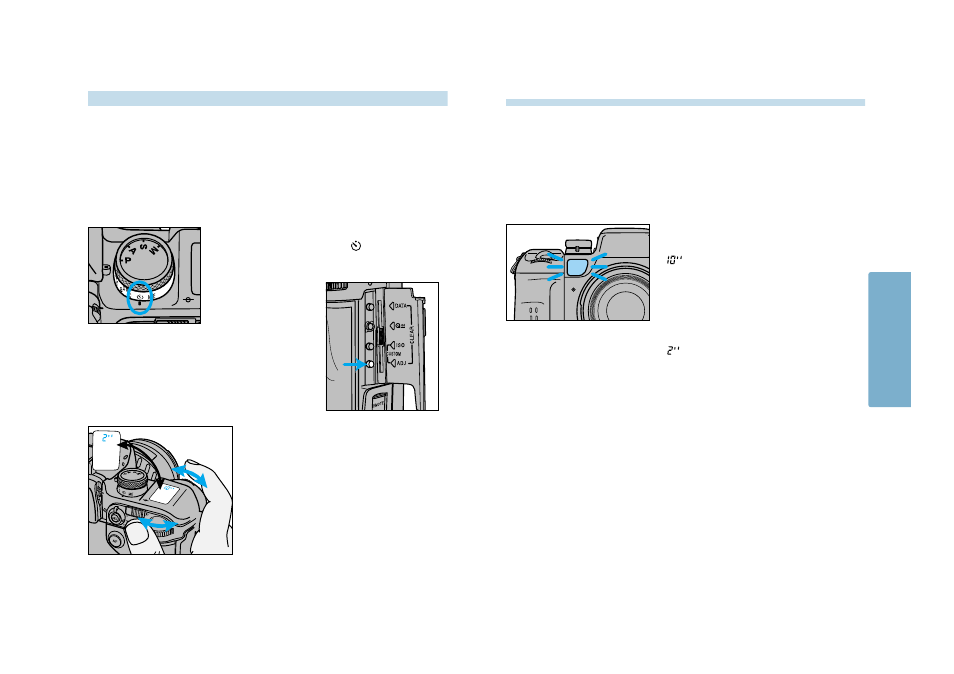
5. Center your subject in the focus
frame, then press the shutter-
release button part way down to
confirm the focus.
• The shutter will be released even if the focus is
not confirmed.
6. Press the shutter-release button all
the way down to start the timer.
(10 sec) – The self-timer indicator on the
front of the camera will blink
slowly, then blink rapidly just
before the shutter releases.
• Turn the main switch to LOCK
or select another drive mode to
cancel the 10 sec self timer.
(2 sec) –
The mirror pops up when the
shutter release button is pressed
all-the-way down. The shutter is
released two seconds later.
• The 2 second self timer cannot
be cancelled.
2. Open the control panel door and
press the adjust button.
1. Place the camera on a tripod, then turn
the drive-mode lever to
.
Use the self-timer to delay the shutter release for 2 or 10 seconds (approx.) after
the shutter-release button is pressed all the way down. In addition to delaying
release of the shutter, the 2 second delay pops the mirror up two seconds before
the shutter opens to reduce blur caused by camera vibration.
• The red-eye reduction flash mode is not effective when the 2 second self timer is
selected.
• Close the eyepiece shutter (p.79) to prevent a bright light source behind the camera from
interfering with the exposure.
3. Turn either control dial until the
desired delay appears in the data
panel.
4. Press the shutter-release button
partway down to enter the
selection.
DRIVE