Installation/removing the unit, Installation, Removing the hard rubber frame – Kenwood KDV-3241Y User Manual
Page 35: Removing the unit
English
|
35
Installation/Removing the Unit
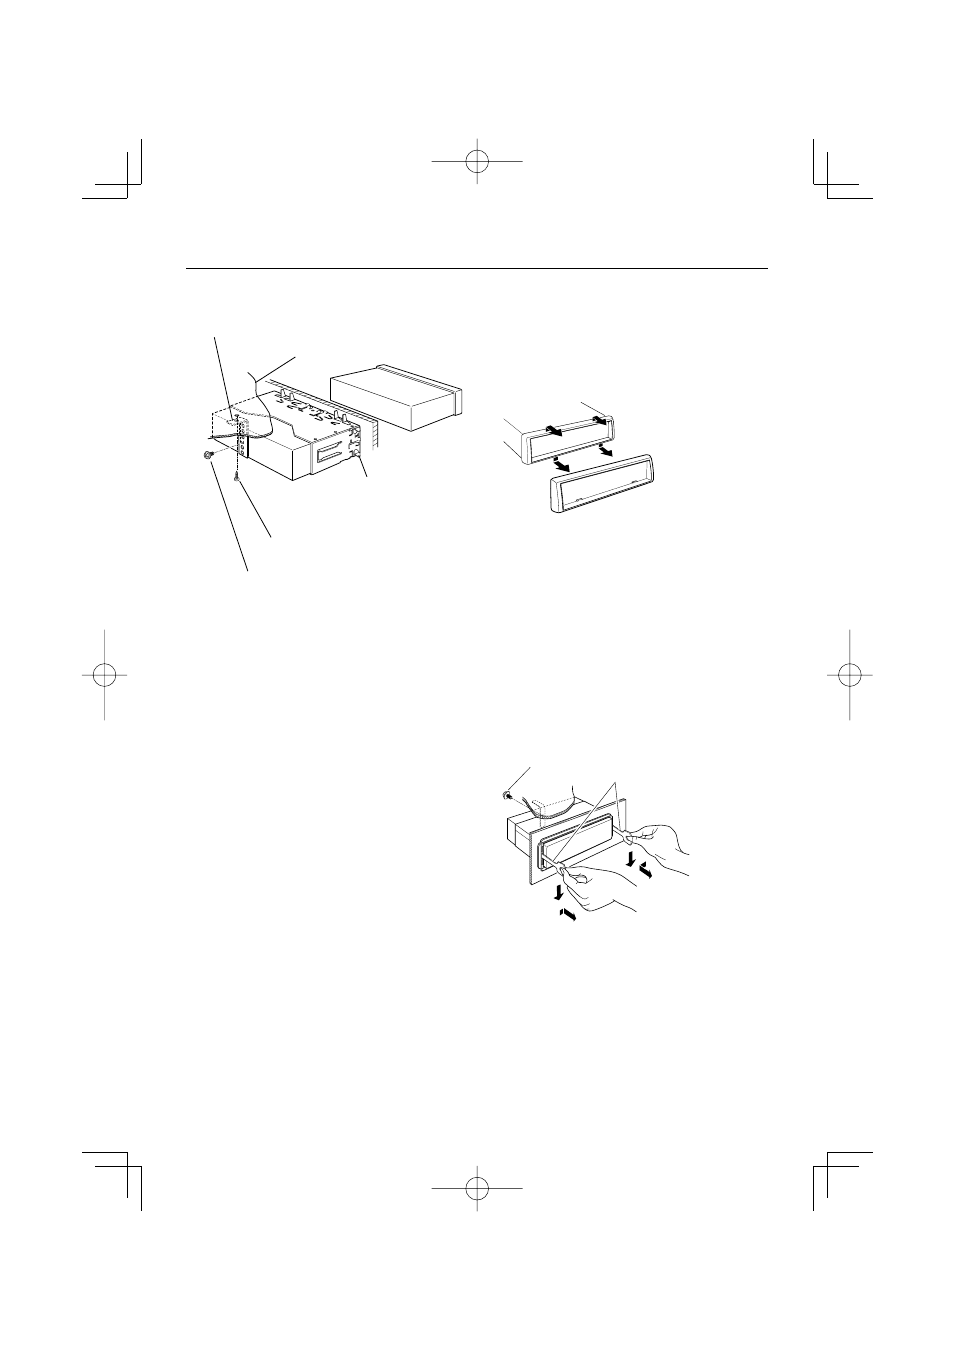
Installation
Firewall or metal support
Screw (M4X8)
(commercially available)
Self-tapping screw
(commercially available)
Metal mounting strap
(commercially available)
Bend the tabs of the
mounting sleeve with a
screwdriver or similar utensil
and attach it in place.
⁄
• Make sure that the unit is installed securely in place. If the
unit is unstable, it may malfunction (for example, the sound
may skip).
Removing the hard rubber
frame
1
Extend top and bottom of the frame outwards to
remove the frame. (When reattaching the frame,
point the side with a groove downwards and
attach it.)
⁄
• It becomes easy to remove the frame if the faceplate is
released.
Removing the Unit
1
Refer to the section frame> and then remove the hard rubber frame. 2 Remove the screw (M4 × 8) on the back panel. 3 Insert the two removal tools deeply into the slots on each side, as shown. 4 Lower the removal tool toward the bottom, and pull out the unit halfway while pressing towards Screw (M4X8) Accessory2 ¤ • Be careful to avoid injury from the catch pins on the removal tool. 5 Pull the unit all the way out with your hands, being careful not to drop it.
the inside.
(commercially available)