SATO M5900RVe User Manual
Page 62
Unit 6: Maintenance
SATO M5900RVe Operator Manual
PN 9001125A
Page 6-4
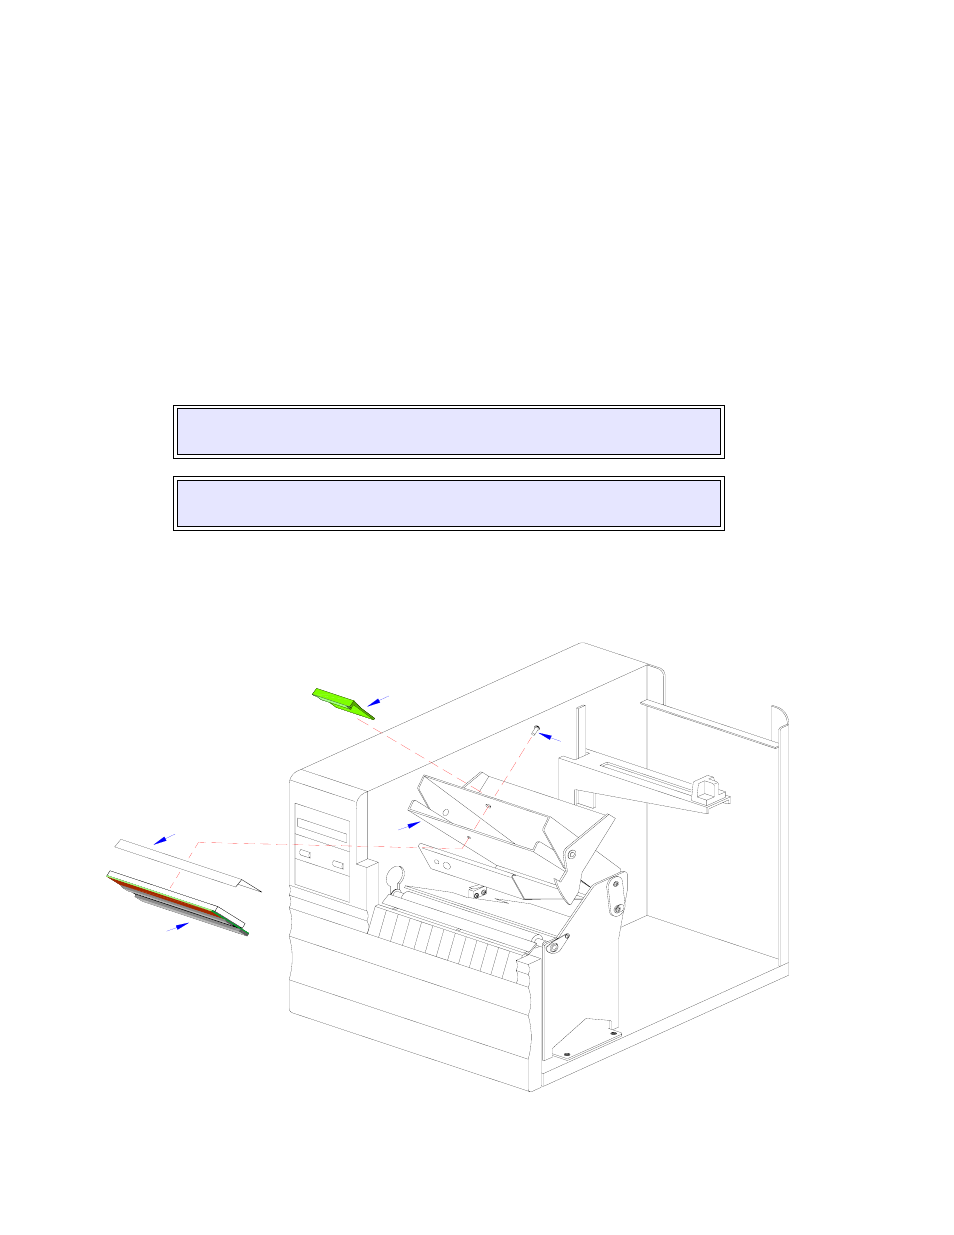
PRINT HEAD REPLACEMENT
If the print head becomes damaged or wears out, it can be easily removed and replaced without
having to make critical adjustments. Before replacing the print head, check the head counter
values by printing a test pattern.
1 Switch off the printer and disconnect the power supply cord.
2 Open the right housing cover and unlatch print head assembly (1, Figure 6-3).
3 Pry lever guard (2) free from print assembly (1).
4 Remove screw (3) to release defective print head (4) and tear bar (5).
5 Disconnect the wiring harness from defective print head (4) and lift away.
6 Apply tear bar (5) to replacement print head (4) and secure to print assembly (1) using
screw (3).
7 Reattach lever guard (2) to print assembly (1).
8 Clear the print head counter. Refer to the relative procedure for instructions if required.
9 Reconnect power supply cord, test cycle, and close right housing cover.
Figure 6-3, Print Head Replacement
CAUTION: EXCERSIZE CARE WHEN INSTALLING THE REPLACEMENT
PRINT HEAD TO PREVENT DAMAGE TO ITS ELEMENTS.
NOTE: A properly installed tear bar will be oriented so that it folds down in
front of the print head andd is parallel with the print assembly.
5
1
4
3
2