SIGMA SD14 User Manual
Page 112
111
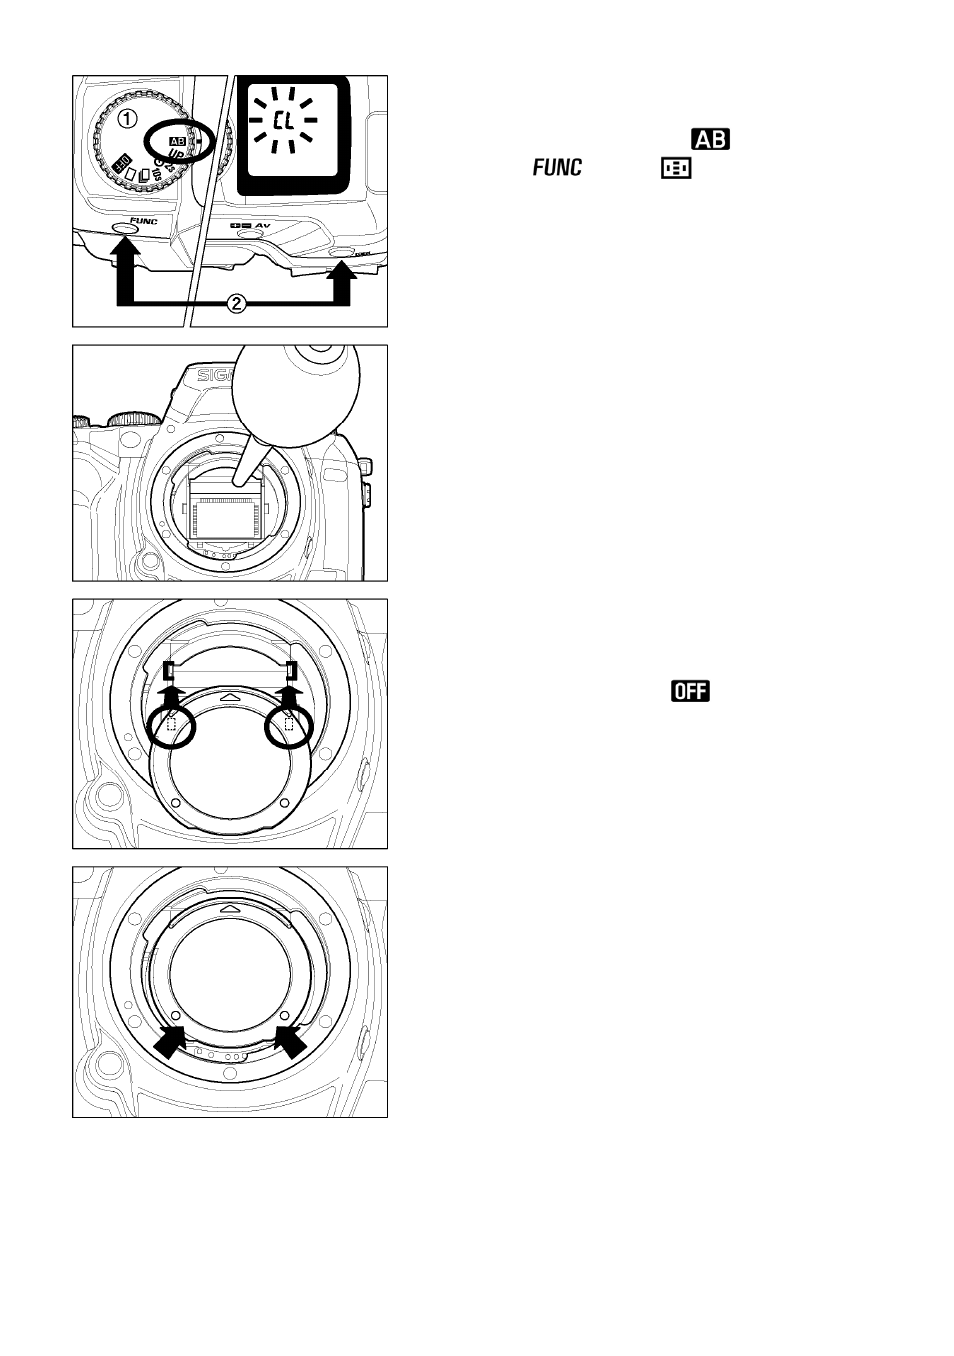
5
Turn the “D”-dial to the
position and
press the
and
button together.
(The CL icon will be displayed on the top LCD
panel, the shutter will open and you will be able
to see the image sensor).
6
Carefully blow away any dust from the image
sensor using the blower.
Make sure that the tip of blower does not
protrude inside the lens mount. If the power
supply should suddenly shut off, the shutter
curtain and mirror will close. These delicate
parts could hit the blower and damage the
camera.
7
Once you are done cleaning the image sensor,
turn the “D” –Dial to the
position. Check
that there is no dust or dirt on the dust
protector.
Insert the upper tabs on the back of the dust
protector into the two holes as shown in the
illustration.
8
Push the lower section of the dust protector, as
shown in the illustration, with your finger until it
clicks into position. In order to avoid any
damage, please ensure that the dust protector
is correctly positioned.
If the dust or dirt cannot be removed with the above-mentioned procedure,
consult with Sigma- authorized service personnel.
If you see fingerprints on the glass portion of the dust protector, first use a blower
to remove any dust, then gently wipe it with a soft, clean cloth.