Caution, Dimm installation, X7sla-l/x7sla-h user's manual – SUPER MICRO Computer X7SLA-H User Manual
Page 24
2-4
X7SLA-L/X7SLA-H User's Manual
2-4 Installing DDR2 Memory
Note: Check the Supermicro web site for recommended memory modules.
CAUTION
Exercise extreme care when installing or removing
DIMM modules to prevent any possible damage.
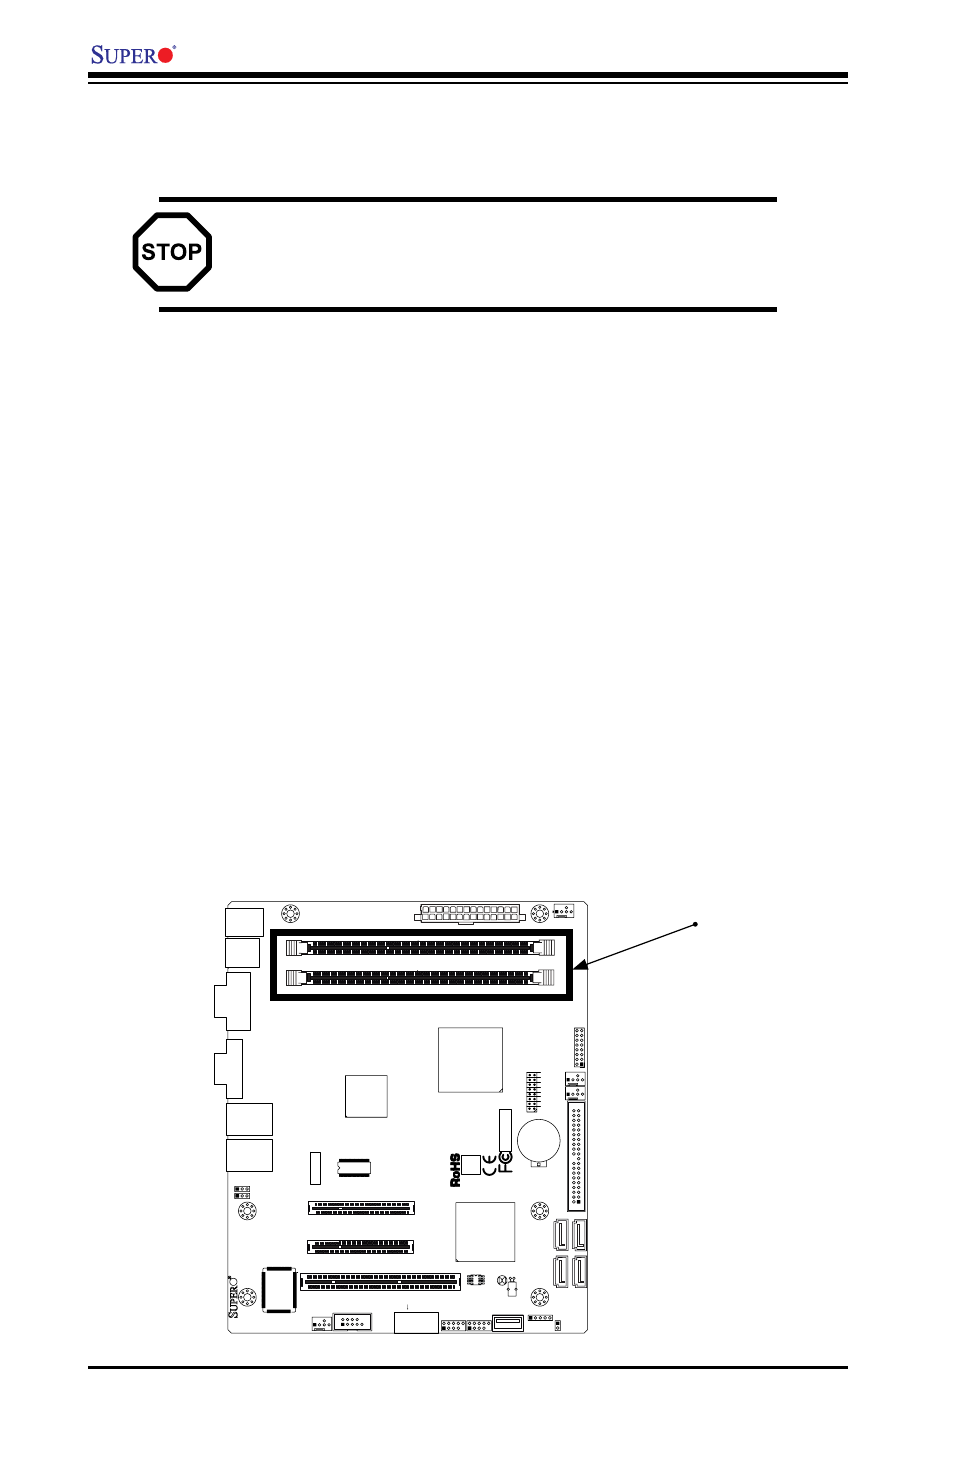
DIMM Installation
Insert the desired number of DIMMs into the memory slots, starting with
1.
DIMM1A. Insert each DIMM module vertically into its slot. Pay attention to
the notch along the bottom of the module to prevent incorrect DIMM module
installation.
Gently press down on the DIMM module until it snaps into place in the slot.
2.
Repeat step 1 to install DIMM1B if needed.
Memory Support
The X7SLA-L/X7SLA-H supports up to 2GB Unbuffered Non-ECC DDR2 533/400
in 2 DIMM slots. Populating these DIMM modules with a pair of memory modules
of the same type and same size will result in interleaved memory, which will im-
prove memory performance.
Installing and Removing DIMMs
Memory
Bank
JF
1
J1
3
JL
1
R52
R53
JPL1
JPL2
FAN3
FAN1
FAN_NB
4
1
FAN2
J3
J5
1
J4
6
JP
5
JP
4
BT
1
JBT1
TP_ICH3
Te
st
ed
t
o
C
omply
W
ith FC
C
S
ta
n
d
ar
d
s
FOR HOME OR OFFICE USE
X7SLA-H
DESIGNED IN USA
NIC
I-SA
TA
3
I-SA
TA
2
I-SA
TA
1
I-SA
TA
0
SLOT7 PCI-E X4 in X8
SLOT6 PCI-E X8
USB2/3
COM2
USB4/5
USB6
JBT1:CMOS CLEAR
ID
E
SLOT5 PCI 33MHZ
1-2:ENABLE 2-3:DISABLE
JPL1-2:LAN1/2
INTRUSION
JL1:CHASSIS
LAN2
LAN1
VG
A
COM1
X
LED
PWR
HDD
NIC
/FF
OH
RS
T
PWR ON
1
JF1
DIMM1A
DIMM1B
JPW1
JPW2 for Device Power Only
KB/MOUSE
USB
7
USB0/1
CPU
945GC
ICH7R