Stanton SCS.4DJ User Manual
Page 11
12
STEP THREE
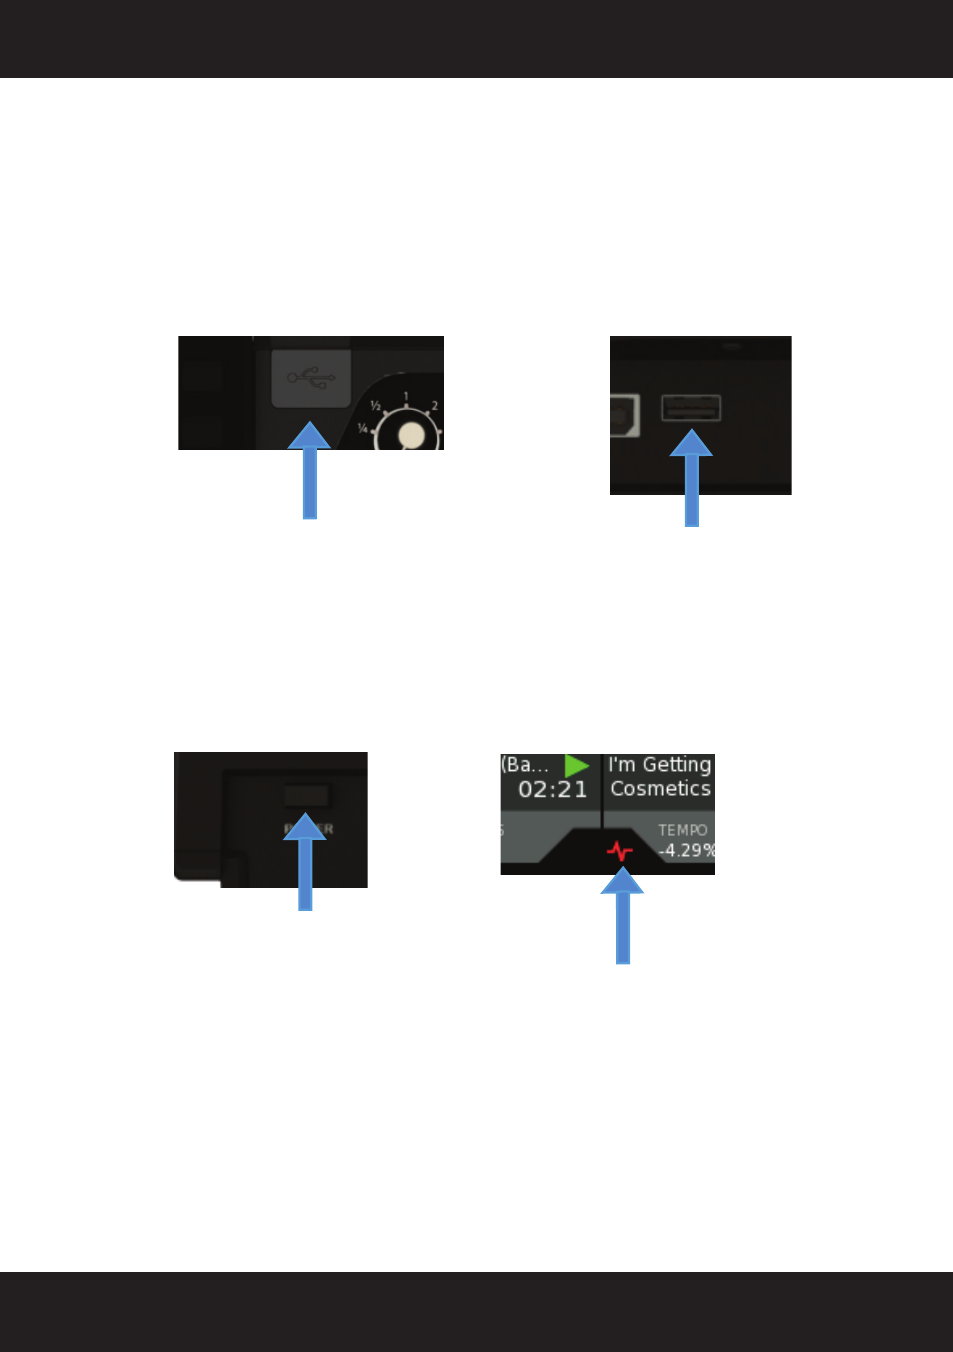
Connect your primary USB device to one of the
USB 2.0 PORTS located on the SCS.4DJ (top, rear
or bottom of unit beneath the door). You may use any driverless USB device that has a FAT32,
NTFS, or HFS+ (non-journaled only) file system. For just starting out, it may make sense to place
only a few songs on a USB drive or use the included demo material so you don’t have to wait long
for drive analysis (where SCS.4DJ calculates your song information, including BPM and Waveform)
to be completed to start playing. You may also connect a USB keyboard, as well as a powered
(active) USB hub to augment the amount of available ports, giving you the advantage of connecting
more USB storage devices.
STEP FOUR
Press the
POWER BUTTON located to the right of the rear panel. The unit will take about 45
seconds to boot up, and will start the process of detecting and analyzing the content located on any
USB devices that are currently connected. When the Song Analysis symbol disappears, then your
songs are analyzed and you can take full advantage of the SCS.4DJ feature set.
Now, let’s take a brief tour of the SCS.4DJ’s controls and connections.
USB Port 2 (rear of unit)
USB Port 1 (top right of unit)
Power Button
Song Analysis Symbol