JVC VN-C655 User Manual
Page 27
27
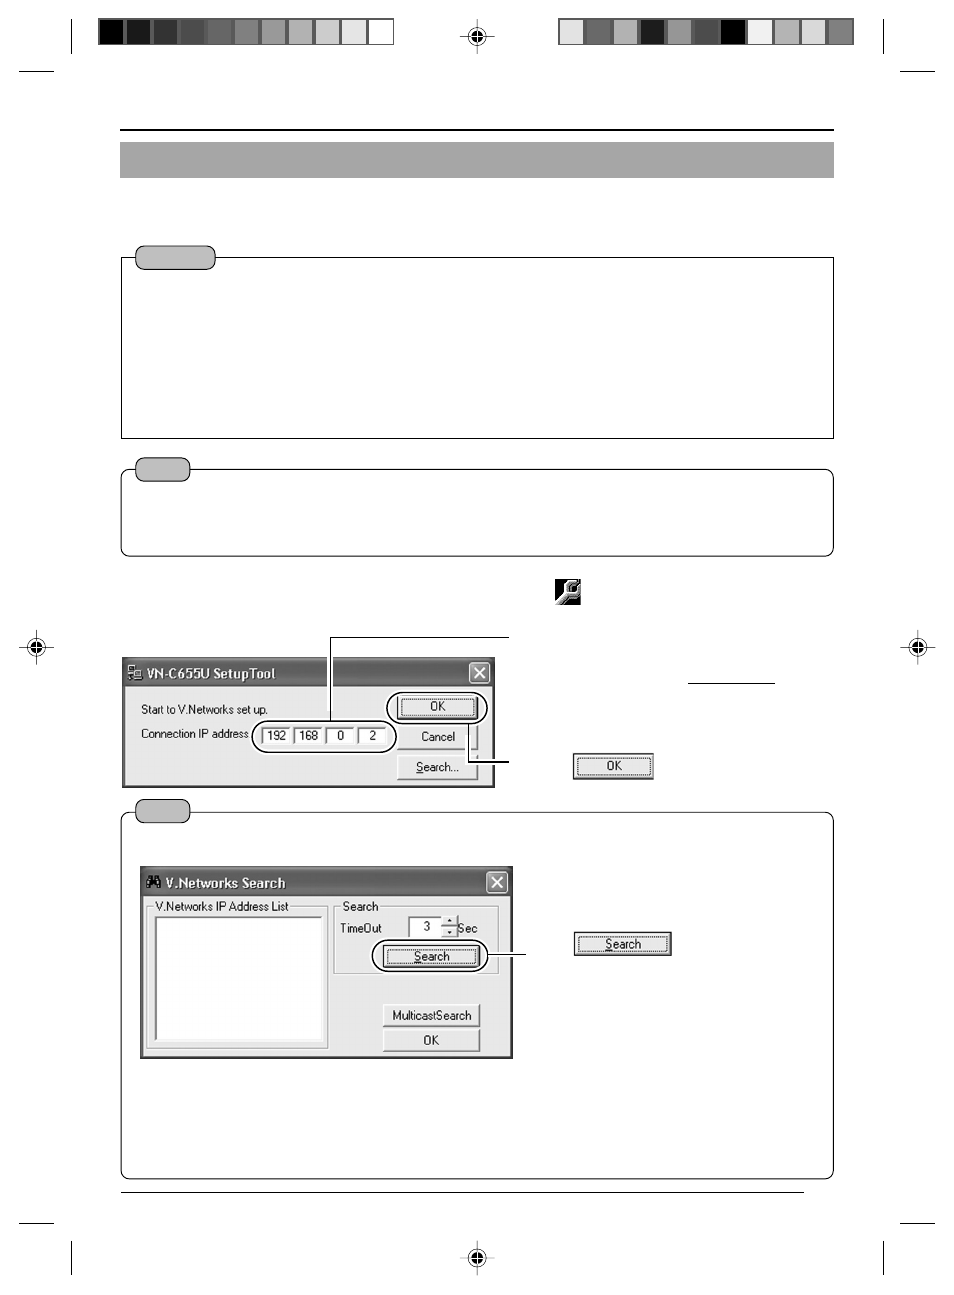
2-3 Setting IP Address for this Camera Using the "VN-C655U Setup Tool"
Set the IP address for VN-C655 using the "VN-C655U Setup Tool" that has been installed.
(This "VN-C655U Setup Tool" only allows connection of VN-C655.)
1.
Select [Start] † [Programs] † [V.NETWORKS] †
[VN-C655U Setup Tool] to start
up the "VN-C655U Setup Tool".
The [V.Networks Search] screen is
displayed.
Click
to start search and
a [V.Networks IP Address List] will
appear.
• [TimeOut] is for setting the time for searching (1 to 30 seconds). If no IP address is displayed
upon searching, change the value to a longer time and search again.
• If the [V.Networks] on the LAN has a different subnet from that of the PC, connection may not
be possible even if the IP address of the camera is found via search. Change the IP address
of the PC to an appropriate value and connect the camera.
1
Enter the IP address of the camera to be
connected in [Connection IP address].
Default IP address is 192.168.0.2.
2
Click
.
Note
To view the IP address of the connected camera, click "Search".
Note
• To connect to a VN-C655 for which DHCP has been enabled, the DHCP server must exist in an
environment where the assigned IP address and MAC address are clearly defined. If the DHCP
server is not found, it will automatically start up using the static IP address after 60 seconds.
Caution
• Upon turning on the power of this camera, it may take about 60 seconds before it can be
connected to the PC.
• At the factory, DHCP is enabled for VN-C655.
• Using DHCP
JVC does not recommend operating VN-C655 with the DHCP function enabled because a
different IP address may be assigned upon the renewal of the leasing contract. The DHCP
function of VN-C655 is included with the aim to simplify installation/setting procedures.
C655(B)_p22-39
05.3.16, 6:00 PM
27