Step 1 connection/installation, 1 connecting cables, Making the hole – JVC VN-C655 User Manual
Page 13: Connect the cables, Preparation (step 1 connection/installation), Cautions
13
Preparation (Step 1 Connection/Installation)
● Attachment of a embedded cover in the ceiling (recess bracket) may be mandatory in certain
regions. If this is so, ensure that the embedded cover (recess bracket) is securely attached
before installing the camera.
● Ensure to attach the cover for the ceiling mount. Installation is not possible without attaching
the cover. In addition, the cover also prevents penetration of foreign objects into the ceiling
mount. Penetration of foreign objects may cause a malfunction or, in the worst scenario,
cause smoking or fire.
1-1 Connecting Cables
1. Making the hole
Cautions
Make a hole for passing the connection cables through the inner side of the ceiling.
Make a 90 mm (3.5 inches) diameter hole in the ceiling.
(
☞Page 36)
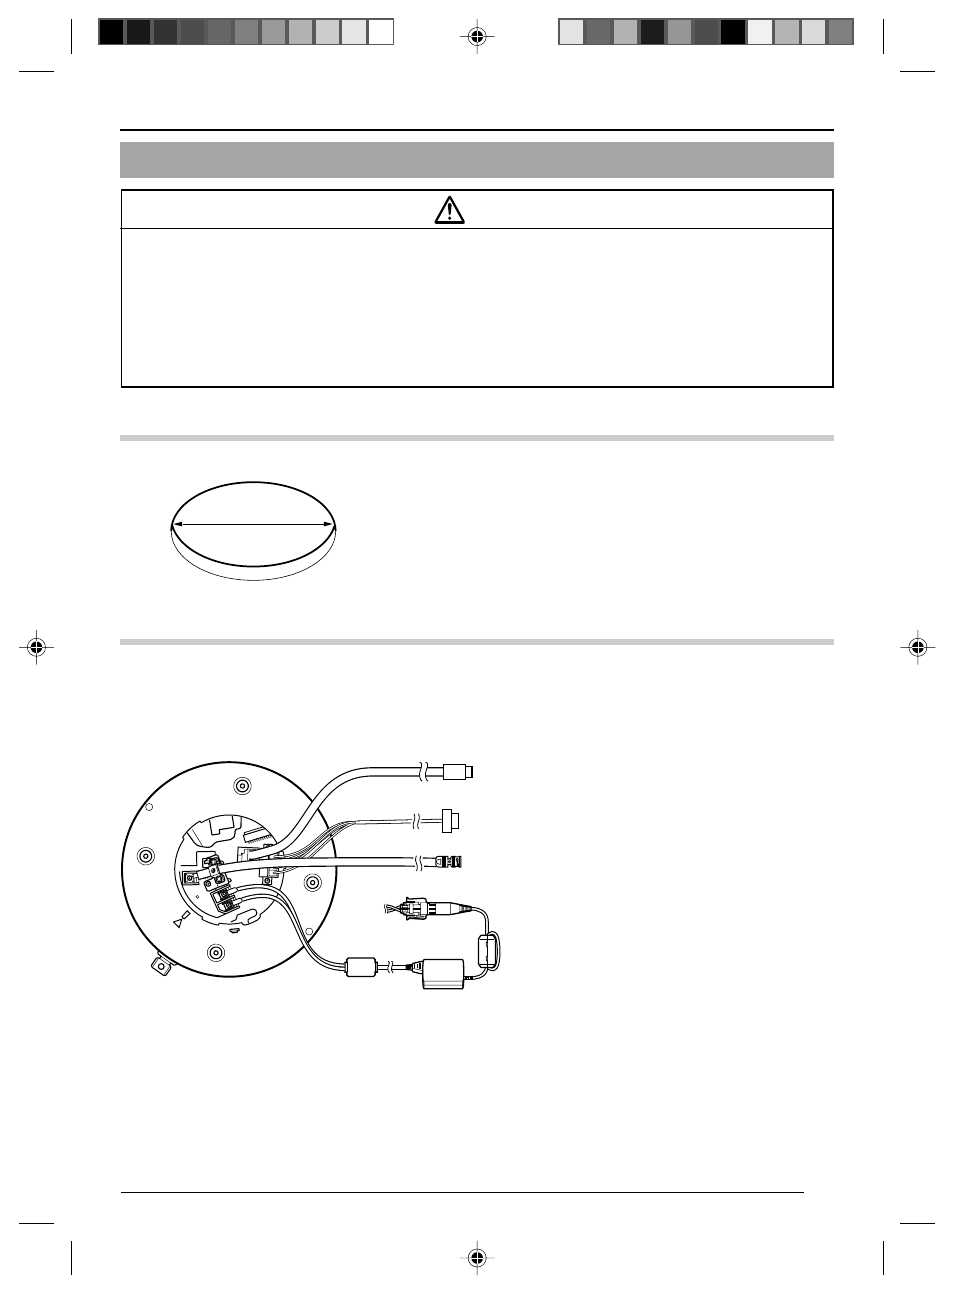
2. Connect the cables
Connect the cables to the terminals on the Ceiling Mount.
Lan cable
Alarm signal cable
Coaxial cable
Converter Unit
Diameter 90 mm
The connection cables include Alarm
Signal cable, LAN cable, coaxial cable and
Converter Unit.
1.
LAN cable (
☞Page 15)
Connect to the hub or PC.
2.
Alarm Signal cable (
☞Page 14)
Connect to devices with an alarm
output terminal.
3.
Coaxial cable (
☞Page 16)
Connect to the monitor, etc.
4.
Converter Unit (
☞Page 17)
Connect to AC 24 V power supply.
VN-C655(B)_0202_p2-21
05.3.16, 6:24 PM
13