Jensen VM8012 User Manual
Page 11
VM8012
7
BEEP
The beep tone feature allows the selection of an audible beep tone to be
heard each time the menu is accessed. “ON” is the default setting. Turn the
rotary encoder to select “OFF”.
12 / 24 MODE
This option allows selection of a 12 hour or 24 hour clock format. “24
HOUR” is the default setting. Turn the rotary encoder to change to the 12
hour clock format.
VOL-MODE
Turn the rotary encoder to select “VOL LAST” or “VOL ADJUST”.
•
VOL LAST: When the unit is turned on, the volume will resume at the
level selected when last turned off.
•
VOL ADJUST: If choosing VOL ADJUST, use the A-VOL setting to
specify a turn-on volume.
Turn-On Volume (A-VOL)
After selecting “VOL ADJUST”, press the MENU button to access the A-
VOL setting and then turn the rotary encoder to select the desired turn-on
volume level. When this option is selected, the unit will revert to the
adjusted volume each time the unit is turned on.
SUBWOOFER
After connecting a subwoofer to the back of the unit, turn the rotary encoder
to select a crossover frequency: 80, 100 or 120Hz.
SUB VOL
The SUB VOL control is only applicable if the unit is connected to an
optional sub-woofer speaker. In addition, the SUB VOL level control option
will only appear in the Audio Menu if the SUBWOOFER function is
activated.
To adjust the sub-woofer level from “00” to “12”, press the MENU/SEL
button (5) until “SUB VOL” appears in the display. Turn the rotary encoder
clockwise to increase or counter-clockwise to decrease the subwoofer level.
Local/Distant Reception (LOC)
When the Local function is on, only radio stations with a strong signal are
played. To activate Local reception mode, press the LOC button (20).
“Local” will appear on the screen briefly. If pressed again, “DX” appears
briefly.
Loudness Control (LOUD)
When listening to music at low volumes, this feature will boost the bass and
treble ranges to compensate for the characteristics of human hearing.
Press the LOUD button (16) to activate this feature as indicated by “LOUD”
on the display panel. Press the LOUD button again to deactivate the
function. “LOUD” will disappear from the display.
Clock Set
1. Press the DISP button (7) to display the clock.
2. Press and hold the DISP button until the clock blinks.
3. Turn the rotary encoder (5) to set the minutes.
4. Press the MENU/SEL button (5) to confirm and move to the hour field.
5. Turn the rotary encoder to set the hour.
6. Press the DISP button to set the clock and exit the clock set function.
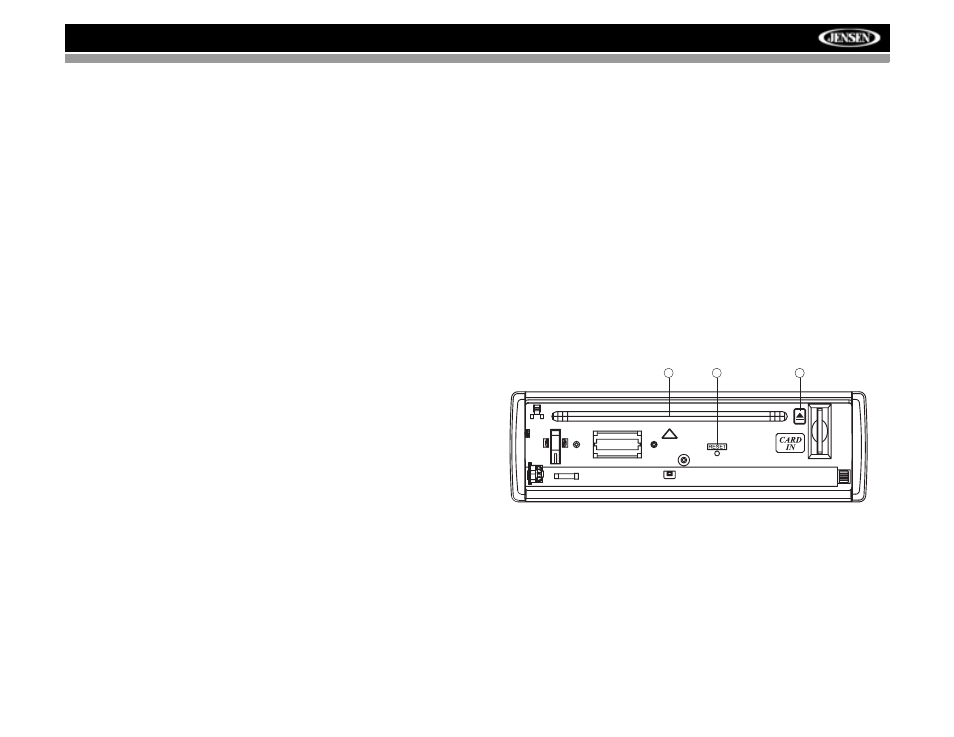
Reset Button
The RESET button is located behind the front panel and can only be
accessed with the front panel removed. The reset circuitry protects the
microprocessor circuitry. Since resetting the unit will erase the time and
preset memories, it should only be activated upon initial installation after all
wiring is complete, or if there is a malfunction of any of the switches on the
unit. In these circumstances, pressing the RESET button (22) will clear the
system and return the unit to normal operation.
1
18
22