JVC GD-V4211PCE User Manual
Page 23
23
ENGLISH
Setting the RGB Input
After connecting the playback device such as a PC to the RGB
terminals, you have to specify which terminal you have
connected the device to — RGB A (D-sub 15 pin) or RGB B
(BNC) input.
• Without setting the RGB input correctly, you cannot show
any picture though you select the RGB input.
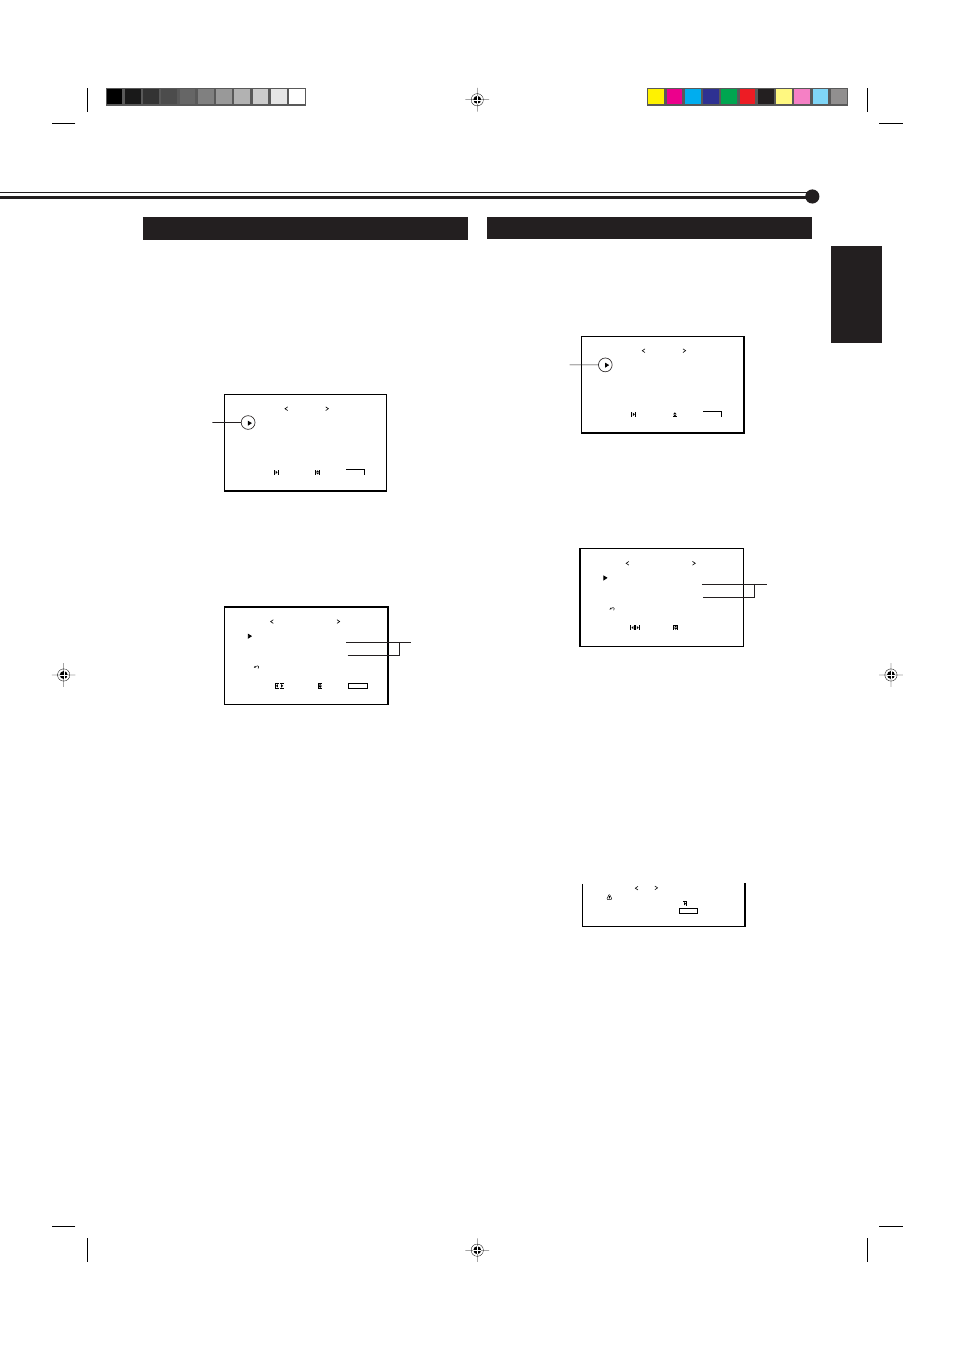
1
Press MENU/EXIT (or MENU on the
Monitor) to display the Main Menu.
2
Press
5/∞ to move the cursor (3) to
“FUNCTION SELECT.”
3
Press
3 to display the Function
Selection Menu.
* “PICTURE MODE” and “SIGNAL MODE” do not
appear at the same time.
“PICTURE MODE” appears when RGB input is
selected, and one of the following signals comes in —
RGB15K-50, RGB15K-60, PC98, VGA480-60, SVGA-56,
SVGA-60, and XGA-60. On the other hand, “SIGNAL
MODE” appears when VIDEO A, VIDEO B, or COMP.
(component) input is selected.
4
Press
5/∞ to move the cursor (3) to
“RGB INPUT.”
5
Press
2/3 to select the correct RGB
terminal you use.
Each time you press the button, the RGB input alternates
between “A” and “B.”
A
:
When connecting the playback device to the
RGB A terminal (D-sub 15).
B
:
When connecting the playback device to the
RGB B IN terminal (BNC).
6
Press MENU/EXIT (or MENU on the
Monitor) twice to exit the menu
operations.
Resetting the Function Selection Menu Settings
You can reset all the Function Selection Menu settings at a
time.
1
Press MENU/EXIT (or MENU on the
Monitor) to display the Main Menu.
2
Press
5/∞ to move the cursor (3) to
“FUNCTION SELECT.”
3
Press
3 to display the Function
Selection Menu.
* “PICTURE MODE” and “SIGNAL MODE” do not
appear at the same time.
“PICTURE MODE” appears when RGB input is
selected, and one of the following signals comes in —
RGB15K-50, RGB15K-60, PC98, VGA480-60, SVGA-56,
SVGA-60, and XGA-60. On the other hand, “SIGNAL
MODE” appears when VIDEO A, VIDEO B, or COMP.
(component) input is selected.
4
Press
5/∞ to move the cursor (3) to
“reset.”
5
Press
3.
The confirmation screen appears.
6
Press
3 again to reset the adjustments.
To cancel the reset,
press MENU/EXIT (or MENU on
the Monitor).
P I C T U R E A D J .
S I Z E / P O S I T I O N A D J .
F U N C T I O N S E L E C T
S T A T U S D I S P L A Y
E N T E R :
M A I N M E N U
S E L E C T :
E X I T :
M E N U
Cursor (
3
)
P I C T U R E A D J .
S I Z E / P O S I T I O N A D J .
F U N C T I O N S E L E C T
S T A T U S D I S P L A Y
E N T E R :
M A I N M E N U
S E L E C T :
E X I T :
M E N U
Cursor (
3
)
C O L O R T E M P .
P I C T U R E M O D E
A S P E C T
S I G N A L M O D E
R G B I N P U T
r e s e t
F U N C T I O N S E L E C T
A D J U S T :
S E L E C T :
E X I T :
M E N U
: H I G H
: S T I L L
: P A N O R A M A
: A U T O
: A
*
*
C O L O R T E M P .
P I C T U R E M O D E
A S P E C T
S I G N A L M O D E
R G B I N P U T
r e s e t
F U N C T I O N S E L E C T
A D J U S T :
S E L E C T :
E X I T :
M E N U
: H I G H
: S T I L L
: P A N O R A M A
: A U T O
: A
*
*
A r e y o u s u r e ?
" Y E S " t h e n p r e s s k e y .
" N O " t h e n p r e s s k e y
M E N U
r e s e t
14-23.GD-V4210PZW[EN]/f
00.9.29, 5:55 PM
23