Setting the keyboard – Matsushita CF-74ECBAXBM User Manual
Page 43
9-21
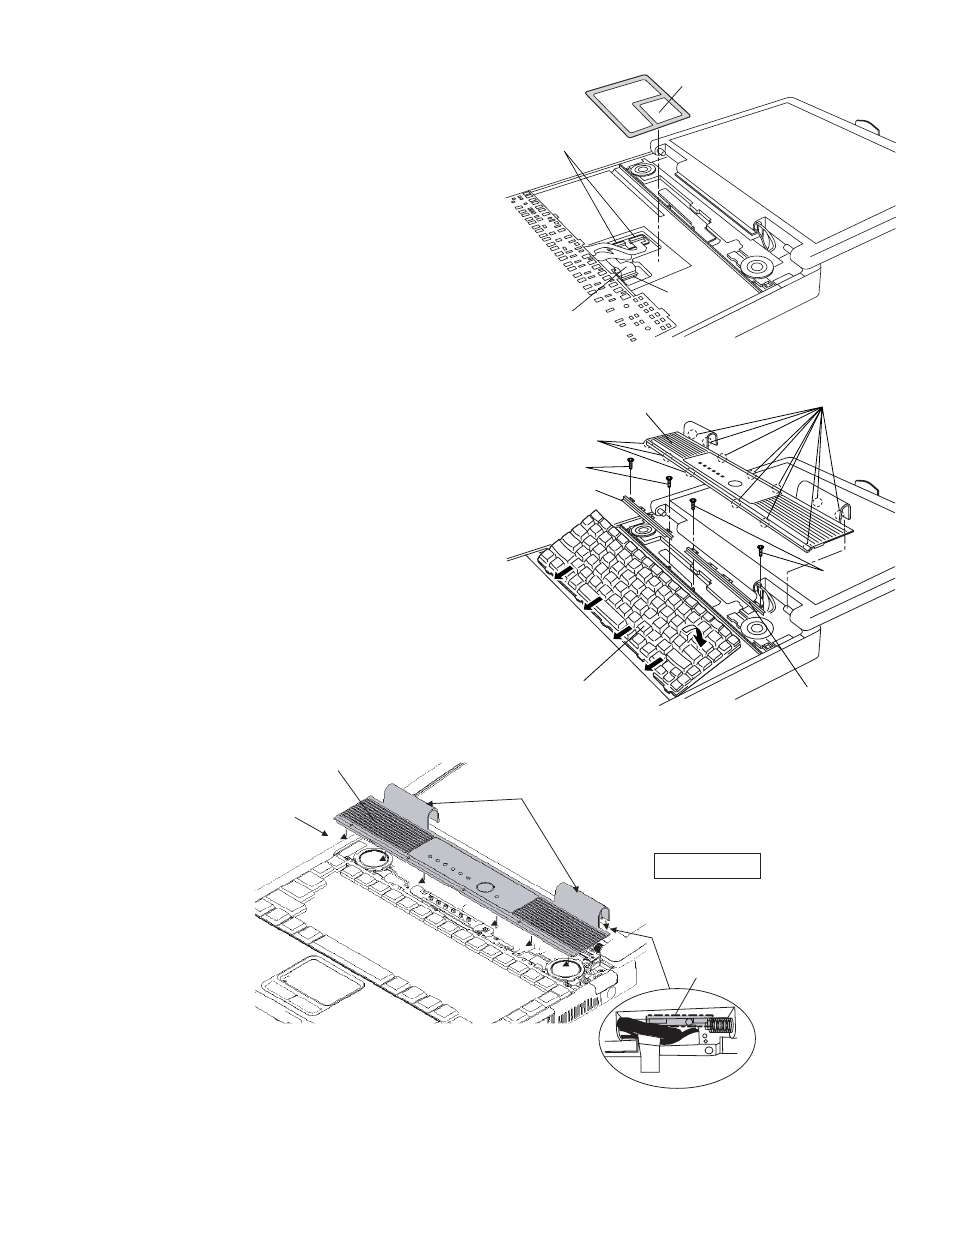
9.2.15. Setting the Keyboard
1. Connect the KBD FPC Cable to the Connector (CN25) of
the Main PCB.
2. Connect the two Cables of the Keyboard to the two Con-
nectors on the KBD FPC.
3. Remove the Release Paper of the KBD WP Sheet, and
attach the KBD WP Sheet to the computer as it covers
the Cable of the Keyboard.
Note:
Press strongly enough until the color of the contact of
two-sided tape is changed.
4. Insert the front Hooks of the Keyboard and the FPC to the
computer, and set the Keyboard to the computer.
5. Fix the KBD Angle L and R using the four Screws
6. Hook the six front Hooks of the Center Cover to the KBD
Angle L and R.
7. Hook the seven rear Hooks of the Center Cover to the
computer, and press the Center Cover to be securely set
in.
Screws
Q
Cautions for Setting the Center Cover
Connectors
KBD FPC
Connector
(CN25)
KBD WP Sheet
Center Cover
Hooks
Hooks
KBD Angle L
KBD Angle R
Keyboard
Center Cover
Hook with the front hooks.
(six points)
Note:
Do not allow any gaps when
aligning the front hooks.
Push in the claws on the rear side of the dome.
(two each on the left and right)
Push until they are snapped on.
When setting the Center Cover,
fit the Lead Wire in the unit and
avoid it from being caught inside
the dome.
Ensure the Cable does not
run in this area.
Safety Working