Removing the keyboard, Removing the speaker and the led pcb – Matsushita CF-74ECBAXBM User Manual
Page 24
9-2
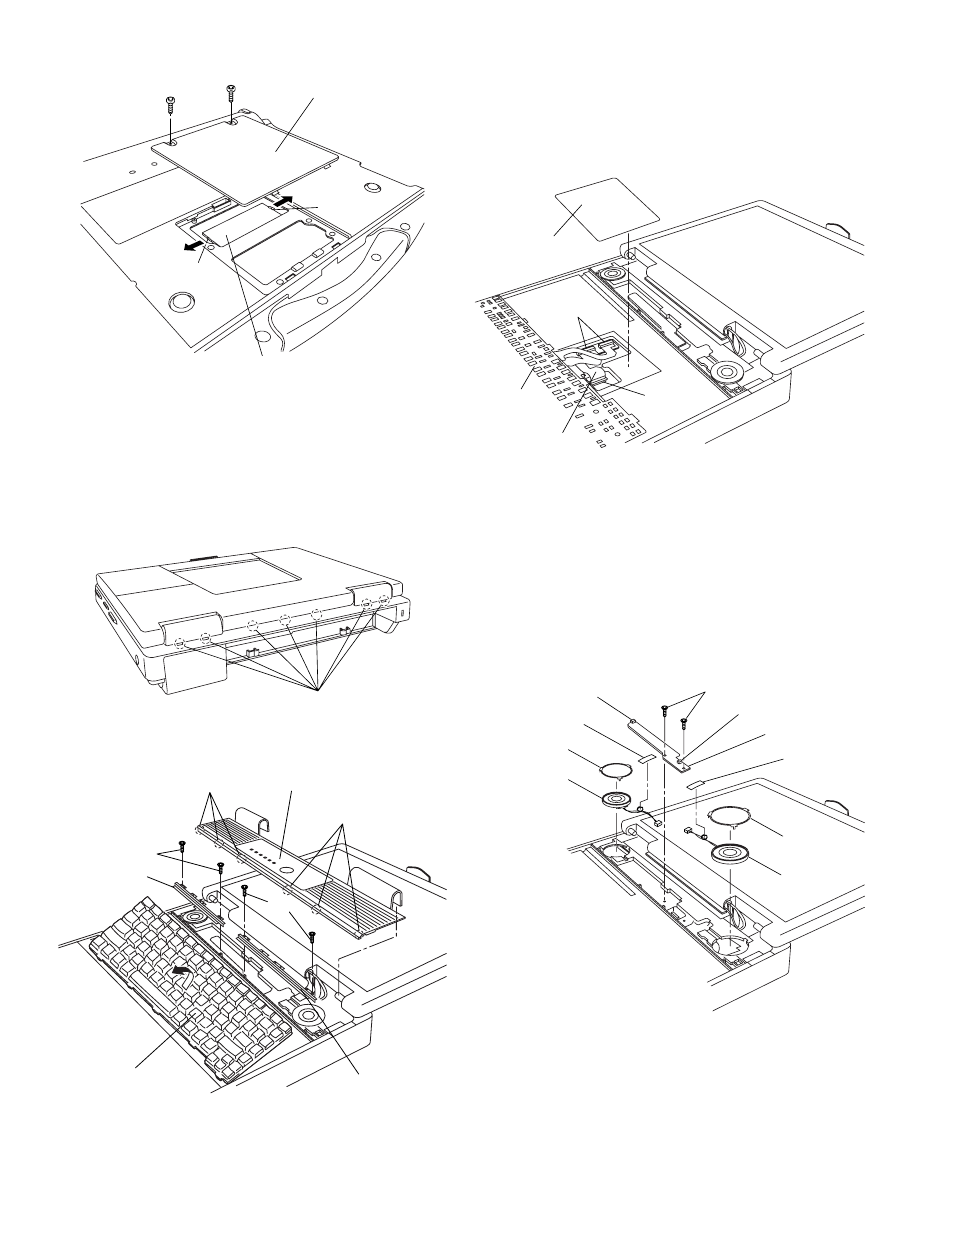
9.1.4.
Removing the DIMM Memory Card
1. Remove the two Screws
Cover.
2. Open the right and left Hooks of the DIMM Memory Card
outward, and remove the DIMM Memory Card.
Screws
9.1.5.
Removing the Keyboard
1. Release the seven Hooks fixing the rear side of the Cen-
ter Cover.
2. Lift the upper part of the Center Cover and draw it back-
ward, release the six Hooks fixing the front side of the
Center Cover, and then remove the Center Cover.
3. Remove the four Screws
R.
4. Lift the upper part of the Keyboard and draw it backward,
and then turn the Keyboard over forward.
5. Remove the KBD WP Sheet.
6. Disconnect the two KBD Cables from the two Connectors
(KBD FPC).
7. Remove the Keyboard.
8. Disconnect the Cable from the Connector (CN25).
9. Remove the KBD FPC,
Screws
9.1.6.
Removing the Speaker and the LED
PCB
1. Remove the two Speaker Holders.
2. Remove the two tapes, and disconnect the two Speaker
Cables from the two Connectors (CN1002, CN1003)
3. Remove the Speaker L and R.
4. Remove the two Screws
PCB.
Screws
Hook
Hook
DIMM Cover
DIMM Memory Card
Hooks
Center Cover
Hooks
Hooks
KBD Angle L
KBD Angle R
Keyboard
Connectors
KBD FPC
Connector
(CN25)
KBD WP Sheet
Keyboard
Speaker
Holder
Speaker
Holder
CN1002
Tape
Tape
CN1003
LED PCB
Speaker L
Speaker R