Installing the battery charging the battery, Installing the battery, Charging the battery – Motorola E816 User Manual
Page 7: Getting started
PAGE 6
INSTALLING THE BATTERY
GETTING STARTED
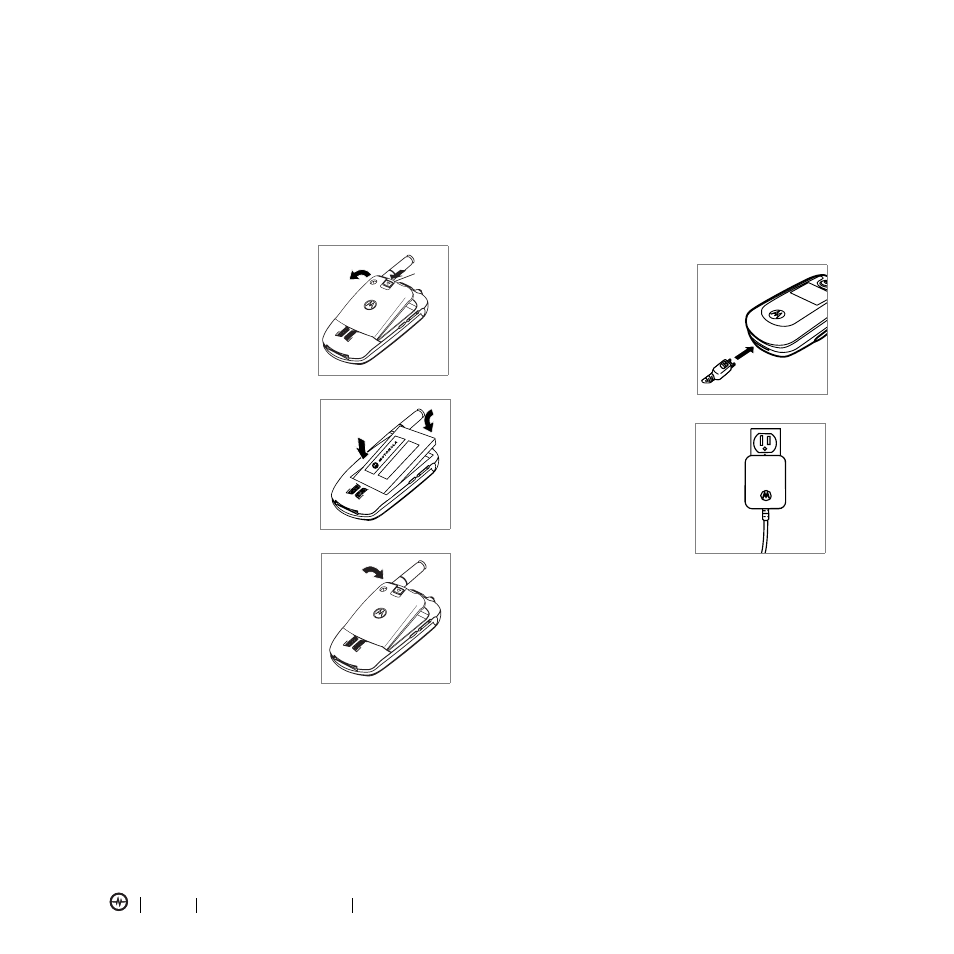
Installing the Battery
Your phone is designed to use only Motorola Original
batteries and accessories.
Note: The battery door unsnaps more easily if you push
it to the left as you remove it.
1. Step one: Release latch
and remove back door.
2. Step two: Follow arrows
to insert battery.
3. Step three: Replace the
back door.
Note: The battery door unsnaps more easily if you push
it to the left as you remove it.
Charging the Battery
New batteries are shipped partially charged. Before you
can use your phone, install and charge the battery as
described below. Some batteries perform best after
several full charge/discharge cycles.
To charge the battery:
1. Plug the charger into the
bottom of your phone with
the release tab facing up.
2. Plug the other end of
the charger into the
appropriate electrical outlet.
3. When your phone’s
interior display shows
Charge Complete,
remove the charger.
Tip: You can safely leave the charger connected to your
phone after charging is complete. This will not damage
the battery.
Note: When you charge the battery, the battery level
indicator in the upper right corner of the display shows
how much of the charging process is complete. At least
1 segment of the battery level indicator must be visible
to ensure full phone functionality while charging.
GETTING STARTED
032409o
032410o
Release
Latch
032409o