Installation and configuration, Cabling and startup for a single user – Motorola SBV5220 User Manual
Page 19
SBV5220 VoIP Cable Modem User Guide
10
Installation and Configuration
To install and configure your Motorola VoIP cable modem for a single PC running Microsoft Windows, we
recommend using the Installation Assistant. You can start the Installation Assistant from the Main Menu on the
SBV5220 VoIP Cable Modem CD-ROM. In most cases, the Installation Assistant automatically configures your
Motorola VoIP cable modem.
Otherwise, to install and configure your Motorola VoIP cable modem:
1
Connect the cables as described for your situation:
•
“Cabling and Startup for a Single User”
•
2
If you are using the
port only, go to
on page 12. Ethernet users can skip this
step.
3
Configure
and verify the
for your computer as described for your situation:
•
For Windows computers, see
•
Refer to your Macintosh or UNIX user manual for information regarding TCP/IP and IP address
configuration.
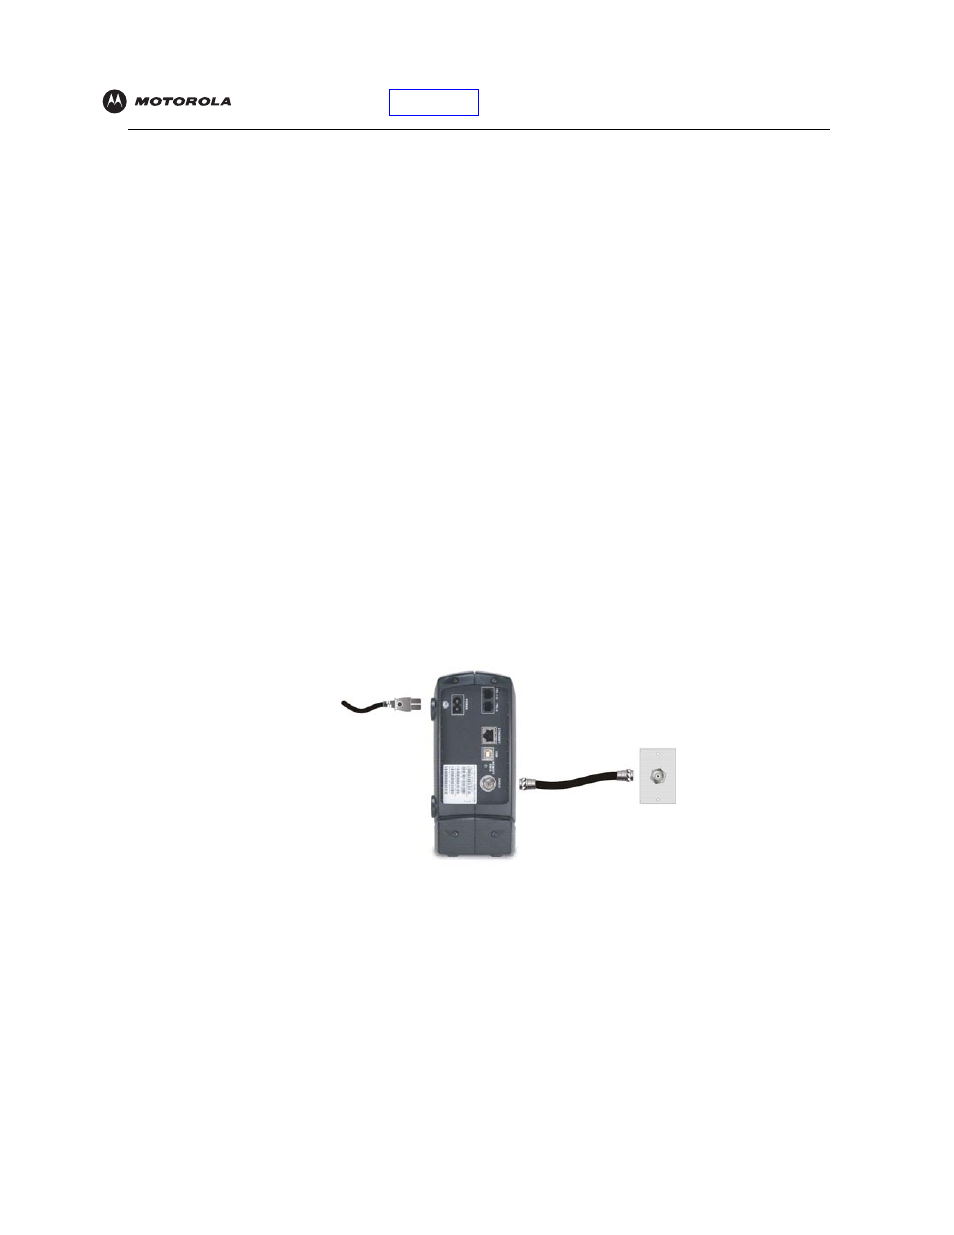
Cabling and Startup for a Single User
Allow some time (5 to 30 minutes) to power up the first time because the Motorola VoIP cable modem must find
and lock on the appropriate channels for communications.
1
Be sure your computer is on and the Motorola VoIP cable modem is unplugged.
2
Connect one end of the coaxial cable to the cable outlet or splitter. Connect the other end of the coaxial cable
to the CABLE connector on the Motorola VoIP cable modem. Hand-tighten the connectors to avoid damaging
them.
3
Insert the SBV5220 VoIP Cable Modem CD-ROM into your CD-ROM drive.
4
Plug the AC power cord into the connector on the Motorola VoIP cable modem and an unswitched AC
electrical outlet.
This turns on the Motorola VoIP cable modem. You do not need to unplug it when not in use.
To cable outlet
(step 2)
Always connect coaxial cable
to the wall outlet first.
To electrical outlet (step 4)