Disc sandpaper replacement, Disc sanding – Grizzly COMBINATION SANDER G1183 User Manual
Page 29
model g1183/g1276 (mfg. since 3/10)
-27-
Disc Sandpaper
Replacement
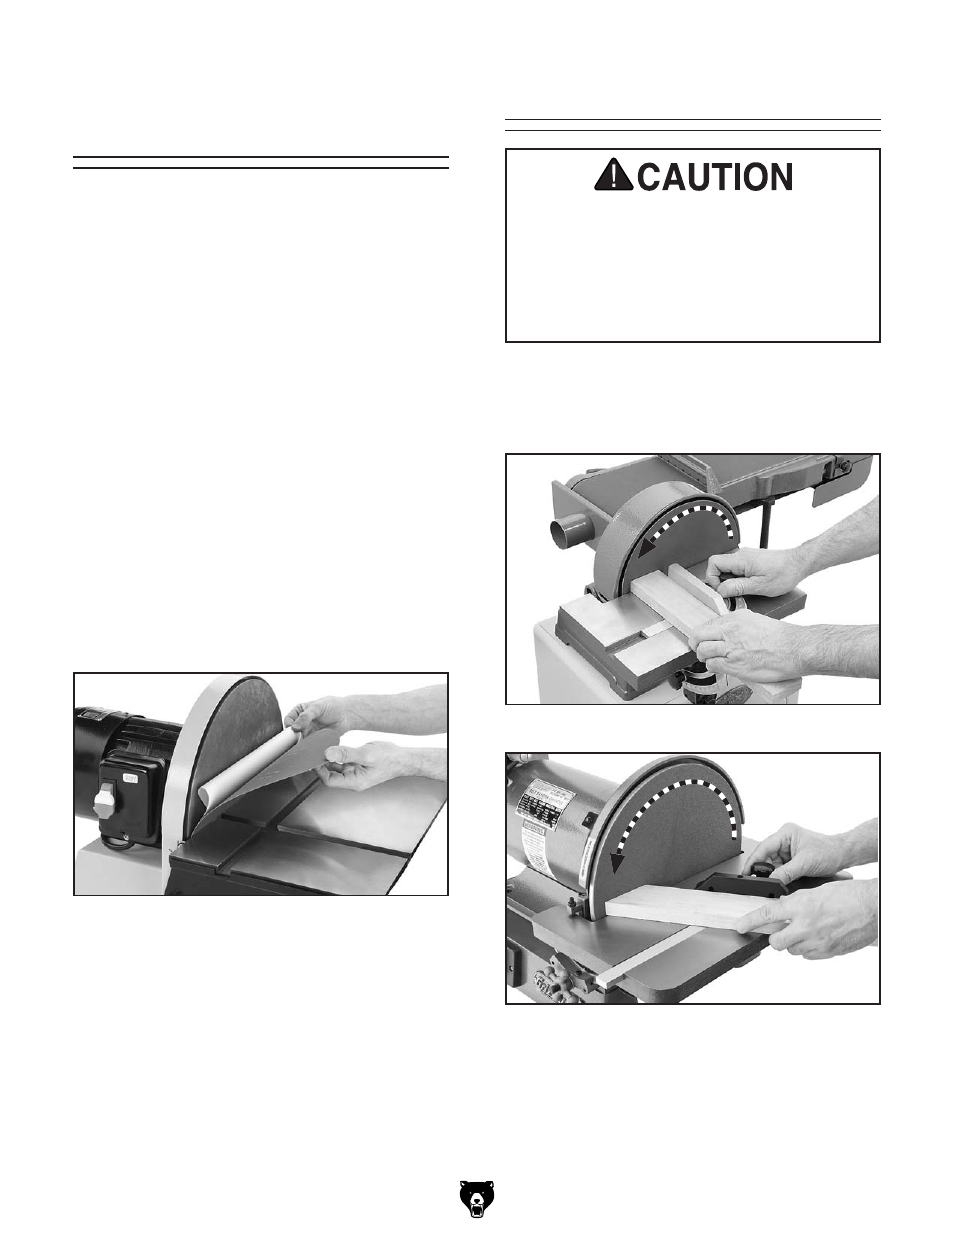
the model g1183/g1276 sander ships with a pre-
installed 80-grit, 12" diameter adhesive-backed
sanding disc.
the sanding disc sticks to the surface of the cast
iron disc platen, using the pressure-sensitive
adhesive (psa) backing. the sandpaper can be
replaced without removing the table or dust port.
To replace the disc sandpaper:
1. disConneCt sander From poWer!
2. peel off the old sandpaper, clean the disc
surface with mineral spirits, then wipe it dry.
3. peel back the protective layer on one-half
of the sandpaper disc and fold it against the
remaining half.
4. slip the half with the protective layer between
the disc and the table edge (see
figure 31
for an example).
figure 31. example photo of installing the
sandpaper disc.
5. position the exposed adhesive on the upper
half of the aluminum disc that extends above
the table. once it is positioned evenly across
the disc, press the adhesive onto the sur-
face.
6. rotate the disc so the lower half is above the
table. peel off the other half of the protective
paper, then press the remaining sandpaper
against the disc so adhesion is complete.
Disc Sanding
refer to
figures 32–35 for examples of sand-
ing operations that are possible with the sanding
disc.
figure 32. example photo of 90° disc sanding.
figure 33. example of miter sanding.
Only sand on the downward-moving left side
of the sanding disc. Sanding on the upward-
moving right side of the sanding disc forces
the operator to rely only on hands (rather
than the table) for support, which increases
the risk of workpiece "kick-out" and impact/
abrasion injuries.