Table gap adjustment – Grizzly COMBINATION SANDER G1183 User Manual
Page 22
-20-
model g1183/g1276 (mfg. since 3/10)
8. loosen the sanding disc table lock knobs, then
move the trunnion brackets away from the
lower disc guard, as shown in
figure 18.
9. place the sanding disc table trunnions
between the bracket and lower disc guard,
then tighten the lock knobs to hold the table
in place (see
figure 19).
Table Gap
Adjustment
to reduce the risk of in-running nip (pinch) points,
yet avoid the risk of the sandpaper contacting the
tables, the tables should be adjusted away from
the sandpaper no more than
1
⁄
16
".
Note: The procedure for the table gap adjustment
is similar for both tables.
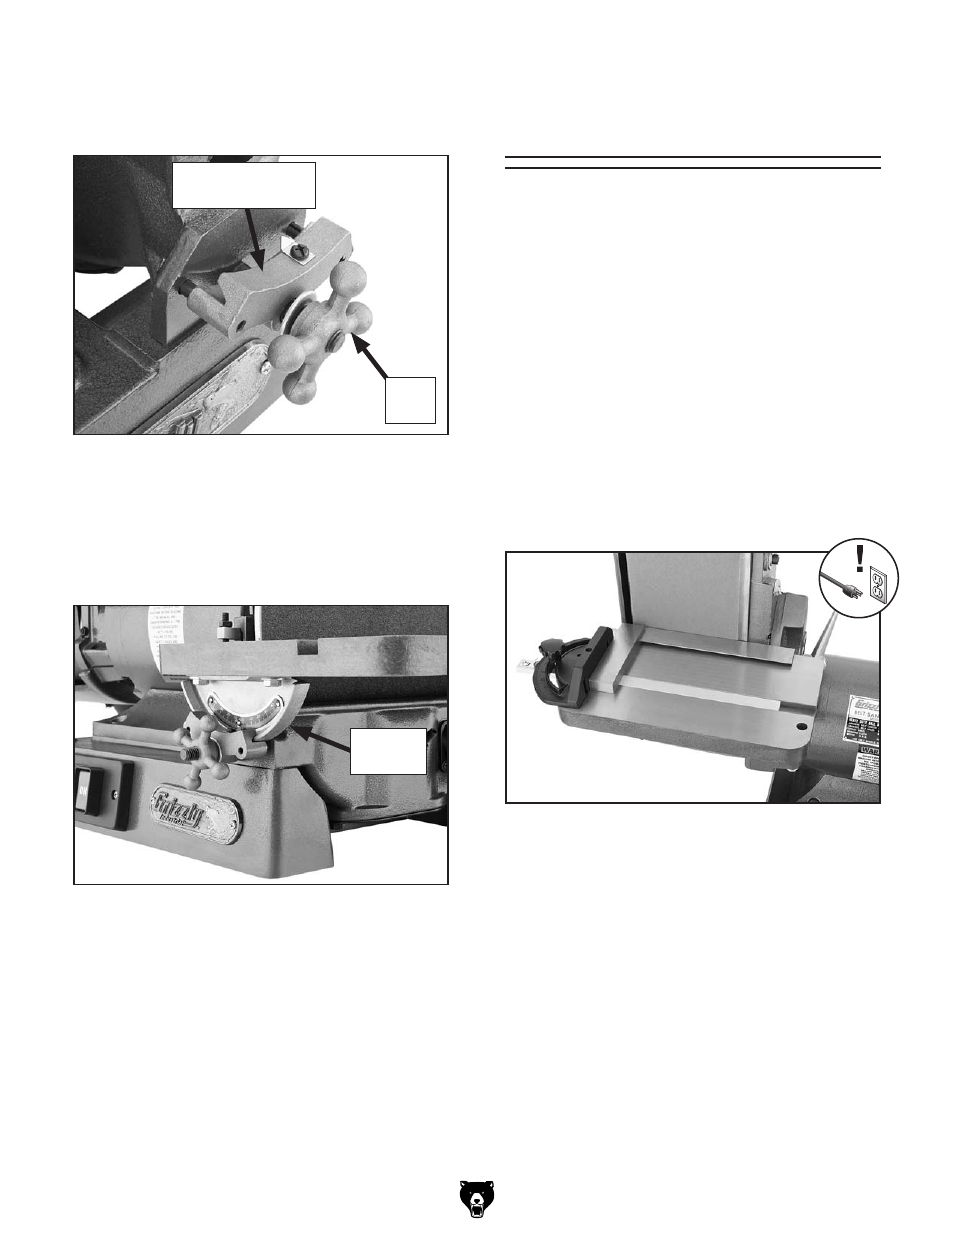
To adjust the table-to-sandpaper gap:
1. disConneCt sander From poWer!
2. First, check the existing adjustment by slid-
ing the miter gauge into the table t-slot, then
positioning a 90° square flat against the miter
face and up against the sanding surface, as
shown in
figure 20.
figure 20. positioning the miter gauge and
square for aligning the table.
— if the square is flat against the miter face
and the sanding surface, and the table is
no more than
1
⁄
16
" away from the sandpaper
for both tables, no adjustments are need-
ed. Fully tighten the hex bolts underneath
the table. Continue to the
Checking Belt
Tracking procedure.
— if the square is not flat against the sanding
surface as it remains flat against the miter
face, or the table is not at least
1
⁄
16
" away
from the sanding surface, continue with the
next step.
figure 18. lock knob and trunnion bracket
positioned to receive the table trunnion.
lock
Knob
trunnion Bracket
(1 of 2)
figure 19. sanding disc table trunnion secured
by the lock knob.
table
trunnion