Checking belt tracking – Grizzly COMBINATION SANDER G1183 User Manual
Page 23
model g1183/g1276 (mfg. since 3/10)
-21-
3. loosen the hex bolts underneath the table
that secure it to the trunnion(s).
Note: The sanding belt table has three hex
bolts (see
Figure 21), and the sanding disc
table has two hex bolts on both sides of the
table (see
Figure 22).
figure 21. sanding belt trunnion hex bolts.
hex Bolts
4. adjust the table so that when the square is
flat against the miter face and the sanding
surface at the same time, and that the table is
no more than
1
⁄
16
" away from the sandpaper,
then re-tighten the hex bolts.
5. repeat Step 2 to make sure the table
is properly positioned. if necessary, repeat
Steps 3–4 until it is.
Checking Belt
Tracking
proper belt tracking depends on two conditions:
1) the platen height, and 2) the upper roller paral-
lelism.
the upper belt roller is designed with a slight
crown in the middle, and the belt platen should be
even with the highest point of this crown to ensure
proper belt tracking.
additionally, the upper roller should be parallel
to the lower roller so that the sanding belt rides
evenly in the middle of the rollers.
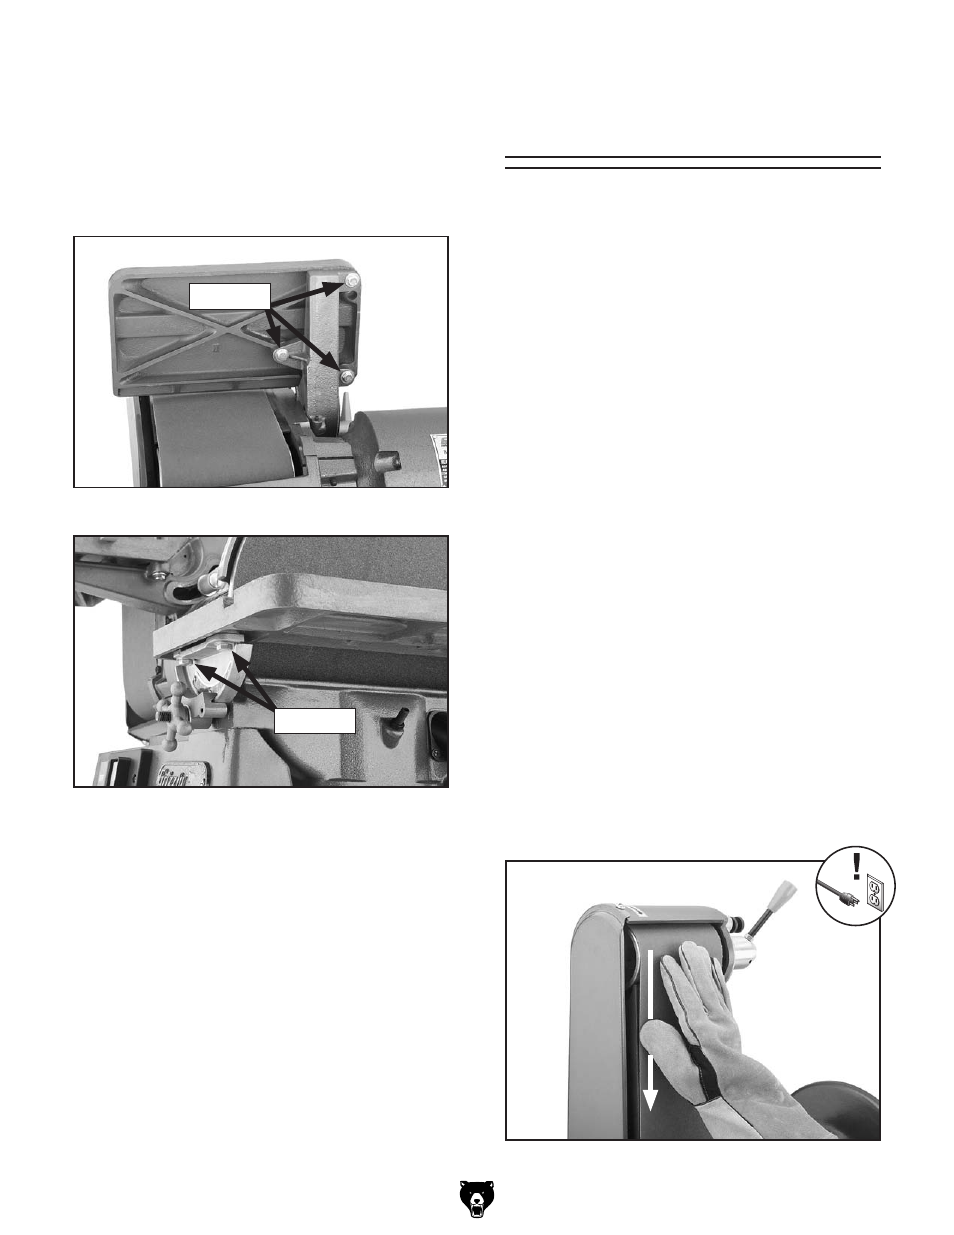
To check the belt tracking:
1. disConneCt sander From poWer!
2. put on heavy leather gloves to protect your
hands from the abrasive sandpaper
3. rotate the sandpaper belt down toward the
table several times by hand—not by pow-
er—as fast as possible (see
figure 23).
— if the belt stays centered on the rollers,
continue to the
Dust Collection procedure
on
page 22.
— if the belt begins moving to one side or
the other, perform the
Tracking Roller &
platen Adjustment on page 35 to make
sure the belt tracks properly.
figure 22. sanding disc trunnion hex bolts (2 of
4 shown).
hex Bolts
figure 23. rotating the sanding belt to check
belt tracking.